5.0 from 3 votes
Beer Can Chicken
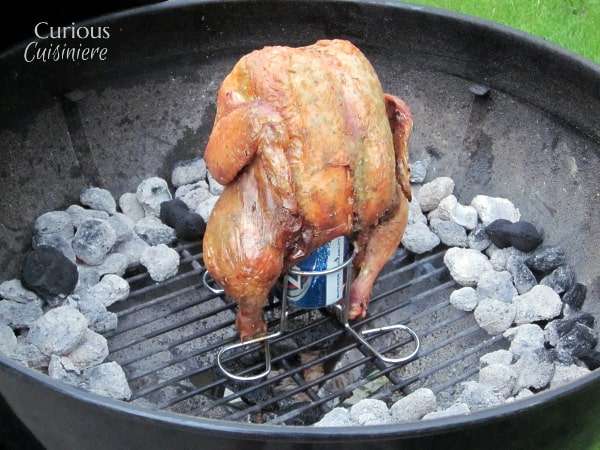
Making Beer Can Chicken
Prep Time
20 mins
Cook Time
1 hr 20 mins
Total Time
1 hr 50 mins
Servings: 5 - 6 people
Course:
Dinner
Cuisine:
American
Ingredients
- 1 (6 lb) whole chicken, giblets and neck removed
- 1 (12 oz) can beer (any cheap beer will do)
For the Rub
- 1 Tbsp salt
- 1 Tbsp onion powder
- 1 Tbsp thyme
- 1 Tbsp rosemary
- 1 Tbsp marjoram or oregano
- 1 tsp garlic powder
Instructions
- Preheat the grill.
- While the grill is warming up, mix together the rub spices. Then, carefully separate the skin from the chicken, starting at the base of the breast (as described in This Post). Season the inside cavity and under the skin of the chicken with the rub.
- Take a large swig out of the beer, to give the liquid a bit of room to breathe. Then set the chicken on the can (using a beer can chicken holder, if you have one). Make sure the chicken will stand by itself on your counter, before attempting to stand it on the hot grill grates.
- Once the coals are hot, create a ring with the ashy coals on the bottom grate of your grill. Carefully place the chicken on the hot grate. Tilt the chicken so that the top of the beer can comes about halfway up the cavity.
- Cover the grill and cook over medium-high, indirect heat for 1 hour, undisturbed.
- After an hour, check the chicken and test the temperature at the thickest part of the thigh. It should read 165F and the juices should run clear when the chicken is done. If you haven’t reached temperature yet, return the lid to the grill, and continue cooking for another half hour.
- Once the chicken has reached 165F, remove the chicken and the can from the grill (using oven mitts). Set aside to let the juices settle for 10 minutes before carving. (This is the perfect time to grill up some veggies to complete your meal!)
Cup of Yum