4.6 from 82 votes
Chocolate Cheesecake Santa Hats
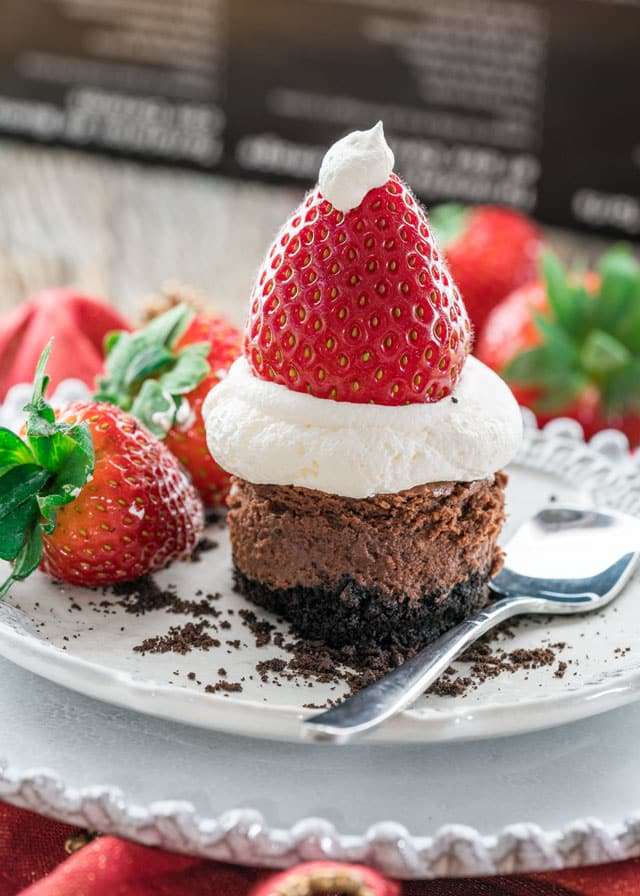
Chocolate Cheesecake Santa Hats are mini no-bake treats with an Oreo cookie crust and a rich, coffee-infused chocolate cheesecake filling. The creamy filling blends cream cheese, brown sugar, sour cream, cocoa powder, and melted bittersweet chocolate for a smooth texture. These individual cheesecakes are baked in small cups and chilled before topping with whipped cream and fresh strawberries shaped like Santa hats, making them a festive dessert option.
Prep Time
30 mins
Cook Time
25 mins
Total Time
55 mins
Servings:
12
Calories:
320 kcal
Course:
Dessert, Cake
Cuisine:
American
Ingredients
For the Crust
- 1 cup Oreo cookies crushed
- 2 tablespoon butter unsalted, melted
For Cheesecake
- 16 ounce cream cheese at room temperature
- ⅔ cup brown sugar packed
- 2 egg at room temperature
- ¼ cup sour cream
- 1½ teaspoon instant coffee dissolved in 2 tsp water
- ¼ teaspoon salt fine grain
- 1 teaspoon vanilla extract
- 2 tablespoon cocoa powder unsweetened
- 6 ounce bittersweet chocolate melted and cooled to just warm
- 1 cup Cool Whip or whipped cream
- 12 strawberries
Instructions
- Preheat the oven to 350℉.
- In a bowl mix together the oreo cookie crumbs with the butter. Divide the mixture equally into each cup in the pan and press down. Bake for 7 minutes. **
- Reduce heat to 300℉.
- Add the cream cheese and brown sugar to the bowl of your mixer and mix until smooth for about 3 minutes. Add the eggs and continue mixing.
- Add the sour cream, instant coffee, salt, vanilla extract, cocoa powder and melted chocolate to the mixer and mix until smooth. Do not over mix since over mixing can cause the cheesecakes to crack.
- Spoon cheesecake batter into each cup and fill to the top. There should be enough batter for all 12 cups. If you have any leftover batter, I usually just bake it in little ramekins, makes for a great dessert.
- Bake for 15 to 18 minutes. Remove the pan from the oven and let the cheesecakes cool completely before removing them from the pan. Refrigerate the cheesecakes for a couple hours so that they set properly.
- Top each cheesecake with cool whip. I used a piping bag to pipe the cool whip easier. You could also use a plastic bag instead of a piping bag. Top the cheesecakes with a strawberry then pipe a bit of cool whip on each strawberry tip.
- Refrigerate until ready to serve.
Cup of Yum
Notes
- If Oreo baking crumbs are unavailable, crush Oreo cookies without cream to make the crust.
- Mini cheesecake pans with 12 cups work well for portioning; leftover batter can be baked in ramekins for an extra dessert.
- Frozen cheesecakes should be fully cooled before freezing, then wrapped tightly in plastic wrap and foil to last up to 3 months.
Nutrition Information
Serving
1cake
Calories
320kcal
(16%)
Carbohydrates
35g
(12%)
Protein
6g
(12%)
Fat
18g
(28%)
Saturated Fat
10g
(50%)
Cholesterol
57mg
(19%)
Sodium
312mg
(13%)
Potassium
278mg
(6%)
Fiber
2g
(8%)
Sugar
27g
(54%)
Vitamin A
354IU
(7%)
Vitamin C
7mg
(8%)
Calcium
97mg
(10%)
Iron
2mg
(11%)
Nutrition Facts
Serving: 12 Serving
Amount Per Serving
Calories 320
% Daily Value*
| Serving | 1cake | |
| Calories | 320kcal | 16% |
| Carbohydrates | 35g | 12% |
| Protein | 6g | 12% |
| Fat | 18g | 28% |
| Saturated Fat | 10g | 50% |
| Cholesterol | 57mg | 19% |
| Sodium | 312mg | 13% |
| Potassium | 278mg | 6% |
| Fiber | 2g | 8% |
| Sugar | 27g | 54% |
| Vitamin A | 354IU | 7% |
| Vitamin C | 7mg | 8% |
| Calcium | 97mg | 10% |
| Iron | 2mg | 11% |
* Percent Daily Values are based on a 2,000 calorie diet.