4 from 6 votes
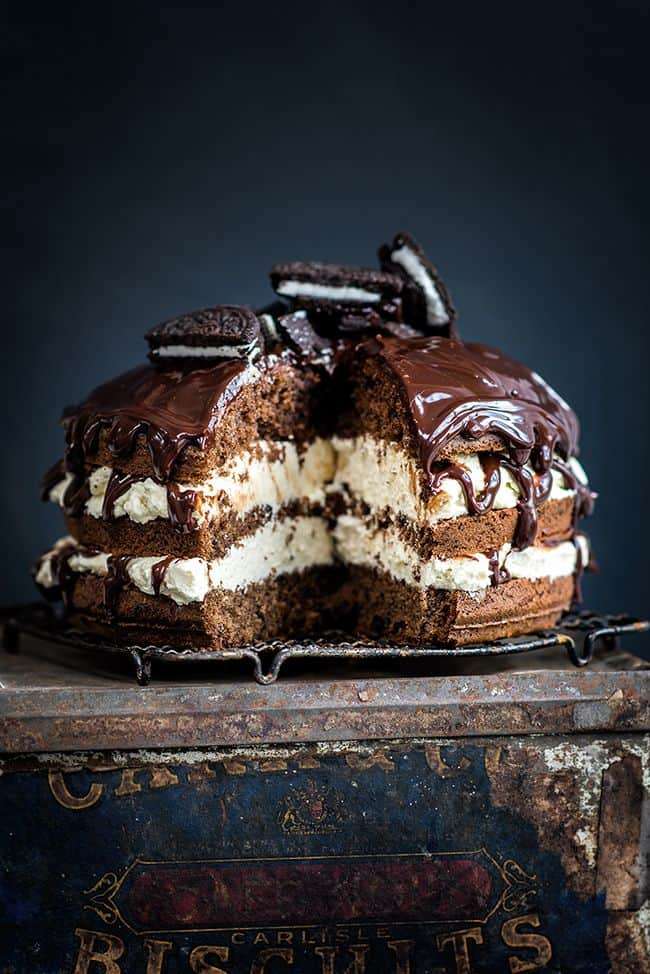
Cookies and Cream Layer Cake with White Chocolate Filling
Cookies and cream but in cake form! Filled with white chocolate whipped cream, topped with rich chocolate glaze and Oreo cookies.
Prep Time
15 mins
Cook Time
20 mins
Total Time
35 mins
Servings:
3
x15cm (6inch) layers
Course:
Cake
Ingredients
- For the cake
- 165 g all-purpose flour all purpose flour, 5.8oz, plain
- 165 g light brown sugar can also use caster, 5.8 oz
- 5 Oreo cookies ground to a powder
- 1 cocoa powder level tablespoon
- 1/2 tbsp baking powder
- 1/2 tsp bicarbonate of soda
- 1/4 tsp salt
- 100 g unsalted butter cubed, 3.5oz, cold
- 2 egg large
- 100 ml whole milk 3.5 fl oz
- 1/2 tbsp vanilla extract
- 60 g dark chocolate chips 2 oz
- butter to grease the cake tins
- flour to grease the cake tins
- filling
- 200 g white chocolate very finely chopped, 7 oz, good quality
- 150 g double cream 5.3oz
- double cream extra cold, 200 g / 7 oz
- chocolate glaze to decorate
- 100 g dark chocolate very finely chopped, 3.5oz
- 100 g double cream 3.5oz
- 1 tbsp golden syrup
- Oreo cookies halved, handful
Instructions
- Preheat the oven to 180C | 350F. Grease 3x15cm (6in) cake tins and line the bottoms with baking paper. Dust with flour and tap out any excess. You can also use one deep tin (preferably springform) instead of 3 shallow ones - increase the baking time to about 45–50 minutes.
- Add the flour, sugar, crushed Oreos, cocoa powder, baking powder, bicarbonate of soda and salt into a food processor fitted with a metal blade. Pulse briefly to mix the ingredients together, then add the cubed butter and pulse again until the mixture resembles breadcrumbs.
- Add the eggs, one at a time, and pulse again until mixed in. Scrape the sides of the bowl with a silicone spatula to make sure everything is well blended.
- Mix the vanilla and milk and then gradually add to the batter, pulsing until it is smooth. Scrape the sides of the bowl as needed.
- Fold in the chocolate chips, divide the batter into the prepared tins and bake for 20-25 minutes. The cakes are ready when springy to the touch and a skewer inserted in the centre comes out clean.
- Transfer to a wire rack to cool slightly and then gently turn the cakes out of the tins. Cool completely before filling.
- Put the chopped white chocolate in a bowl and set aside. Heat 150ml (5.3oz) double cream in a small saucepan until tiny bubbles appear around the edge - do not allow it to boil. Pour over the chocolate and leave to stand for a minute. Using a balloon whisk, slowly stir, starting from the centre of the bowl using small motions until the chocolate is melted and smooth. Set aside to cool - if the chocolate is too warm it will not whip easily. But don't let it set completely if chilling in the fridge, keep stirring.
- Pour a little of the (remaining) double cream into the melted chocolate and stir together (this is to make sure it is cold enough). Start whipping the rest of the double cream in a stand mixer and gradually add the melted chocolate. Whip at high speed until you have peaks - do not mix for too long or the filling will become grainy.
- Sandwich your cake layers with a generous amount of the filling - either smoothing it on with a palette knife, or piping it for neater results. If you like, you can also drizzle the layers with some of the chocolate glaze as well.
- Heat the double cream and golden syrup in a small saucepan until tiny bubbles appear around the edge. Pour over the chopped dark chocolate, leave to stand for a minute, and use a balloon whisk to slowly stir the chocolate/cream mixture until the chocolate is melted and smooth. Leave it to cool slightly.
- Carefully pour the chocolate glaze over the cake, letting it drip down the sides. Decorate with the chopped Oreos.
Cup of Yum
Notes
- Double the recipe to make 4x20cm (8in) layers.You can make the cake in a stand mixer following the same method.