5 from 10 votes
Ehomaki (Lucky Direction Sushi Rolls)
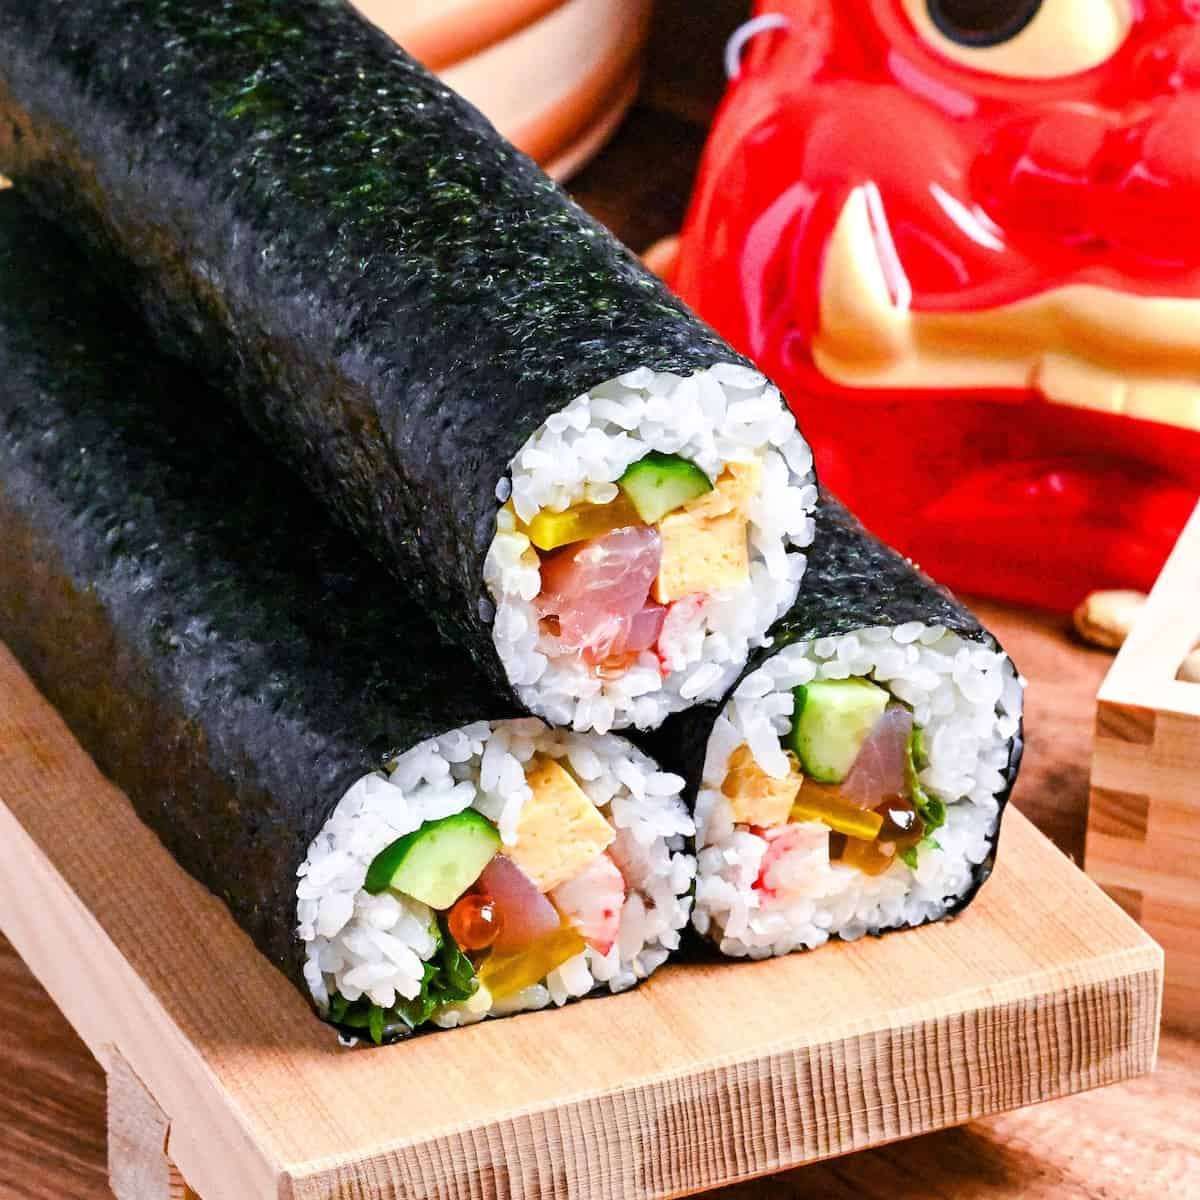
Ehomaki are thick sushi rolls made by tightly packing short-grain Japanese rice, prepared with vinegar, along with fillings such as tamagoyaki (rolled Japanese omelet), cucumber, perilla leaves, imitation crab, sashimi-grade tuna or salmon, salmon roe, and pickled daikon. The rice is washed thoroughly and soaked before cooking for ideal texture. These rolls combine savory, fresh, and slightly briny flavors with varied textures.
Prep Time
30 mins
Cook Time
20 mins
Additional Time
30 mins
Total Time
1 hr 20 mins
Servings:
3
rolls
Cuisine:
Japanese
Ingredients
- 300 g Japanese short-grain rice uncooked
- 350 ml water cold
- 2 tbsp rice vinegar
- ½ tsp sugar
- 1 tsp salt
- 3 heets nori seaweed approx. 21cm x 19cm (8.27 inches x 7.48 inches, sushi
- 1 block egg tamagoyaki (dashimaki tamago, Japanese rolled omelet
- 100 g cucumber preferebly Japanese or Persian, Japanese or Persian varieties
- 9 perilla leaves shiso/ooba leaves, shiso
- 6 imitation crab
- 150 g tuna or salmon, sashimi grade
- 3 tbsp salmon roe ikura, marinated, aka ikura
- 6 lices daikon radish takuan, yellow, pickled
Instructions
Washing the rice
- First, measure out 300 g uncooked Japanese short-grain rice. You can use kitchen scales to measure, or use 2 rice cooker cups.
- Next, pour the rice into a sieve and place it over a large bowl. Pour cold water over the rice and wash. When the water becomes cloudy, drain and repeat twice more (3 times in total).
- Fill the bowl once more, then cover and leave to soak for 30 minutes (1 hour in winter).
- Once it's finished soaking, drain and leave to dry for 5 minutes.
- Transfer your rice to a rice cooker or a pot with a lid and add 350 ml cold water. Start your rice cooker or follow the steps below to cook rice on the stove.
Cup of Yum
How to cook sushi rice on a stove
- Place your pot on the stove and bring the water to a boil over a medium heat. Don't remove the lid at any point, listen for the boiling water. Once starts to boil, set a timer for 2 minutes.
- After 2 minutes, reduce the heat to medium-low and set a timer for 3 minutes. Reduce the heat to low and simmer for 5 minutes.
- Once 5 minutes are up, blast the heat on high for 10 seconds and then turn it off. Leave the rice to steam on the warm stove for 10 minutes. Don't be tempted to take off the lid or mix it until these 10 minutes are up.
- After 10 minutes, the rice is ready and can be transferred to a large mixing bowl. Wet the bowl slightly before putting the rice in, this will help prevent sticking. Gently mix, being careful not to crush the rice.
Seasoning
- In a small bowl, mix 2 tbsp rice vinegar, ½ tsp sugar and 1 tsp salt until the salt and sugar are dissolved.
- Pour the vinegar mixture over the rice while it's still hot. Use a rice paddle to mix until evenly distributed, then spread the rice thinly to help it cool down faster. Cover with a damp tea towel to stop it from drying out.
Fillings
- Cut your choice of fillings into strips. If using 100 g Japanese or Persian cucumber, scrub the surface with salt, rinse and dry before cutting into strips (make sure some skin is on each piece).
- Optional: Turn your gas burner on low and carefully fan the nori over the fire to improve the texture and aroma.
- Position the nori rough-side up on a bamboo sushi mat, aligning the lines vertically. Keep a bowl of water nearby to wet your hands; this will help stop the rice from sticking.
- Take 200g of rice and gently press it into a ball/cylinder shape. Place it in the top left corner, leaving a 1-inch gap at the top.
- Spread the rice evenly over the surface, right up to the left and right edges. Leave a slight gap at the bottom and pinch the rice at the top to make a wall.
- Add a small blob of wasabi and use your finger to spread it horizontally through the center of the rice (optional). Arrange the fillings on top.
- If using Perilla leaves (or any kind of lettuce/leaves), lay them along the top of the fillings, this will help hold them in place.
- Carefully lift the edge of the bamboo mat closest to you and fold it over the top of the fillings.
- Continue to roll tightly until the far edges come into contact with one another, then lift the bamboo mat up slightly and seal your sushi roll using the gap at the top.
- Wrap the whole roll in the mat and press tightly.
- Unroll the mat and gently push any fillings back in each end.
- Face the lucky direction for the year and enjoy!
Notes
- Thoroughly wash and soak the rice for about 30 minutes (longer in winter) to achieve ideal sticky texture when cooked.
- Use kitchen scales or rice cooker cups to measure rice and water precisely for consistent results.
- Variations in fillings are common—choose ingredients to suit your preference while preserving the layered style of Ehomaki.