5.0 from 3 votes
Get the Recipe Fresh Spring Charcuterie Board
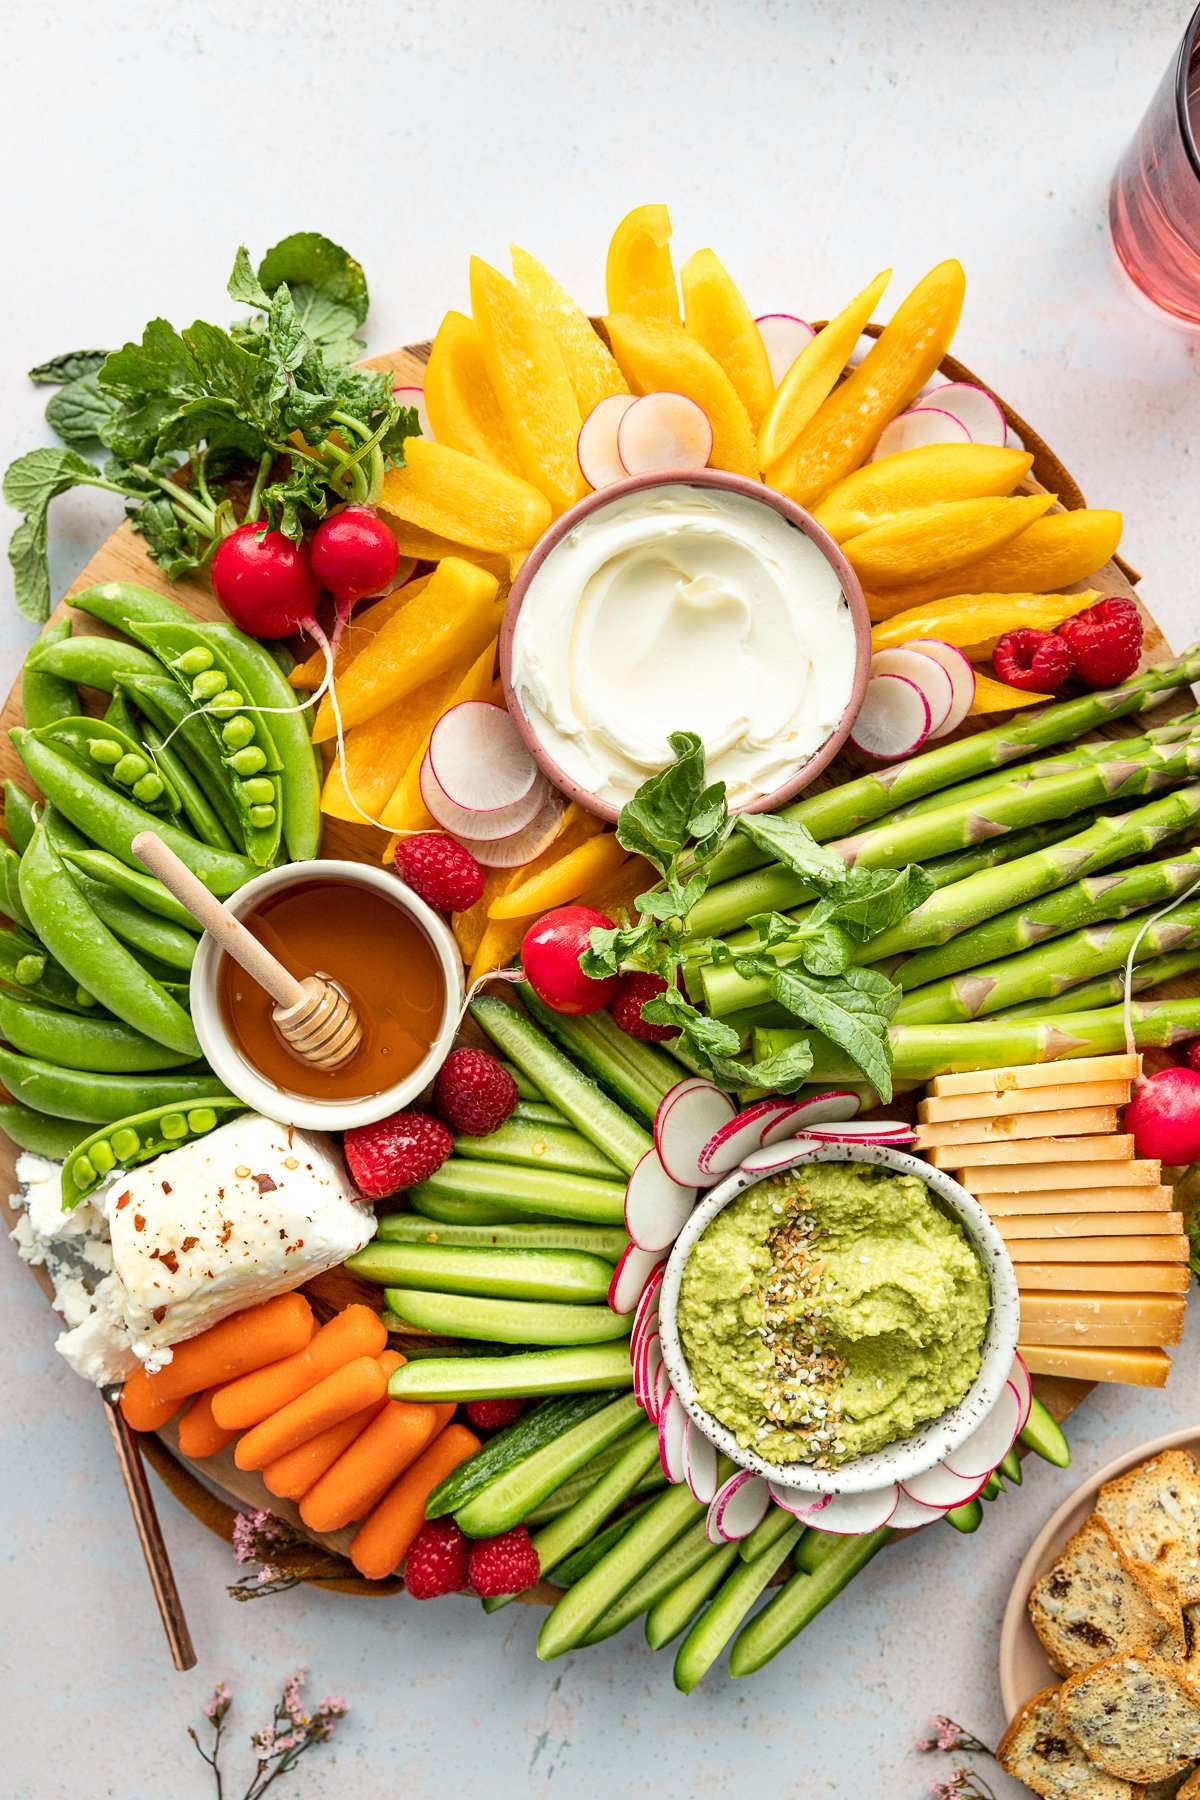
Celebrate the fresh brightness of spring with a beautifully created spring charcuterie board! This vegetarian version is bursting with colorful crisp veggies, delectable dips, and fresh berries. It's easy to put together a spring-themed cheese board with this collection of ideas to get you started!
Prep Time
10 mins
Total Time
10 mins
Servings: 6 servings
Course:
Appetizer
Cuisine:
American
Ingredients
Ingredient Suggestions
Cheeses (2-3 Options)
- 4 ounces honey goat cheese
- 4 ounces cheddar or another hard cheese variety
- 4 ounces brie cut into wedges
Produce
- 4 cocktail cucumbers sliced
- 1 cup snap peas
- 2 yellow bell peppers sliced
- 1 bunch asparagus spears ends trimmed
- 1/4 /4 cup radishes sliced
- 1/2 /2 cup raspberries
Dips & Spreads
- 2 Tablespoons honey
- 1 batch mascarpone fruit dip or just mascarpone for a less-sweet version
- 1 batch Edamame Hummus
Additional Items
- ½ cup mixed nuts
- crackers
- Crostini or baguette slices
- Easter candy for a sweet treat!
Instructions
- Start by placing any items that will be in bowls on the board, in a spread-out triangle shape. I recommend placing dips or jams in bowls for easy serving. You can also set a bowl off to the side if needed.
- Next, add in the cheeses, already cut into serving portions, with the exception of blue cheese, which you can start the crumble on the board (or a triple creme that people can spread themselves). Place the cheeses in a triangle around the board, too, to make it the most visually appealing.
- Now, add in any other bigger components like veggie slices, and crackers or bread. Continue to fill in smaller remaining spaces with smaller items like berries, nuts, herbs, etc. Place them sporadically around the board for the most interest.
Cup of Yum
Notes
- Please see the post for more suggestions - there are many varieties of dips, jams, produce, and cheeses you can add to the board.
- Take this "recipe" as a guide and use what you already have on hand to create a beautiful board, following the guidance in the post on how to assemble the board.
- Don't put everything out at once! This will overwhelm the board. Instead, keep the extras in a convenient place so you can continue to replenish the board as time goes on.
- **Look for cheese specifically labeled vegetarian (or microbial enzymes), if needed.