5.0 from 138 votes
No Knead Bread
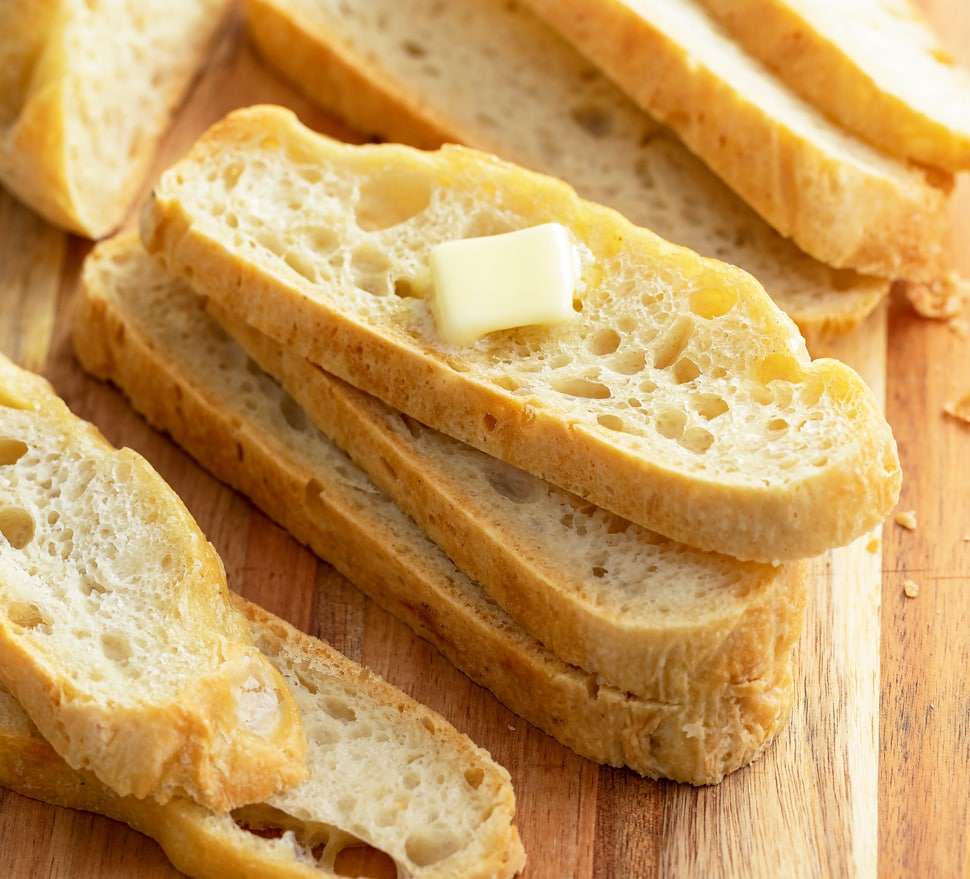
This no knead bread recipe is easy to make with or without a Dutch oven! It's crusty on the outside and light and airy on the inside! Serve this with soups, pastas, dips, sandwiches, and more!
Prep Time
10 mins
Cook Time
10 mins
Rising Time
3 hrs 45 mins
Total Time
4 hrs 45 mins
Servings: 1 loaf
Calories: 1687 kcal
Course:
Bread
Cuisine:
Italian , American
Ingredients
- 2 teaspoons instant yeast active or rapid rise will work as well.
- 2 teaspoons sugar
- 1 ½ cups barely warm water 100° F
- 3 cups bread flour 360 grams
- 2 teaspoons salt see notes
- 1 tablespoon olive oil
- 1 tablespoon butter
Instructions
- See notes for making this without a Dutch oven.
- Note: The dough in this recipe is sticky, gently handle with a silicone spatula throughout this process. (Not your hands.)
- Combine the yeast, sugar, and water in a small bowl. Cover with saran wrap and let sit for 5 minutes.
- Combine the flour and salt and stir to combine. Add the olive oil and water/yeast mixture and use a silicone spatula to combine until all of the flour is moist. The dough will be sticky.
- Roughly shape into a ball and be sure to spray the top with cooking spray. Cover with saran wrap, and then with a dish towel. Let rise for 2-3 hours, until at least doubled in size. See notes for rising tips.
- Optional step after rising: Transfer to the fridge for up to 3 days to develop more flavor. It will rise more, and may eventually deflate slightly, but that’s okay. After refrigerating, proceed with the steps below.
- Use a silicone spatula to scrape the dough out of the bowl and turn it onto a sheet of floured parchment paper. Use a silicone spatula to fold the dough onto itself, by taking the outer edges and folding them into the middle, until a sturdier ball is formed. Spray with nonstick cooking spray, and cover loosely with saran wrap. Let it rest/rise for 45 minutes while you preheat the oven.
- Preheat the oven to 425° F and place the Dutch oven inside, uncovered. (Verify that this is an acceptable practice with your brand of Dutch oven, some advise against preheating it with nothing inside.)
- Remove the saran wrap from the dough. Using oven mitts, remove the Dutch oven from the oven. Lift the parchment paper and carefully lower the parchment paper and dough into the Dutch oven. Close the lid right away and transfer it to the oven.
- Bake for 40 minutes. Remove it from the oven and use a pastry brush to distribute 1 tablespoon of butter over the top, until melted. This will help it achieve a golden-brown color.
- Return it to the oven, uncovered, and bake for 10-12 minutes, or until golden brown on top.
- Allow the bread to cool for at least 5 minutes before slicing in. Serve with Olive Oil Bread Dip!
Cup of Yum
Notes
- To Make Without a Dutch Oven:
- If Your Dough Isn't Rising:
- If you need a little boost of warm air, try these tricks:
- Pro Tips:
- Storage
- Follow the recipe as outlined through step 5.
- Use a silicone spatula to scrape the dough out of the bowl and turn it onto a lightly floured nonstick baking sheet or cast-iron skillet.
- Use the spatula to fold the dough onto itself by taking the outer edges and folding them into the middle, until a sturdier ball is formed. Spray with nonstick cooking spray and cover loosely with saran wrap. Let it rise for 45 minutes. Gently reshape the ball with the spatula if it becomes too flat after rising.
- Bake at 475° F (not 425° as outlined for Dutch oven method), for 25 minutes, or until the top begins to brown. Remove from the oven and brush with butter. Bake for another 5 minutes, or until the top is lightly golden brown.
- Pro Tip: Place 1.5 cups of water in a shallow pan or cast iron skillet on the bottom oven rack when you preheat the oven for baking. Leave it there while the bread bakes. This will create steam, resulting in a crispier outer crust. (This is to replicate the steam that is created when baked in a covered Dutch oven.)
- Oven: This trick works great! While your yeast is sitting in the warm water, heat your oven to 200° for 2 minutes, then shut the heat off. Place your covered bowl of dough in the oven and shut the door to trap the warm air inside. Let it rise!
- Microwave: Fill a glass measuring cup with 1 cup of water and microwave for 2 minutes, until boiling. Remove the water and replace it with your covered bowl of dough. Close the door right away. The residual heat will allow your dough to rise.
- Warm Dish Towel: Place a kitchen towel in the dryer until it's nice and warm, place it over the saran wrap on top of the bowl and let it hang over the sides. Repeat as needed.
- Outside: If it's warm outside, place your dough outside to rise! (Even better if it's a little humid.)
- My key advice: Handle the dough gently and minimally to keep the airy holes intact. Use a silicone spatula, not your hands. Less is more with the flour. Give the dough sufficient opportunity to rise, (twice).
- Saran wrap traps in moisture and creates a humid environment, perfect for rising. If you don't have it on hand, place your dough in a greased plastic container with a tight fitting lid to rise in.
- Flour: Be sure to weigh your flour to ensure that you don't add too much. Bread flour is best in this recipe, but all-purpose can be used if needed. This recipe uses minimal flour, which makes the end result so light and airy.
- Yeast: Instant yeast is great for this recipe, but Active and Rapid Rise yeast are fine as well. (Photos are actually from using active yeast.)
- Salt: Non-iodized salt is best for baking. (Table salt is generally supplemented with iodine, which can generate a bitter taste in baked goods.) I use Redmond Real Salt for all of my baking and cooking recipes. (Enter code 'COZY' for 15% off!) Of course, table salt can definitely be used if that's what you have on hand.
- Parchment Paper: Crumple it up first so that it better molds to the shape of the Dutch oven, if using that method.
- High Altitudes: Baking at a high altitude typically requires adjustments, see this guide from Bob's Red Mill on what adjustments may be needed for this recipe.
- See blog post for: Make-ahead method, info on baking temperatures, and my preference of Dutch oven vs. non Dutch oven.
- 📘 Find this recipe on page 238 of my 2nd cookbook, Let’s Eat!
- Store in a covered container at room temperature for 5 days, refrigerate for up to 10 days, or freeze for up to 3 months.
- This bread can be frozen as a whole loaf or in slices. I like to freeze sliced up loaves in a gallon freezer bag, it's easy to grab for breakfast, lunch, and dinner during the week! Be sure to seal out the air.
Nutrition Information
Calories
1687kcal
(84%)
Carbohydrates
290g
(97%)
Protein
55g
(110%)
Fat
33g
(51%)
Saturated Fat
10g
(50%)
Polyunsaturated Fat
5g
Monounsaturated Fat
15g
Trans Fat
0.5g
Cholesterol
30mg
(10%)
Sodium
4761mg
(198%)
Potassium
609mg
(17%)
Fiber
15g
(60%)
Sugar
9g
(18%)
Vitamin A
357IU
(7%)
Vitamin C
0.1mg
(0%)
Calcium
70mg
(7%)
Iron
4mg
(22%)
Nutrition Facts
Serving: 1loaf
Amount Per Serving
Calories 1687
% Daily Value*
| Calories | 1687kcal | 84% |
| Carbohydrates | 290g | 97% |
| Protein | 55g | 110% |
| Fat | 33g | 51% |
| Saturated Fat | 10g | 50% |
| Polyunsaturated Fat | 5g | 29% |
| Monounsaturated Fat | 15g | 75% |
| Trans Fat | 0.5g | 25% |
| Cholesterol | 30mg | 10% |
| Sodium | 4761mg | 198% |
| Potassium | 609mg | 13% |
| Fiber | 15g | 60% |
| Sugar | 9g | 18% |
| Vitamin A | 357IU | 7% |
| Vitamin C | 0.1mg | 0% |
| Calcium | 70mg | 7% |
| Iron | 4mg | 22% |
* Percent Daily Values are based on a 2,000 calorie diet.