5 from 155 votes
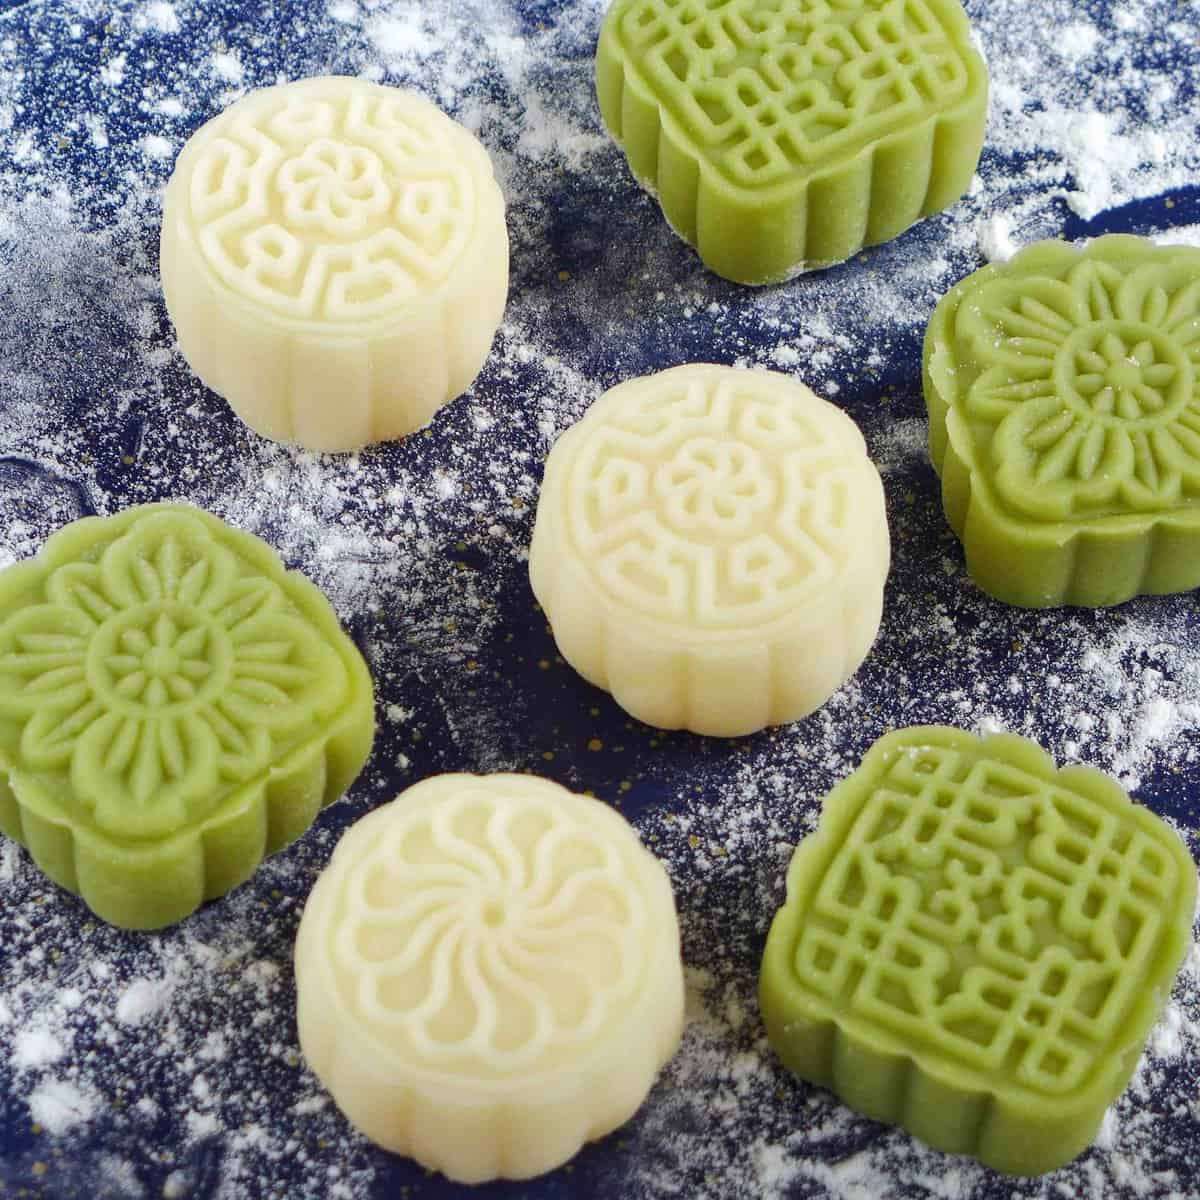
Snow skin mooncake with custard filling (冰皮月饼)
Snow skin mooncake with custard filling features a tender, chewy, and slightly sweet glutinous rice-based skin wrapped around a smooth, rich custard center. This no-bake style mooncake uses starchy flours and condensed milk to achieve its soft texture and delicate sweetness. Its colorful appearance, sometimes enhanced with matcha powder, makes it an appealing treat for festive occasions, especially when traditional baked mooncakes aren’t desired.
Prep Time
30 mins
Cook Time
15 mins
Chill
2 hrs
Total Time
2 hrs 45 mins
Servings:
8
mooncakes
Calories:
169 kcal
Course:
Dessert
Cuisine:
Chinese
Ingredients
For the filling
- 2½ tablespoon wheat starch or cornstarch/tapioca starch (see note 1)
- 3 tablespoon powdered sugar aka icing sugar
- 3 tablespoon butter melted, unsalted
- 2 tablespoon condensed milk See note 2 for substitute
- 2 large egg
For the skin
- 3 tablespoon glutinous rice flour
- 3 tablespoon rice flour regular
- 2 tablespoon wheat starch or cornstarch/tapioca starch
- 3 tablespoon powdered sugar aka icing sugar
- ½ cup milk
- 1 tablespoon condensed milk
- 1 tablespoon neutral cooking oil
- matcha powder for coloring (optional)
For dusting
- 2 tablespoon glutinous rice flour
Instructions
Make the filling
- Mix wheat starch (or cornstarch/tapioca starch), powdered sugar, melted butter and condensed milk until well combined. Add the eggs. Lightly beat until fully incorporated.
- Pour the mixture into a saucepan. Cook over low heat. Once the mixture starts to solidify at the bottom of the pan, stir and fold constantly with a flexible spatula.
- When the mixture becomes evenly solid, transfer it to a bowl. It should hold in shape but not too dry (please refer to the video below for the desired consistency).
- Lay a piece of cling film tightly over the cooked filling. Leave to cool completely then put into the fridge to firm up further.
Cup of Yum
Prepare the skin
- While waiting for the filling to cool, prepare the skin. Put glutinous rice flour, regular rice flour, wheat starch (or cornstarch/tapioca starch) and powdered sugar into a bowl. Pour in milk. Mix until smooth. Add condensed milk and oil. Stir to combine.
- Pour the mixture into a deep plate, then cover it with another plate. Cook it using one of these methods: [Option 1] In a microwave for 4 minutes on high power; [Option 2] In a steamer for 20 minutes over medium-high heat (see note 3).
- By then the mixture should have turned solid. Use a flexible spatula to scrape it off and transfer to another plate to speed up cooling (see note 4).
- When it’s cool enough to touch, combine and knead it in your hands until it becomes smooth (you’ll need to wear food-safe gloves to prevent sticking). Wrap it with cling film if not used immediately.
Color the skin (optional)
- Sprinkle matcha powder or purple sweet potato powder over the cooked dough. Knead to distribute the powder until the color becomes even. For the entire dough this recipe makes, you’d need about ½ teaspoon of powder.
Toast the dusting flour
- In a pan, toast glutinous rice flour over low heat for about 4 minutes. Transfer out to cool for later use.
Shape the mooncakes
- Take the filling out and knead in your hands briefly to make it smoother. Divide it into 8 equal pieces and roll each into a ball.
- Also, shape the skin into 8 equal balls. Flatten one piece into a round wrapper. Place a filling ball in the middle. Gently push the wrapper upwards to tightly cover the filling. Seal at the top.
- Roll the assembled ball in the toasted glutinous rice flour. Rub off any excess flour leaving just a very thin layer.
- Put the ball into a mooncake mold. Place the mold, with the opening facing down, onto a lightly dusted surface. Press the springy handle then lift up the mold. Push the handle again to release the mooncake (see note 5).
Store
- In the fridge: Store them in air-tight containers in the fridge and consume within 72 hours.
- In the freezer: Lay them in a single layer to freeze. Once completely frozen, transfer them into air-tight containers/bags. Store in the freezer for up to 1 month.
Serve
- They’re best when consumed right after assembly. The skin will harden over time.
- To soften, you can [Option 1]: Lightly wet them and microwave them in a plate/bowl covered with cling film. Run on high power for 15 seconds. Check the softness and cook longer (10 seconds at a time) until softened. [Option 2]: Steam them for 2 minutes. Check the softness. Cook a little longer as needed.
Notes
- Use cornstarch or tapioca starch instead of wheat starch to make the mooncakes gluten-free.
- Condensed milk in the filling can be substituted with full-fat milk powder if preferred.
- If doubling the skin mixture, cook in batches and increase steaming time accordingly.
- It is normal for oil to separate after cooking the dough; knead it back into the mixture before shaping.
- Lightly dust mooncake molds with glutinous rice flour to prevent sticking when shaping.
Nutrition Information
Serving
1mooncake
Calories
169kcal
(8%)
Carbohydrates
25g
(8%)
Protein
4g
(8%)
Fat
6g
(9%)
Saturated Fat
1g
(5%)
Polyunsaturated Fat
3g
(18%)
Monounsaturated Fat
2g
(10%)
Trans Fat
0.04g
(2%)
Cholesterol
2mg
(1%)
Sodium
20mg
(1%)
Potassium
77mg
(2%)
Fiber
2g
(8%)
Sugar
12g
(24%)
Vitamin A
45IU
(1%)
Vitamin C
0.05mg
(0%)
Calcium
68mg
(7%)
Iron
0.3mg
(2%)
Nutrition Facts
Serving: 8 mooncakes
Amount Per Serving
Calories 169
% Daily Value*
| Serving | 1mooncake | |
| Calories | 169kcal | 8% |
| Carbohydrates | 25g | 8% |
| Protein | 4g | 8% |
| Fat | 6g | 9% |
| Saturated Fat | 1g | 5% |
| Polyunsaturated Fat | 3g | 18% |
| Monounsaturated Fat | 2g | 10% |
| Trans Fat | 0.04g | 2% |
| Cholesterol | 2mg | 1% |
| Sodium | 20mg | 1% |
| Potassium | 77mg | 2% |
| Fiber | 2g | 8% |
| Sugar | 12g | 24% |
| Vitamin A | 45IU | 1% |
| Vitamin C | 0.05mg | 0% |
| Calcium | 68mg | 7% |
| Iron | 0.3mg | 2% |
* Percent Daily Values are based on a 2,000 calorie diet.