5.0 from 3 votes
Focaccia Bread
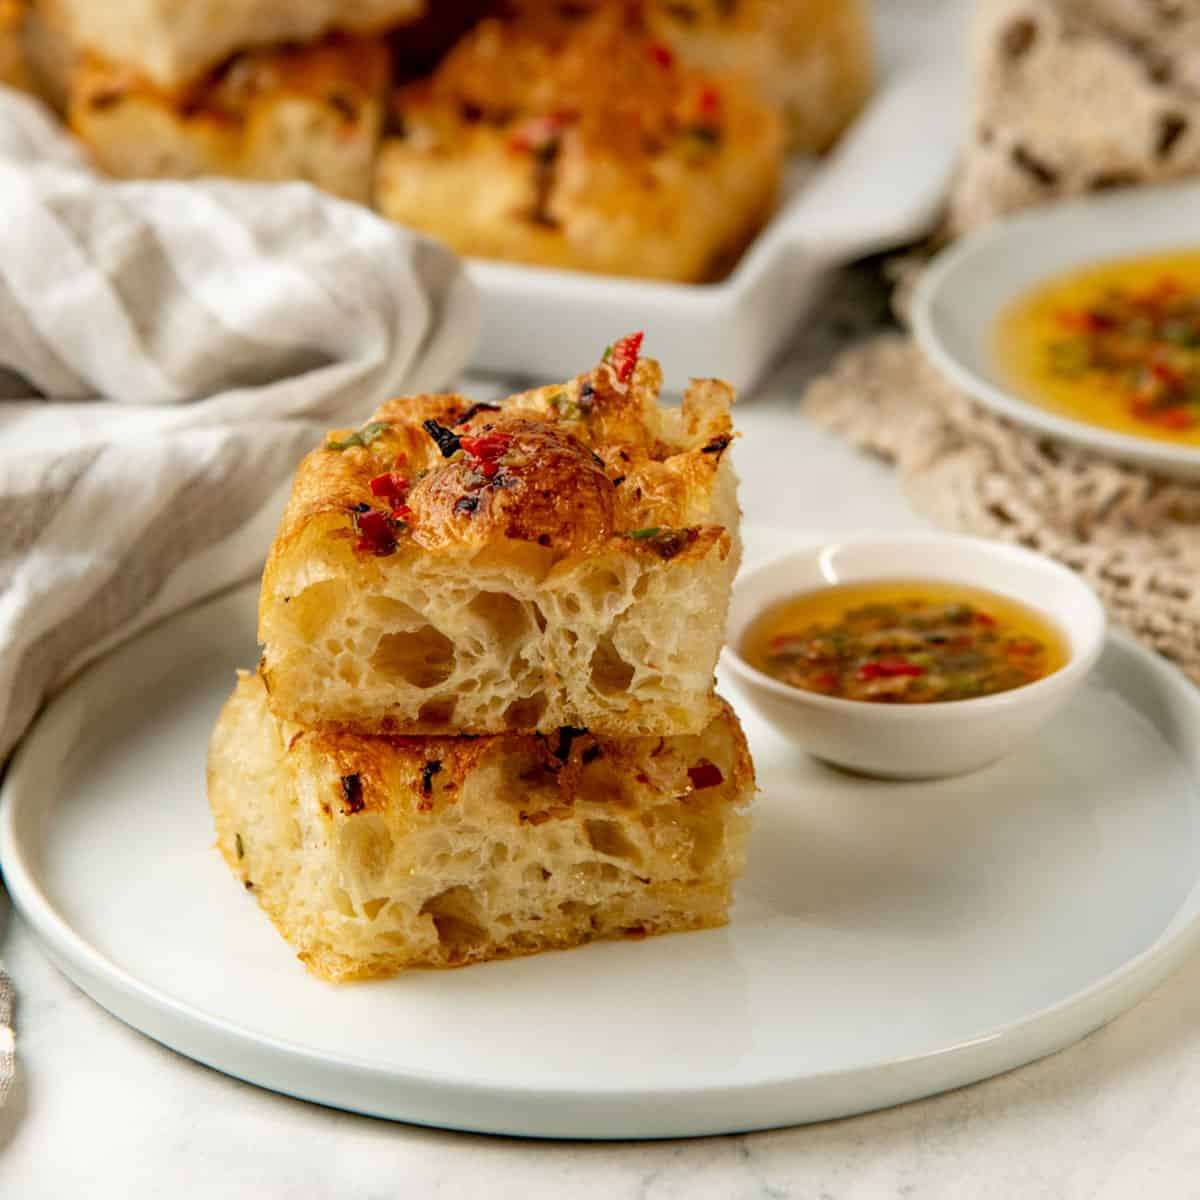
Italian focaccia bread is a novice baker-friendly, mega flavorful bread recipe! Baked in a shallow pan, this bread is drenched in flavor, with big air pockets inside, and crispy throughout. Very versatile recipe and you can make so many different variations.EASY - Very easy and very adaptable recipe (even if you mess it up a little)! I provide detailed step by step instructions so you can make perfect focaccia that will taste and look even better than what you can buy from a high end bakery.US based cup, teaspoon, tablespoon measurements. Common Measurement Conversions. Weight measurements are recommended for accurate results.
Prep Time
55 mins
Cook Time
55 mins
Additional Time
14 hrs
Total Time
15 hrs 25 mins
Servings: 24 pieces
Calories: 76 kcal
Course:
Breakfast , Appetizer , Snacks , Bread , Lunch , Brunch
Cuisine:
European , Italian
Ingredients
For the dough
- 350 g bread flour about 3 cups (spooned and leveled)
- 315 g water 1 ⅓ cup (preferably lukewarm; i.e. 104 - 115°F / 40 - 45°C)
- 20 g honey 1 tbsp
- 3.5 g active dry yeast about 1 tsp (fine granules). Increase to 5 g for same day focaccia (about 1.5 tsp)
- 7 g fine sea salt ½ tsp
- Infused oil and herb topping recipe below (see recipe notes for other options)
For the topping (there is enough for the topping, and more as a dip)
- 100 g olive oil ½ cup
- 3 spring onions 25 g (finely chopped)
- 1 - 2 long red chili pepper about 20 g (finely chopped, deseed to reduce the heat of the chili if you prefer)
- 2 - 3 sprigs rosemary leaves only, finely chopped (about 10 g)
- 1 whole roasted garlic bulb you can also use raw garlic as well (about 8 - 10 cloves, minimum)
- 1 tsp flaked salt or ½ tsp sea salt (add more to taste)
Instructions
Infused oil and herb topping
- Make this topping while the dough is proofing (for overnight focaccia) and store it in the fridge overnight.
- If you’re making same day focaccia, make the infused oil and herb topping first, so that it has time to cool down before the focaccia is proofed.
- I recommend following the recipe here to make roasted garlic for the topping. I like to make a big batch of the roasted garlic and freeze it.
- If you choose not to make roasted garlic, then you can finely mince the raw garlic cloves and use this instead.
- Chop the ingredients - Chop the spring onions, red chili, and rosemary, and place them in a heat-proof bowl. Place the minced raw garlic cloves / roasted garlic cloves in the bowl as well. Use a spoon to mash the roasted garlic cloves and stir to mix with the rest of the chopped herbs.
- Heat the oil - In a small saucepan, heat the olive oil over medium heat. The oil is heated enough when if you drop a piece of rosemary into the oil, it starts to sizzle (this will be at around 300 - 350°F).
- Mix in the hot oil - Remove the saucepan from the heat and carefully pour the oil into the chopped herb and spice mix, while gently stirring. The oil should sizzle as it hits the spices.
- Cool down - Once the oil has been stirred in, set it aside to cool down. Add the salt and stir it in. Taste and add more to your taste.
- If needed, store this in an airtight container and chill in the fridge.
Cup of Yum
Focaccia dough (no knead overnight dough)
- Measure all the ingredients.
- Activate the yeast - In a large bowl, place the water and whisk in the honey to dissolve. Sprinkle the yeast over the surface. Set aside for about 10 - 15 minutes until the yeast is activated and looks bubbly and frothy.
- Make the dough - Add the flour into the activated yeast, followed by the salt. The salt should not be added directly to the activated yeast. Stir the mixture with a wooden spoon / spatula or dough whisk until you have a scraggly dough. The flour should be mostly hydrated by the water.
- Cover with plastic wrap and let it sit for about 20 - 30 minutes to let the dough fully hydrate.
- After 20 minutes, start the process of stretching and folding the dough. To keep the dough from sticking to your hands, keep another bowl of cold water next to you to dip your hands in. Wet your hands as needed to prevent the dough from sticking too much.
- Developing gluten (stretch and fold) - Pick up one corner of the dough in your bowl and slowly stretch it up while very gently shaking it. Then fold this dough over the top of the remaining dough. Do not stretch too far, as the dough may tear (see pictures in the post for reference).
- Rotate the bowl 90 degrees and repeat the process by grabbing the dough section right next to the previous section, and repeat the stretch and fold process. Dip your hand in water as needed. Repeat this process all along the edge of the dough (I usually cover the whole dough in 4 to 5 stretches). This process is one round of stretching and folding, and it's important to do this all along the edge of the dough.
- Cover the dough with plastic wrap and let it rest again for another minimum of 15 minutes. If possible, 30 minutes. Then repeat for another round of stretching and folding.
- Repeat this process at least 2 more times, for a total of 4 - 5 rounds of stretching and folding, with a minimum of 15 minute resting time in between (or 30 minutes of rest time if possible).
- Bulk fermentation - Cover the bowl with plastic wrap and place it in the fridge for at least 12 hours, up to 48 hours. If you’re covering the dough with a damp cloth instead of plastic wrap, then apply a thin layer of oil on the dough surface to prevent the dough from drying out.
Next day
- Prepare a 9 x 13 inch baking pan by adding a few tablespoons of the infused oil to the bottom of the baking dish. Spread this on the bottom and sides of the pan. Alternatively, you can spread a thin layer of butter if you’re worried that the bread will stick to the dish.
- Shape the dough - Remove the dough from the fridge and hold the bowl over the prepared baking pan. Shake the bowl gently to let the dough fall down on its own into the baking pan. If needed, use a dough scraper to remove the dough, but don’t manipulate the dough too much.
- Once the dough is in the pan, flip it over gently so that the dough is covered with the oil. Then shape the dough gently to a rectangle. The dough will not fill the whole bottom of the pan, and that is OK.
- Cover and keep the dough in a warm spot to let it come to room temperature. Check on the dough every 15 minutes or so, and gently stretch the dough so that it fills and fits into the pan.
- Proofing the dough - Once the dough is almost filling the bottom of the baking pan, cover and let it proof until about doubled in size. Avoid handling the dough at this stage, so that it can create large air pockets. This can take anywhere between 1 - 3 hours depending on how warm the environment is.
- The dough is proofed when the top of the focaccia dough jiggles like jello when you shake the pan, and there are bubbles visible on the surface as well.
- Preheat oven - When the dough is almost proofed, preheat a conventional oven to 425°F / 218°C. Assuming the middle of the oven is where other baked goods bake evenly, place one oven rack closest to the bottom element, and another rack in the upper third of the oven.
- Dimpling the dough - When the dough is proofed and the oven is preheated, drizzle a little of the infused oil over the surface (along with some of the herbs), and gently spread it over the surface with your hands. Use your fingers to press into the dough to create dimples throughout the dough. Make sure your fingers are covered with oil, so that the dough doesn’t stick to your hands.
- Create dimples evenly through the dough, but don’t overdo it either. Because of the high hydration and large air pockets, the dimples in the dough won’t be as visible. But you should be able to see creases in the dough and larger bubbles on the surface.
- Since the chopped herbs already have salt, you do not need to sprinkle the top with salt. However, if you did not add salt, then sprinkle flakey salt on top at this stage.
- Bake the focaccia - Place the focaccia on the lowest oven rack in your preheated oven. Bake for about 15 - 20 minutes. The bottom of the focaccia should turn golden brown.
- Then move the focaccia to the upper third of the oven (for up to 5 minutes) so that the top of the bread turns golden brown, for a total bake time of 20 - 25 minutes.
- If the focaccia needs more time to bake at the bottom of the oven, bake the focaccia longer in the lower rack. If the top of the focaccia is browning too much, loosely cover it with a piece of foil.
- Remove the pan from the oven and let it cool slightly. Carefully transfer the focaccia onto a wire rack to cool down completely. This will prevent the bottom from getting soggy.
- Ideally, let the focaccia cool down to room temperature before cutting into it, or the crumb can be too damp.
- Serve as is, or with the remaining chopped herb and infused oil as a dip. Or with antipasti or cheese platters.
Notes
- You can substitute the active dry yeast with instant yeast as well. If using fresh yeast, use double the amount by weight.
- Instant yeast doesn't have to be activated, but you have the option of activating if you want to make sure the yeast is fresh.
- If you don't want to make the infused oil and herb and chili topping, then you can just use minced garlic and rosemary to make a garlic and rosemary focaccia.
- To do so, mince 4 - 5 garlic cloves and add about 1 tbsp of finely chopped fresh rosemary into a bowl. Add about 1/4 cup olive oil to the minced garlic and herbs and use this instead. You can add more oil as needed.
- If you prefer to have focaccia with a smaller crumb and a little more dense in texture, lower the hydration level and use a mixer to develop the gluten for a more even crumb.
- Keeping the water amount the same = 315 mL
- 80% hydration = 393 g flour
- 75% hydration = 420 g flour
- 70% hydration = 450 g flour
- Double the recipe to make a large focaccia in a half sheet pan.
- Activate the yeast in the mixing bowl of your stand mixer. Then add the rest of the ingredients, and use the kneading hook or a spatula to mix the ingredients together to form a dough.
- When the dough has formed, knead the dough on medium high speed (speed 6 - 7) for about 15 - 20 minutes. The dough is very loose and sticky, so don’t add any extra flour.The dough will start to look smoother while kneading in the mixer.
- Once the dough is kneaded, cover the bowl with plastic wrap and let it proof in a warm place until doubled in size. This can take anywhere between 30 minutes - 1 ½ hours.
- Once the dough has proofed, follow the recipe steps from "Next day" onwards above. The final proofing time before baking will also be shorter because the dough is already active and warm.
Nutrition Information
Serving
1piece (2 x 2 inches)
Calories
76kcal
(4%)
Carbohydrates
12g
(4%)
Protein
2g
(4%)
Fat
2g
(3%)
Saturated Fat
0.3g
(2%)
Polyunsaturated Fat
0.3g
Monounsaturated Fat
2g
Sodium
147mg
(6%)
Potassium
29mg
(1%)
Fiber
0.5g
(2%)
Sugar
1g
(2%)
Vitamin A
34IU
(1%)
Vitamin C
3mg
(3%)
Calcium
5mg
(1%)
Iron
0.2mg
(1%)
Nutrition Facts
Serving: 24pieces
Amount Per Serving
Calories 76
% Daily Value*
| Serving | 1piece (2 x 2 inches) | |
| Calories | 76kcal | 4% |
| Carbohydrates | 12g | 4% |
| Protein | 2g | 4% |
| Fat | 2g | 3% |
| Saturated Fat | 0.3g | 2% |
| Polyunsaturated Fat | 0.3g | 2% |
| Monounsaturated Fat | 2g | 10% |
| Sodium | 147mg | 6% |
| Potassium | 29mg | 1% |
| Fiber | 0.5g | 2% |
| Sugar | 1g | 2% |
| Vitamin A | 34IU | 1% |
| Vitamin C | 3mg | 3% |
| Calcium | 5mg | 1% |
| Iron | 0.2mg | 1% |
* Percent Daily Values are based on a 2,000 calorie diet.