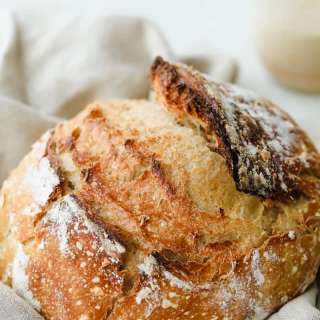
Best Recipe for Sourdough Starter
User Reviews
0.0
Best Recipe for Sourdough Starter
Learn how to make an easy sourdough starter with just flour, water, and patience. Create a bubbling culture perfect for bakery-quality bread at home!
Ingredients
- 60 grams whole wheat flour See Note 1 (for day 1)
- 60 grams rye flour See Note 1 (for day 1)
- 4 - 5 cups unbleached all-purpose flour See note 1 (or bread flour) for balance of days
- filtered water See Note 2, cool (if your house is warm), or lukewarm water (if your house is cool)
Instructions
- Making a sourdough starter is super easy! You’ll feed it every 24 hours for the first 5 days, then switch to every 12 hours to build strength. It doesn’t have to be exact—give or take an hour or two and your starter will be fine. Here’s the step by step:
Day 1: Begin the Starter (Equipment: Clean Large Jar, Kitchen Scale, Spatula)
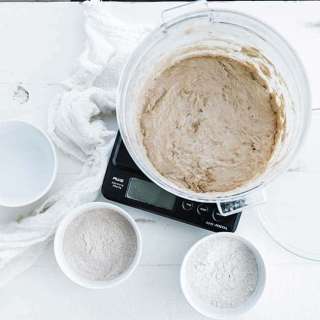
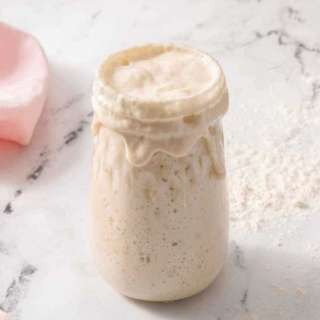
- Place a clean, wide-mouth jar (at least 4 cups/1L capacity) on your kitchen scale and press the "tare" button to zero out the jar's weight. Add 120 grams of flour (see Note 3 for US measurements and Note 1 for flour variations). I used a mix of 60 grams of whole wheat and 60 grams of rye flour, combined with 100-120 grams of water. Stir vigorously to fully combine, scraping down the sides and bottom of the jar. Cover loosely with a clean tea towel or a non-airtight lid, and place the jar in a warm spot (70-75°F) for 24 to 48 hours. You want to see a few bubbles before moving on to day 2, even if it takes 48 hours. If you don't see much activity, give the mixture a stir to incorporate some air, then let it rest again. (See note 4)
- WARM SPOT TIP: Place your starter on a sheet pan on the center rack of your (turned-off) oven with the light on for about an hour—but be careful, those oven lights can get HOT! Other great options include using a proofing setting on your oven, an Instant Pot, or a countertop oven set to the right temperature. You can also try a microwave with the door slightly ajar and the light on, or the top of your fridge.
Day 2: Feed starter every 24 hours
- Discard half of the starter (this prevents it from getting too big too fast). Add 120 grams of flour* and 100 grams of water and stir well. Cover and put it back in the warm spot for 24 hours.*At this point, you can switch to bread flour if desired.
Day 3: Feed Starter every 24 hours
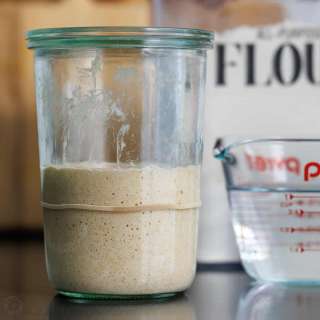
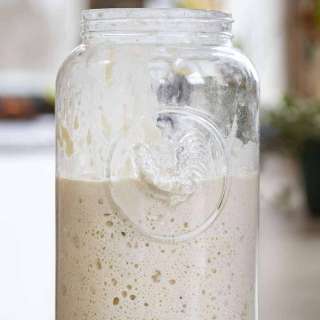
- Discard half of the starter again, add 120 grams of flour and 100 grams of water and stir well. Cover and let it rest for 24 hours.By now, it might rise until doubled or more than doubled and then collapse, this is a sign your starter is becoming active and the wild yeast is growing. But don't be fooled, it's not ready to use yet, you need to build it's strength.
Day 4: Feed Starter every 24 hours
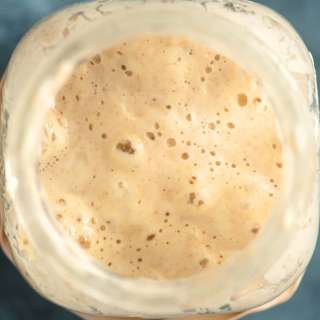
- Repeat the same process as Day 3. The bubbles should be more noticeable and your starter should have a tangy smell. Sometimes the starter stalls around day 4 or 5, this is normal, keep going.
Day 5: Feed Starter one more 24 hour feeding
- One more 24 hour feeding cycle! Discard half of the starter, feed it 120 grams of flour and 100 grams of water, stir and cover. Tomorrow you’ll be feeding it every 12 hours so plan your schedule accordingly.
Day 6: Feed every 12 hours
- Now you can feed your starter every 12 hours. Morning and evening feedings are a good rhythm.Discard half, feed it 120 grams of flour and 100 grams of water, stir well and cover loosely. I did 6 am and 6 pm which worked for my schedule.
Day 7: Feed your starter every 12 hours one last time
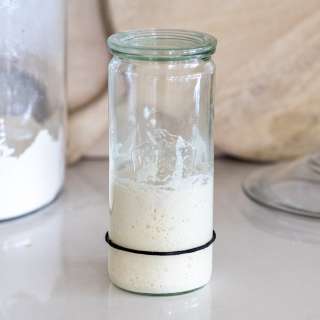
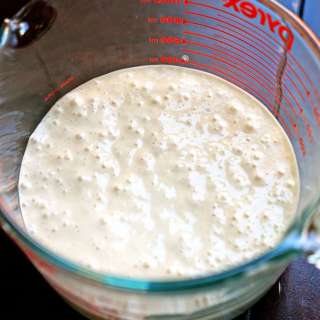
- Start by discarding half your starter and do one more round of feeding every 12 hours.Discard half, feed it 120 grams of flour and 100 grams of water, stir well and cover loosely. You'll do this twice a day, it should rise and fall throughout the day.Your starter should be bubbly, tangy and doubling in size between feedings—it’s ready to bake!
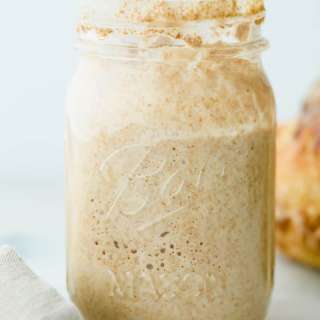
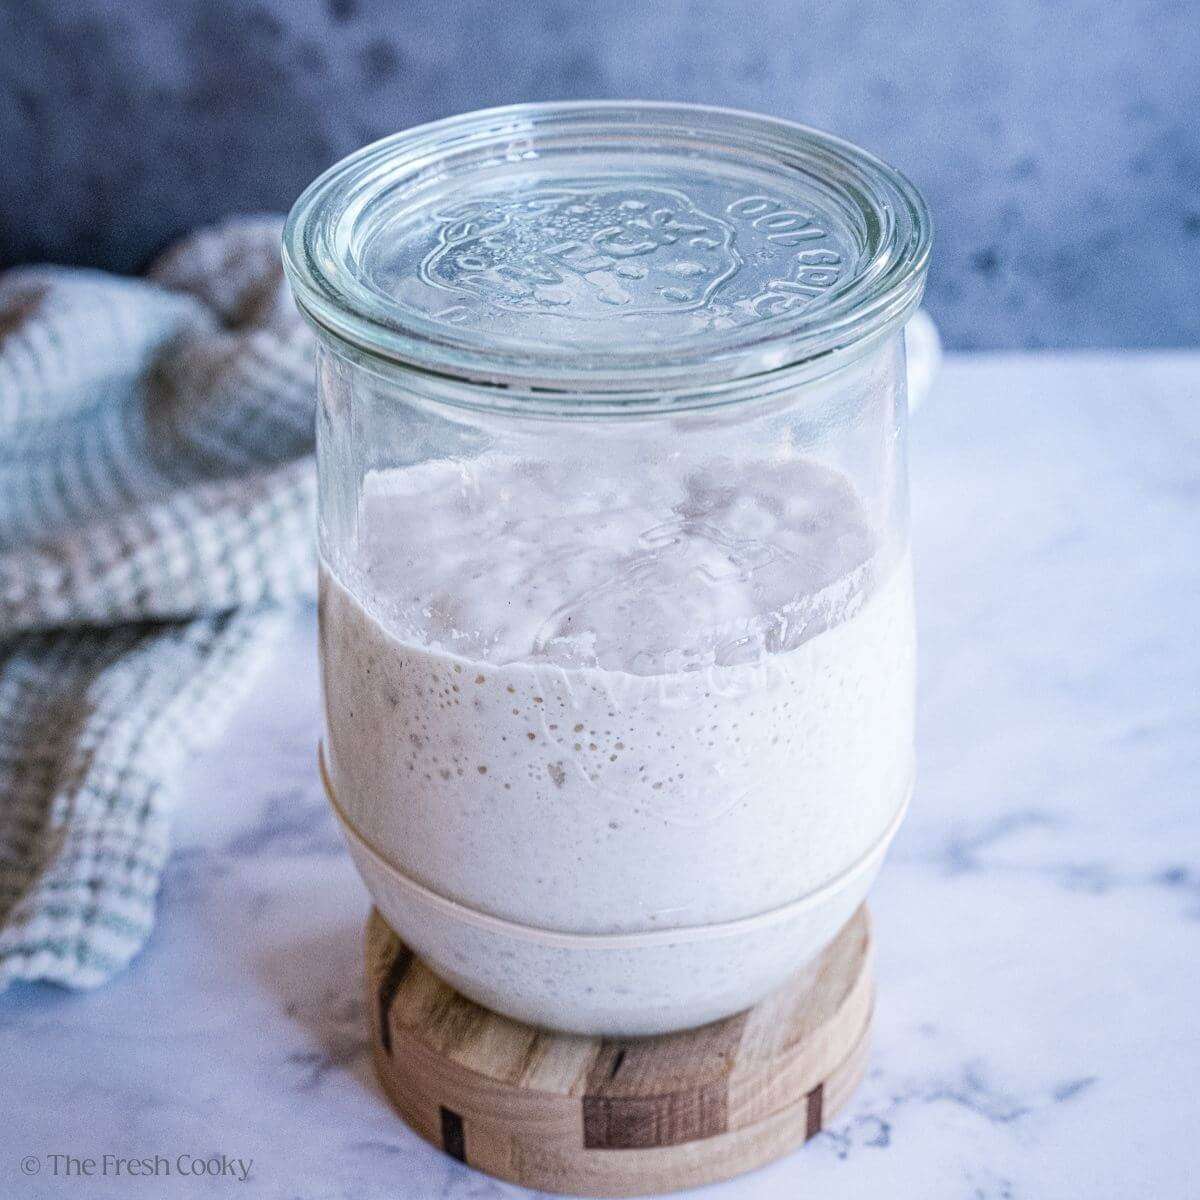
- Give it one more feeding before you start your sourdough adventures. If it’s still sluggish don’t worry! Keep up the feeding process and have patience—it’s a living thing and sometimes needs more time. Some have said it takes up to two weeks.
Ready to Use
- By the end of day 7, your starter should be ready to use! If you're ready to bake, go ahead and dive in. If not, store it covered in the fridge until you're ready. I recommend feeding it once a week if possible. The more often you feed your starter, the quicker and easier it will be to get it active and ready for baking when you need it.
Notes
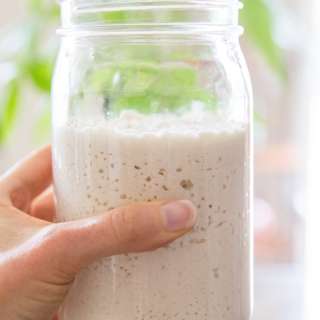
- Brown Liquid on Top: The liquid on top of your sourdough starter is called "hooch," and it can sometimes smell extra sour—some even say "gym socks." Don’t worry; it’s a normal sign that your starter is hungry. You can stir it back in for a tangier flavor or pour it off. Either way, it’s time to feed your starter!
- If you notice brown, green, orange, or red spots, that’s mold, and unfortunately, the starter needs to be discarded. That said, it’s quite hard to kill a starter unless it’s left unfed for weeks on the counter or your fridge loses power and gets too warm. With regular care, your starter will stay healthy and happy!
Using whole grain flours will give your starter a quicker, stronger start, but unbleached all-purpose or bread flour works too—it may just take a bit longer. If you’re using multiple flours, I typically mix equal parts, such as 60 grams of each.
You might need to adjust the water slightly depending on your flour type. Aim for a consistency similar to thick peanut butter.
- You might need to adjust the water slightly depending on your flour type. Aim for a consistency similar to thick peanut butter.
- Filtered water is best for your sourdough starter, but avoid reverse osmosis (RO) water—it removes too many minerals for a healthy starter or bread. If tap water is your only option, let it sit out uncovered for 24 hours to allow the chlorine to evaporate, as chlorine can harm your starter. Prepare a large batch in advance for the week and store it in a jar after dechlorinating.
- You can use US measuring cups to make your starter. Use 1 cup of flour (spoon and leveled) and about ½ cups of water. Be consistent as you feed, using the same method. But I highly recommend you invest in a kitchen scale at some point, as it's much more accurate.
- Not Necessarily 7 Days: Every home environment is different, depending on the season, your location, and how warm or cool you keep your house. While many starters are ready in about 7 days, for some, it can take 10-14 days to bubble and double consistently, especially in cooler environments or when using flours like all-purpose. Watch for cues from your starter rather than sticking to a strict timeline. If it’s not ready yet, give it a stir and let it sit in a warm (70-75°F) spot a bit longer. Remember, sourdough is all about patience and paying attention to the process!
- Brown Liquid on Top: The liquid on top of your sourdough starter is called "hooch," and it can sometimes smell extra sour—some even say "gym socks." Don’t worry; it’s a normal sign that your starter is hungry. You can stir it back in for a tangier flavor or pour it off. Either way, it’s time to feed your starter! If you notice brown, green, orange, or red spots, that’s mold, and unfortunately, the starter needs to be discarded. That said, it’s quite hard to kill a starter unless it’s left unfed for weeks on the counter or your fridge loses power and gets too warm. With regular care, your starter will stay healthy and happy!
How to Store Sourdough Starter
Refrigerator Storage (Low-Maintenance): Perfect for occasional bakers (like me, baking every 7-10 days). Feed your starter, let it sit at room temperature for 1-2 hours, then refrigerate. Feed it weekly by discarding half, giving it fresh flour and water, and returning it to the fridge. Counter Storage (Frequent Use): Ideal if you bake multiple times a week. Keep your starter at room temperature and feed it every 12 hours to stay active and bubbly. This method requires more upkeep but ensures your starter is always ready.
- Refrigerator Storage (Low-Maintenance): Perfect for occasional bakers (like me, baking every 7-10 days). Feed your starter, let it sit at room temperature for 1-2 hours, then refrigerate. Feed it weekly by discarding half, giving it fresh flour and water, and returning it to the fridge.
- Counter Storage (Frequent Use): Ideal if you bake multiple times a week. Keep your starter at room temperature and feed it every 12 hours to stay active and bubbly. This method requires more upkeep but ensures your starter is always ready.
- Share Your Starter! Every time you discard, you can share your sourdough journey. Double the amount you feed your starter, then pass the extra to a neighbor or friend. It’s a simple way to spread the love of sourdough baking!
- See the post for more information, troubleshooting tips, and indicators if your sourdough has gone bad.
Nutrition Information
Show DetailsNutrition Facts
Serving: 1Serving
Amount Per Serving
Calories 413 kcal
% Daily Value*
| Serving | 11 serving | |
| Calories | 413kcal | 21% |
| Carbohydrates | 88g | 29% |
| Protein | 14g | 28% |
| Fat | 2g | 3% |
| Saturated Fat | 0.4g | 2% |
| Polyunsaturated Fat | 1g | 6% |
| Monounsaturated Fat | 0.3g | 2% |
| Sodium | 2mg | 0% |
| Potassium | 442mg | 9% |
| Fiber | 14g | 56% |
| Sugar | 1g | 2% |
| Vitamin A | 5IU | 0% |
| Calcium | 35mg | 4% |
| Iron | 4mg | 22% |
* Percent Daily Values are based on a 2,000 calorie diet.
User Reviews
Overall Rating
0.0
You'll Also Love