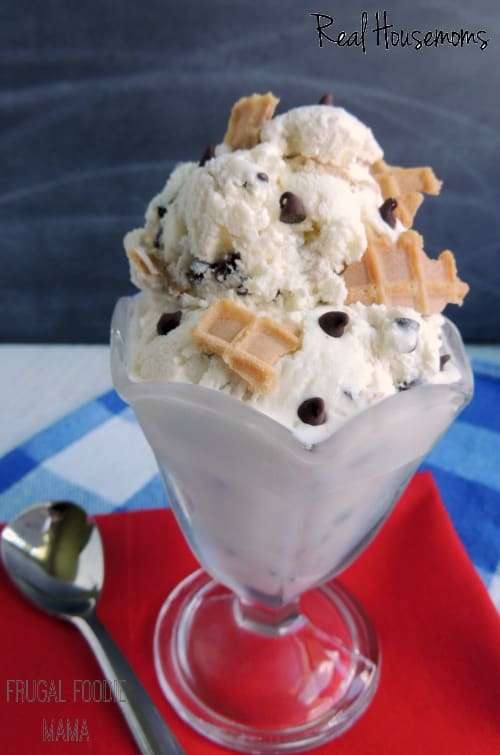
Chocolate Chip Waffle Cone Ice Cream
User Reviews
5
3 reviews
Excellent
-
Servings
6
-
Course
Dessert
Chocolate Chip Waffle Cone Ice Cream
Report
No waffle cone necessary for this classic and creamy no-churn Chocolate Chip Waffle Cone Ice Cream!
Share:
Ingredients
- 1 cup coffee creamer vanilla flavored
- ½ sweetened condensed milk
- 2 cups heavy cream
- ½ whipped topping thawed
- 3 waffle cone broken into bite-sized pieces, large
- ½ cup chocolate chips mini, semi-sweet
Instructions
- In a large bowl, whip together the vanilla coffee creamer, sweetened condensed milk, and heavy cream until light and frothy- about 3-4 minutes. I like to use my immersion blender for this.
- Fold in the thawed whipped topping.
- Pour the vanilla ice cream base into a freezer safe container, and allow to set up in your freezer for 1 hour.
- While the base is freezing, break up your waffle cones and arrange them in a single layer on a baking sheet. Place the baking sheet in your freezer, and freeze the pieces for the remainder of the hour.
- After an hour, remove the ice cream base from your freezer and scrape down the sides of the container and stir with a rubber spatula.
- The ice cream base should be set enough to add in the frozen waffle cone pieces and chocolate chips. Add them both in and stir well.
- Freeze for another hour, and then scrape down the sides and give the ice cream base a stir again.
- Freeze for at least an additional 4 hours and up to overnight.
- Allow the ice cream to set out at room temperature for at least 10-15 minutes before serving as homemade ice cream freezes harder than store bought.
- Scoop and enjoy!
Genuine Reviews
User Reviews
Overall Rating
5
3 reviews
Excellent
Other Recipes
You'll Also Love