Christmas Shortbread Cookies
User Reviews
5
Christmas Shortbread Cookies
Description
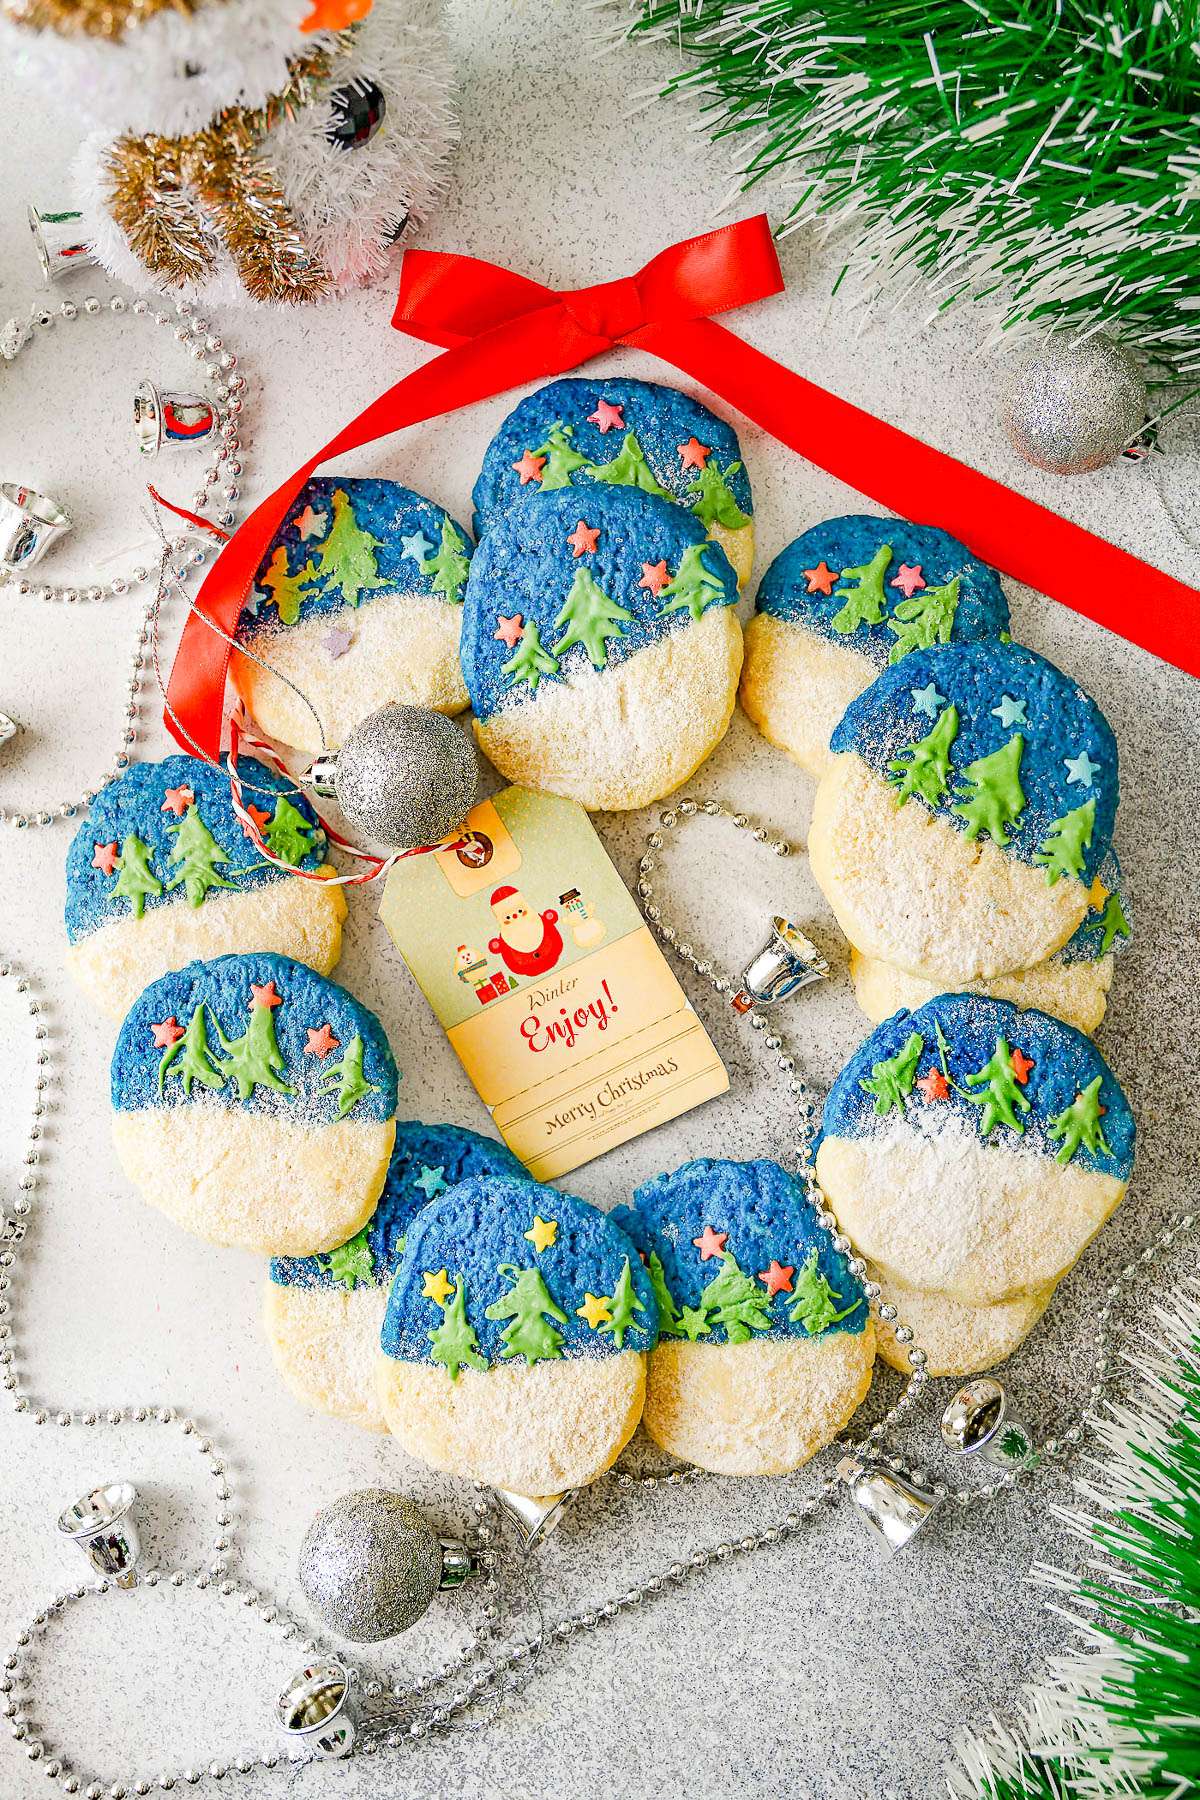
This cookie recipe builds from creaming butter, granulated sugar, and vanilla extract until creamy, then gradually incorporates sifted all-purpose flour, baking powder, salt, and milk to form a soft dough. The dough is divided, and one half may be tinted using gel food coloring, like Wilton Royal Blue, for seasonal flair. The dough is rolled or shaped and baked at a moderate temperature.
Baking length affects texture: shorter baking times yield slightly softer cookies, while extended drying in the cooling oven results in crisper cookies with a tender crumb. Butterfat content is high, creating a rich and melt-in-your-mouth quality characteristic of shortbread. The cookies can be decorated with tinted white chocolate and sprinkles for added color and sweetness.
These cookies hold well at room temperature for about a week and are best stored airtight without refrigeration. The dough also freezes well for extended storage, making it convenient to bake fresh batches through the holiday season. Using baking powder ensures a slight rise for tender crumb, distinguishing these from denser traditional shortbreads.
Ingredients
Shortbread Cookies
- ½ cup unsalted butter 115 g, softened
- ⅓ cup granulated sugar 67 g
- 1 teaspoon vanilla extract
- 1 ¼ cups all-purpose flour 170g, sifted
- 1 teaspoon baking powder
- ½ teaspoon salt
- 3 tablespoons milk whole
- ¼ teaspoon food coloring gel Wilton Royal Blue
- Sprinkles as desired (or other favorite sprinkles or jimmies may be substituted, Wilton Star
Decorating, Optional
- 2 ounces white chocolate baking bar 50 g, white chocolate chips not recommended due to melting difficulty
- ⅛ teaspoon food coloring gel Wilton Green
- confectioners' sugar as needed, for dusting
Instructions
- Shortbread Cookies - To a large bowl (and bowl of a stand mixer), add the butter, granulated, sugar, vanilla extract, and beat on medium-high speed until creamy. Stop, scape down the sides, and set bowl aside.
- To a separte bowl, add the flour, baking powder, salt, and whisk to combine.
- Slowly, add the dry ingredients to the wet, alternating with 1 tablespoon of milk at a time, and beating on low speed, until you have a soft dough.
- Transfer the dough to a clean working surface and divide the dough in half. Set one half aside on a clean work surface.
- Place the other half back in your mixing bowl, and using gel blue food coloring (I used Wilton Royal Blue for this recipe, AmeriColor Blue is also good) dye that half blue. Add a few drops at a time and gently mix in, and keep adding drops until the desired color is achieved. Note - It is optional to dye the dough blue, and you can also use another color such as red or your favorite, or you can optionally skip dying the dough.
- Place both the blue dough and the plain dough on a clean work surface. Tip- If you have a baking mat with measurements on it, it's very handy for this recipe.
- Shape each mound of dough into an 8-inch log.
- Then cut each log in half lengthwise. You'll now have 2 plain and 2 blue sections of dough.
- Press 1 plain + 1 blue together. And repeat, and press the other plain + blue together.
- Wrap each of these two bundles tightly in plastic wrap and freeze for at least 10 minutes or until slightly firm. Tip - Do not skip this step or your dough will be too mushy to cleanly slice and the cookies will also spread too much in the oven.
- Preheat your oven to 350F and line a baking sheet with parchment paper. Set aside.
- After about 10 minutes, or when the dough is slightly firm (it doesn't have to be in shouldn't be rock hard), remove it from the freezer, and slice the dough horizontally down each log in 1/4-inch slices. Press each down slightly with your palm, but don't over-flatten.
- Place each doll mound on the prepared baking sheet, spaced 1 to 2 inches apart. Tip - The cookies don't spread very much, but to be safe if you're baking sheet is on the smaller size, use 2 baking sheets rather than cramming onto one.
- Decorate with star-shaped sprinkles, or your favorite sprinkles or jimmies. If using stars, I use approximately 3 stars per cookie. I decorate the blue side, but you can decorate whichever side you prefer.
- Bake for 10 to 12 minutes, or until set. Cookies will continue to firm up as the cool so don't be afraid to pull them even if they look slightly underdone. Allow cookies to cool completely on the baking sheets* See Notes for Baking Tips.
- Optionally, dust the cookies now with confectioners' sugar. I always dust them again at the end.
- Decorating - Note that if you do not plan to make or decorate with Christmas trees, you can skip this whole section below. Just dust with confectioner's sugar and serve.
- While the cookies are cooling, melt the white chocolate in a heatproof bowl in the microwave in 10-second bursts, stopping to stir after every burst. You can also melt the white chocolate in a heatproof bowl set over a pot of boiling water.
- After the chocolate has melted, and has been stirred smooth, add gel green food coloring, until desired shade is reached (I used Wilton Green in the same set at the Royal Blue I used in the dough, AmeriColor in Forrest Green is also good).
- Allow the green tinted white chocolate to continue to cool for a couple more minutes. If it's too warm, it's usually too thin and more difficult to use.
- Making The Trees - Optional
- Note that the trees are an optional step but do go along way in adding towards the fun and festive look!
- I recommend starting with three straight green lines, each placed where you want a tree to be. I use the dividing line between the blue and plain dough for where I put the trees so the “roots” are just barely going into the plain and the tree and its branches will be in the blue section.
- After drawing the lines, carefully start adding three more lines on each side of those original lines to create the outline of the branches.
- Fill in with your toothpick, adding more green as necessary.
- Repeat on all the cookies.
- Fixing “Mistakes” – If you make a mistake you can take a tiny section of lightly moistened paper towel and try to correct it if you really care that much if a quick wipe with your finger doesn’t do the trick. You don’t have to be Picasso!
- Allow cookies to fully set up before dusting with confectioners" sugar and serving.
Notes
- Bake cookies for about 10 minutes for a softer texture; extend baking time or dry them in the cooling oven for up to 2-3 minutes for crispier results.
- Watch cookies closely near the end of baking to prevent burning due to the high butter content.
- Store baked decorated cookies airtight at room temperature for 5 to 7 days; refrigeration is not recommended.
- Freeze raw dough airtight for up to four months; bake from frozen after allowing it to reach a cold room temperature before slicing and baking.
Nutrition Information
Show DetailsNutrition Facts
Serving: 14Serving
Amount Per Serving
Calories 88 kcal
% Daily Value*
| Serving | 1 | |
| Calories | 88kcal | 4% |
| Carbohydrates | 18g | 6% |
| Protein | 1g | 2% |
| Fat | 1g | 2% |
| Saturated Fat | 1g | 5% |
| Cholesterol | 2mg | 1% |
| Sodium | 116mg | 5% |
| Sugar | 9g | 18% |
* Percent Daily Values are based on a 2,000 calorie diet.
User Reviews
Overall Rating
5
You'll Also Love