Creepy Witch Finger Cookies
User Reviews
5.0
-
Prep Time
1 hr 40 mins
-
Cook Time
1 hr
-
Additional Time
1 hr
-
Total Time
3 hrs 40 mins
-
Servings
48 cookies
-
Calories
91 kcal
-
Course
Dessert, Snacks, Baked Goods
-
Cuisine
European, North American, French
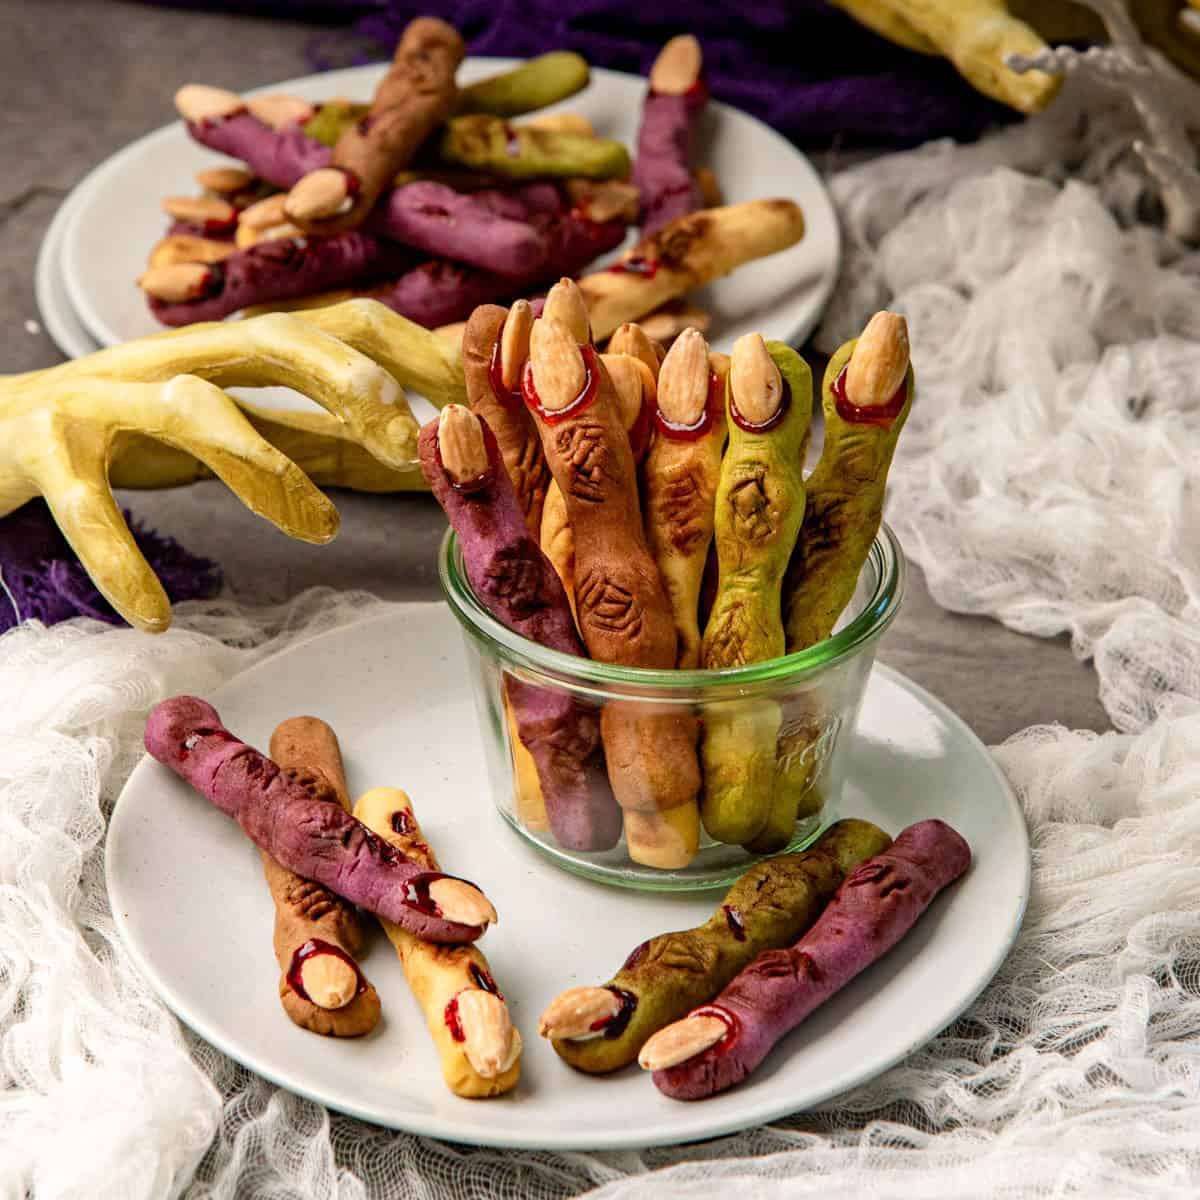
Creepy Witch Finger Cookies
Made with a soft, moist, buttery, rich French butter cookie dough (sablé breton), and naturally colored (no artificial coloring at all!), with so many decorating options. So creepy, so easy, and so much fun to make!EASY - Very easy recipe. Shaping the cookies is the most time-consuming step. But, they don't need to be precise, crooked and wonky fingers will only make them look even more on theme! The cookies can be formed the day before and frozen overnight, to be baked the following day US based cup, teaspoon, tablespoon measurements. Common Measurement Conversions. Weight measurements are recommended for accurate results.Makes 44 - 48 cookies
Ingredients
Witch finger cookie dough base
- 226 g unsalted butter 2 sticks (softened)
- 140 g confectioner's sugar 1 ¼ cup (spooned and leveled)
- 1 tsp sea salt
- 4 egg yolks from large eggs (at room temperature)
- 5 mL vanilla extract
- 454 g all purpose flour 1 lb / 3 ⅔ - 3 ¾ cups (spooned and leveled)
- ¼ tsp baking powder
- 50 whole blanched almonds
Coloring and flavoring (for 1 batch - divide by half for ½ batch)
- 4 - 6 g matcha powder For GREEN color - 2 - 3 tsp (I use high grade matcha powder, if you’re using baking matcha powder, you will need to add more)
- 20 - 30 g purple sweet potato powder For PURPLE color - 2 - 3 tbsp
- 5 - 15 g cocoa powder For BROWN color - Add less for a lighter brown color, and up to 15 g for a darker color
Decorating
- cocoa powder
- strawberry jam or raspberry jam
- Red cake writing gel / piping gel or red food color and corn syrup mixed together
- Melted white chocolate or melted candy wafers in a preferred color
Instructions
Witch finger cookie dough
- In a bowl, place the softened butter, salt, and confectioner's sugar. The butter should be very soft, but not melted.
- Cream the butter sugar mixture until the butter is very creamy and light in color. For this, you can either use the flat beater with your stand mixer, or an electric hand beater. Make sure to scrape down the bowl halfway through to ensure all the butter and sugar are creaming well together. This can take as little as 2 minutes or as long as 10 minutes depending on the temperature of your butter and ambient temperature.
- While the butter is creaming, separate the egg yolks into a separate bowl. The egg whites will not be used in this recipe (and you can use it in other applications).
- When the butter - sugar mixture is ready, scrape down the sides of the bowl, and then add the egg yolks and vanilla extract.
- Scrape the sides of the bowl to make sure the egg yolks are mixing well with the butter.
Optional step to color the dough
- At this stage, you can add the food coloring / flavor to the dough. You can either color the entire batch of dough in one color / flavor, OR divide the butter mixture to make several colors / flavors.
- To make two colors - Weigh the butter mixture and equally divide it into 2 portions, by weight. Place each portion in a separate bowl.
- Choose two colors for the dough you want to make, and add the powder to the butter mixture.
- Matcha for green. Sweet potato powder for purple. Cocoa powder for brown (adjust for color intensity), and no addition for a pale color. Mix really well until the powder has evenly mixed in with the butter mixture. Set aside.
- If you only want to make 1 color, just leave the mixture in the mixer bowl and add the color you like (or none for pale color). Mix well and set aside until needed.
Adding flour to form the dough
- Next, place the flour and baking powder in a large bowl and whisk to combine very well, OR sift together to ensure that the baking powder mixes evenly with the flour.
- For 2 colors, divide the flour into two equal portions (ideally by weight). For 1 color, you do not need to divide the dough.
- Add the flour mixture to the butter egg mixture.
- Gently fold in the flour with a spatula. The butter and flour will incorporate together to form a soft dough. Be careful not to overwork the dough as this can lead to tough and rubbery cookies.
- Scrape the dough out onto a lightly floured surface. Lightly flour the surface of the dough as well, and fold it over itself 2 -3 times, to ensure that the flour is mixed in evenly. Lightly flour your hands if you need to keep the dough from sticking to your hands.
- Shape the dough into a disc, and wrap it well with plastic wrap. Place in the fridge for 20 - 30 minutes.
- Repeat for other doughs if you're making multiple colors / flavors.
Shaping the finger cookies
- Remove the rested dough from the fridge. Use a 1 tablespoon cookie scoop, and take a portion of the dough. This should weigh between 16 - 20 g. Keep the rest of the dough covered with the plastic wrap to prevent it from drying out.
- Roll this portion into a smooth ball, and then roll it into a sausage / finger shape on your work surface.
- Then create two thick, raised areas for the knuckles by gently squeezing the dough together in two separate spots.
- The final cookie is about 1 cm thick, with the knuckles being slightly thicker and raised. The finger does not need to be straight, and can look “de-formed" or misshapen for a more spooky, crooked look.
- Use the dull side of a butter knife or toothpick to create lines on the knuckle. I like to create more wrinkly knuckles with a hash pattern, but you can also create parallel lines for a cleaner look.
- OPTIONAL - Use a dry paint brush and dab cocoa powder on the knuckles and other parts of the finger to make the finger look dirty.
- Next, press one whole almond on the tip of the cookie, with the wider base of the almond as the base of the nail.
- Place the cookie on a half sheet pan or tray that is lined with parchment paper (or silpat).
- Repeat this process with the rest of the dough until the half sheet pan / tray is full of a single layer of cookies.
- Place these cookies in the freezer until the cookies freeze, i.e. about 40 - 60 minutes minimum. If you want to keep the cookies in the freezer overnight, wrap the tray well with plastic wrap.
- Repeat with the remaining dough and freeze as needed.
Baking the witch fingers
- Preheat conventional oven to 325°F / 163°C.
- Take the frozen cookies from the freezer. Place the cookies on a parchment paper or silpat lined half sheet pan, with about 1 ½ inches of space between the cookies. I.e. about 16 - 18 cookies per tray.
- Bake from frozen in the preheated oven for 20 - 25 minutes. The cookies should not color on top, and will only start to brown on the bottom. The precise time will vary, depending on your oven and the material of the half sheet pan.
- Remove the baking pan from the oven and let the cookies cool.
- Repeat with more of the frozen cookies with the second half sheet pan, while the previous batch cools.
Decorating the cookies
- Once the cookies are baked and cooled, the almonds will come off easily. The first step is to securely stick the almond nail back on the cookie.
- Place a small amount of strawberry jam in the nail bed cavity. Then place the almond back on top of the jam and gently press it in. The jam should slightly ooze out from the sides to create a “bloody” nail bed.
- Brush on more cocoa powder to create a dirty look, if needed.
- OPTIONAL - You can also use melted white chocolate to stick the almond back on the cookie, and use red piping gel to create the bloody nail bed.
- The piping gel or red corn syrup can also be used to brush on the cookie to create bloody scrapes and bruises on the cookies, and to color the nails.
- Let the chocolate set, and then serve.
Notes
- In this post, each colored dough is one half of a batch of this recipe (i.e. I make two times this recipe for 4 different colors).
- The red corn syrup paint is made by mixing about 2 tbsp of corn syrup with 1 - 2 drops of red food coloring.
- The cookies can be stored in an airtight container for up to 4 days at room temperature, or about 5- 6 days in the fridge. But the cookies will become stale the longer they are stored.
- Alternatively, the cookies can be stored in the freezer for about 1 month. Let the cookies thaw at room temperature before serving.
- Unbaked cookies can be stored in the freezer for up to 2 months, IF stored properly to prevent freezer burn. Once the cookies are frozen on the baking tray, transfer the cookies into an airtight container.
- Cookies are then baked from frozen.
- Cookies are then baked from frozen.
- If you want to make nut free witch finger cookies, the nail can be replaced by brushing on melted chocolate or melted candy melts in a color of your choice.
- You can also create a small cavity where the almond is supposed to go with a chopstick before baking, so that the cavity can be filled with the melted chocolate to look like a nail.
Nutrition Information
Show DetailsNutrition Facts
Serving: 48cookies
Amount Per Serving
Calories 91 kcal
% Daily Value*
| Serving | 1cookie | |
| Calories | 91kcal | 5% |
| Carbohydrates | 10g | 3% |
| Protein | 2g | 4% |
| Fat | 5g | 8% |
| Saturated Fat | 3g | 15% |
| Polyunsaturated Fat | 0.4g | 2% |
| Monounsaturated Fat | 2g | 10% |
| Trans Fat | 0.2g | 10% |
| Cholesterol | 26mg | 9% |
| Sodium | 50mg | 2% |
| Potassium | 24mg | 1% |
| Fiber | 0.4g | 2% |
| Sugar | 3g | 6% |
| Vitamin A | 144IU | 3% |
| Calcium | 8mg | 1% |
| Iron | 1mg | 6% |
* Percent Daily Values are based on a 2,000 calorie diet.
User Reviews
Overall Rating
5.0
You'll Also Love


French Almond Cookies (aka Almond Cloud Cookies) Gluten Free!