Hanami Dango
User Reviews
4.8
102 reviews
Excellent
Hanami Dango
Report
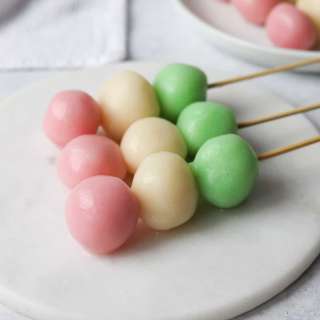
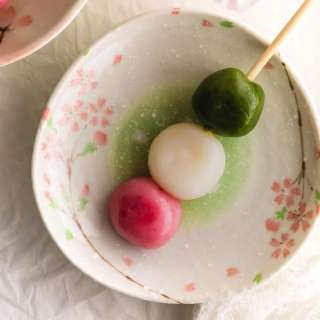
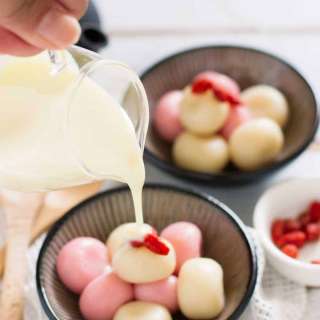
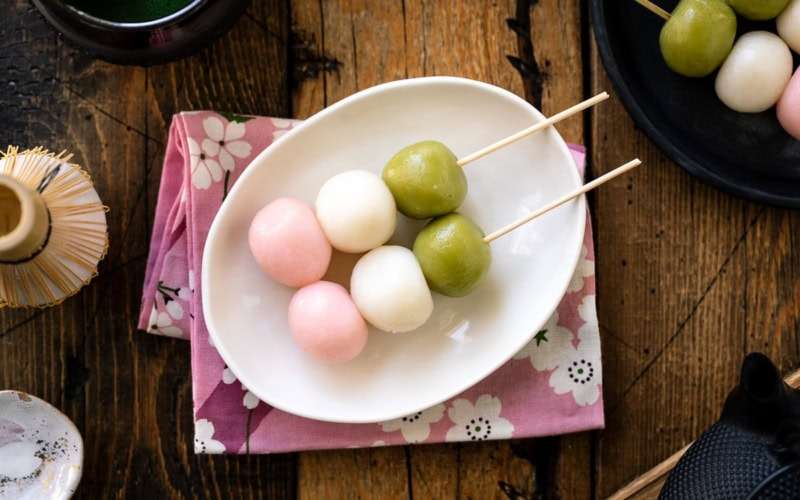
Skewered dumplings made with rice flour and glutinous rice flour, Hanami Dango are popular snacks enjoyed during cherry blossom viewing in Japan. These chewy dumplings in three colors (sanshoku dango) come in pink, white, and green springtime hues. With just a touch of sweetness, this traditional Japanese confectionery announces the arrival of spring.
Share:
Ingredients
For the Dumplings Using Joshinko and Shiratamako
- ⅔ cup joshinko (Japanese rice flour) (上新粉; this is short-grain rice flour, different from other Asian varieties; you can buy it from Amazon)
- ¾ cup shiratamako (glutinous rice flour/sweet rice flour) (白玉粉; this is short-grain glutinous rice flour, different from other Asian varieties; you can buy it from Amazon; you can substitute with mochiko)
- ⅓ cup sugar (the sugar helps the dango stay softer and gives it a mild, subtle sweetness)
- ⅔ cup boiling water (joshinko requires boiling water)
For Coloring the Dumplings
- ¼ tsp matcha (green tea powder) (I love and use matcha from Ippodo)
- Red food coloring (I use this powdered food coloring; if you prefer to use a natural ingredient, crush freeze-dried strawberries/raspberries)
For the Dumplings Using Dangoko (Optional)
- 1⅓ cup dangoko (Japanese rice dumpling flour) (団子粉; you can find it at Japanese grocery stores)
- ⅔ cup water
For the Yomogi Dango Version (Optional)
- 1 Tbsp yomogi (mugwort) (you can buy it on Amazon)
- 2 Tbsp hot water
Instructions
- Gather all the ingredients. Soak the 6-inch (15-cm) bamboo skewers in water. You can start boiling a large pot of water on low heat. Once boiling, keep it on low heat.
To Make the Dough
- Combine ⅔ cup joshinko (Japanese rice flour), ¾ cup shiratamako (glutinous rice flour/sweet rice flour), and ⅓ cup sugar (or 1⅓ cup dangoko (Japanese rice dumpling flour) and ⅓ cup sugar) in a large bowl.
- Using chopsticks, mix it all together until well blended. Next, add in ⅔ cup boiling water (or ⅔ cup water (cold) for the dangoko) a little bit at a time while mixing with chopsticks. Please note: You may not need to use the entire measured amount of hot water. If you add too much water, your dough will be too soft.
- The flours will start to stick together and eventually form clumps. When your dough reaches this stage, stop adding the water.
- Using your hands, combine the dough into one ball.
- Knead by hand until the dough becomes smooth. If needed, add a tiny bit of hot water to pick up any residue in the bowl (I did not use all the measured hot water).
- The texture of the finished dough should feel similar to an earlobe. The "texture of an earlobe" is such a funny description, but that’s how we check the consistency in Japan. The dough shouldn‘t be too soft. It‘s slightly on the dry side. Tip: If you add too much water, your dough will be too soft. If that happens, add more joshinko.
- Using a kitchen scale, weigh the dough. Using a bench scraper or knife, divide it into thirds. Put two of the pieces in separate bowls.
To Color the Dough
- To make the green dough, add ¼ tsp matcha (green tea powder) to the dough in one of the bowls. Using a silicone spatula (or your hand), mix the matcha into the dough until well blended.
- If you want to adjust the color, add a very small amount. Make sure all the powder is incorporated and check the color before you add more matcha.
- For the pink dough, add a very tiny bit of red food coloring powder to the dough in the other bowl. I used a toothpick to pick up the coloring powder and you can see from the image how little I scooped. With a different (clean) silicone spatula, mix the food coloring into the dough until well blended. Tip: Don’t add too much food coloring or the color will be too strong and intense; you want it to be a soft, pale, pastel pink.
- You can see that I added slightly more red food coloring to get the right shade of pink. Tip: If the dough is getting too dry, dip your spatula in water and mix the dough (instead of drizzling water into the dough).
To Form the Dumplings
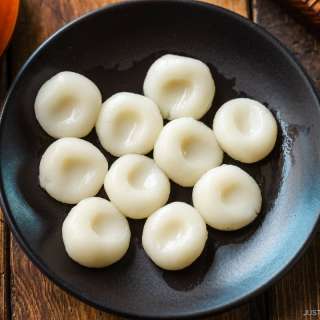
- Take the white dough and roll it into a cylinder. Using the bench scraper or knife, divide the dough into 6 equal pieces.
- Roll a piece of white dough between your hands into a smooth, round ball. Tip: If the dough is cracking or wrinkled, dip the tip of your finger in water and apply a small amount to the cracked area to smooth it out.
- When you are done making a nice ball shape, continue with the rest of the dough pieces.
- Next, take the green dough and roll it into a cylinder. Divide the dough into 6 equal pieces.
- Roll a piece of green dough between your hands into a smooth, round ball. Continue with the rest of the dough pieces.
- Finally, take the pink dough and roll it into a cylinder. Divide the dough into 6 equal pieces.
- Roll a piece of the pink dough between your hands into a smooth, round ball. Continue with the rest of the dough pieces.
- Now, the dumplings are ready to boil.
To Cook the Dumplings
- Prepare a bowl of iced water just before cooking the dumplings. First, we will cook the light-colored white and pink dumplings. Once the water in the pot is boiling, quickly re-roll each white or pink dumpling into a nice, round ball before you gently drop them into the pot. Stir the balls occasionally so they don’t stick to the bottom of the pot.
- Cook the dumplings until they start floating, about 7–8 minutes. The dumplings will stay near the bottom of the pot at first, but they will float once they are cooked. When they rise to the top, boil them for an additional 1 minute.
- Remove the white and pink dumplings from the pot and immediately place them in iced water for 15–30 seconds so they stop cooking and are cool enough to handle. Then, drain them well and transfer to a plate or tray moistened with water. Tip: Don‘t keep the dumplings too long in the iced water or they will get hard. Also, wet the plate or tray so the dumplings don‘t stick.
- Next, work on the green dumplings and repeat the same process. As you see, the boiling water changes color, so I recommend starting with the light-colored white and pink dumplings; don‘t cook all three colors at the same time.
- Remove the cooked green dumplings from the pot and immediately place them in iced water for 15–30 seconds to stop the cooking and cool slightly. Then, transfer to a plate moistened with water.
To Assemble the Hanami Dango
- Thread one dumpling of each color onto a skewer. Start with the green dumpling first, then a white dumpling next, and finish with a pink dumpling at the tip. For an ideal presentation, keep the tip of the skewer hidden within the pink dumpling. Continue with the rest of the skewers and set aside. Tip: If your hands get sticky from handling the moist dumplings, you can wash the starch off your hands from time to time.
To Serve
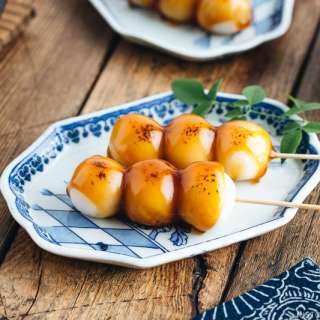
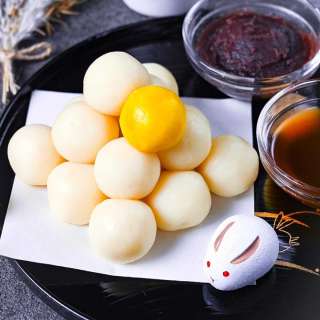
- Serve the Hanami Dango at room temperature. Since the Hanami Dango is rather mild tasting with just a touch of subtle sweetness, I sometimes serve it with sweet red bean paste (optional) on the side.
To Store
- Option 1: After you form the dough into round dumplings, you can store the uncooked dumplings in a single layer in an airtight container and freeze up to a month. When you use them, boil the frozen dango without defrosting.
- Option 2: After boiling and cooling the dumplings, pat them dry and pack them so they don't touch each other into an airtight container. Freeze for up to a month. When you use them, microwave or boil until they are warm.
- Option 3: Put the leftovers in an airtight container and keep at room temperature for up to 2 days. If you live in a hot climate, find a cool place to store it, but not in the refrigerator as the dango will become too tough. Enjoy it within 24–36 hours.
For the Optional Yomogi Dango Version
- To color the green dough using the more traditional yomogi dango version, use yomogi powder.
- Combine 1 Tbsp yomogi (mugwort) and 2 Tbsp hot water in a bowl and mix well together.
- Set aside for 5 minutes. Then, strain the yomogi using a fine-mesh strainer. Discard the liquid.
- Add the yomogi to the dough and knead well to combine.
Nutrition Information
Show Details
Calories
165kcal
(8%)
Carbohydrates
38g
(13%)
Protein
2g
(4%)
Fat
1g
(2%)
Saturated Fat
0.1g
(1%)
Polyunsaturated Fat
0.1g
Monounsaturated Fat
0.1g
Sodium
0.4mg
(0%)
Potassium
26mg
(1%)
Fiber
1g
(4%)
Sugar
11g
(22%)
Vitamin A
8IU
(0%)
Calcium
7mg
(1%)
Iron
0.2mg
(1%)
Nutrition Facts
Serving: 6sticks
Amount Per Serving
Calories 165 kcal
% Daily Value*
| Calories | 165kcal | 8% |
| Carbohydrates | 38g | 13% |
| Protein | 2g | 4% |
| Fat | 1g | 2% |
| Saturated Fat | 0.1g | 1% |
| Polyunsaturated Fat | 0.1g | 1% |
| Monounsaturated Fat | 0.1g | 1% |
| Sodium | 0.4mg | 0% |
| Potassium | 26mg | 1% |
| Fiber | 1g | 4% |
| Sugar | 11g | 22% |
| Vitamin A | 8IU | 0% |
| Calcium | 7mg | 1% |
| Iron | 0.2mg | 1% |
* Percent Daily Values are based on a 2,000 calorie diet.
Genuine Reviews
User Reviews
Overall Rating
4.8
102 reviews
Excellent
Other Recipes
You'll Also Love