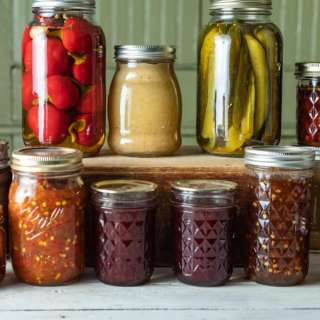
Home Canning - Pressure Canning Method
User Reviews
5.0
12 reviews
Excellent
Home Canning - Pressure Canning Method
Report
Whether you're entertaining or relaxing, this recipe hits the spot.
Share:
Ingredients
- pressure canner
- 3-piece canning jars
- Wide mouth funnel
- Jar lifter
- 2 tbsp white vinegar optional, recommended
Instructions
- Before you start, make sure your hands and all of the tools you'll be using are very clean. According to FDA guidelines, while the jars should be clean before starting, they do not need to be boiled to sterilize before pressure canning due to the high temperature levels in the pressure canner. If you would prefer to boil and sterilize the jars prior to pressure canning, please refer to my previous post: Home Canning - Boiling Water Method.
- Remove the lids and rings from your canning jars. If you are re-using jars, be sure that you aren’t using any with cracks or chips. Keep in mind that canning lids can only be used once, so don't reuse old ones-- buy fresh lids before you begin.
- Place the canning lids and rings into a small saucepan. Cover with water and bring to a low simmer for a few minutes. This will soften the sealing strips around the edges of the lids.
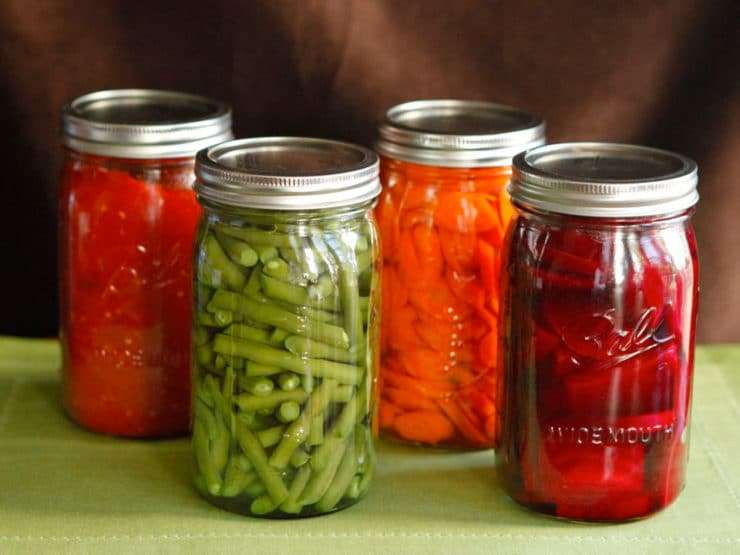
- Meanwhile, using a wide mouth funnel, carefully fill the jars with your product. Depending on what you will be canning, you will need to leave 1/2 – 1/4 inch of space at the top of the jar. Most recipes will specify what is necessary, but as a general guideline, most jams or jellies will need 1/4 inch, while pickles and thicker products will need 1/2 inch.
- With tongs or a magnetic lid lifter, remove the lids from the simmering water and place on a clean towel.
- Place the lids with warm seals directly onto the jars and seal with the circular bands using just your fingertips so that they are secure, but not too tight. Wipe any spills or excess product from the lid and sides of your jars using a damp cloth.
- Before you start canning, be sure your pressure canner has been thoroughly cleaned. Also check that the sealing ring, the black overpressure plug on the cover and the white compression gasket are not cracked or deformed.
- Prepare your pressure canner pot lid based on your manufacturer's instructions. Ours has a rubber sealing ring that fits into the edge of the pressure canner lid. This rubber seal usually comes pre-lubricated, but if it feels a bit dry you can apply a light coating of cooking oil around the ring (I usually do this step just to be safe).
- Fit the lubricated rubber sealing ring into the edge of the lid.
- Check the vent pipe for any food or debris that may be clogging the opening. If something is blocking the opening you can clear the vent pipe with a toothpick or a pipe cleaner.
- Attach the dial gauge to the canner based on your manufacturer's instructions. On our model, we first place the white compression gasket onto the end of the dial gauge.
- Then we insert the dial gauge and the compression gasket into the hole at the center of the cover. The compression gasket should sit within the cover hole.
- Turn the cover upside down and place the metal washer onto the dial gauge.
- Place the nut onto the end of the dial gauge and tighten very tightly with your fingers. You can use a wrench if necessary.
- Place the canning rack into the bottom of your pressure canner along with 3 quarts of hot water (the amount of water may vary based on the size of your canner-- refer to manufacturers instructions for your specific amount). To prevent water stains on your jars, you can add 2 tbsp of white vinegar to the water.
- Place your filled jars with secured lids on top of the canning rack. You must always use a canning rack to keep the jars away from the direct heat of the burner, which can lead to breaking or cracking.
- Place the lid on the pressure canner and secure the lid tightly based on your manufacturer’s instructions. On our model, we apply pressure to the handles to compress the sealing ring and turn clockwise until the lid handles are directly above the pot handles. Your model may have a different method for securing the lid.
- Heat the pressure canner over medium-high until a steady flow of steam can be seen or heard coming from the vent pipe. Allow the steam to flow from the vent pipe for 10 minutes. If necessary, reduce the heat to maintain a steady, moderate flow of steam with minimal sputtering. It's kind of difficult to capture that flow of steam on camera, but it's there-- trust me. :)
- Once the 10 minutes have passed, place the pressure regulator (a cap-like piece) on top of the vent pipe. Adjust stove heat to a relatively high setting to heat the water within.
- On our canner, as the heat rises and pressure develops inside, the air vent/cover lock (a small metal knob) will lift and lock the cover on the canner. Your model may have a different "signal" to let you know there is pressure in the canner. Once that cover is locked, DO NOT open the canner until the vent/cover lock lowers again, or until your canner signals that there is no longer any pressure inside the canner (more details below). Likewise, do not remove the pressure regulator cap from the top of the vent pipe.
- As the heat rises inside and pressure builds, the pointer of the gauge will move up. Your goal is to build to the amount of pressure specified in your canning recipe (each recipe is different, so refer to your specific canning recipe for the correct poundage). Continue heating until the pressure on the dial gauge reads the desired poundage. You may want to reduce the heat a bit when you are 1-2 pounds away from the desired pressure weight, so that the heat does not rise too high too quickly and surpass the desired poundage by a large amount.
- When the pressure gauge reads the desired poundage, start your timer. Adjust heat to maintain correct pressure on the dial gauge. Going slightly above the recommended poundage is ok, though you should try to keep it as close to level as possible. If at any time the pressure drops below the desired poundage, you must return pressure to the correct setting and start the timer over. The cans need to cook at the recommended poundage for the full recommended time period as stated in your pressure canning recipe, or you risk spoilage.
- When the timer goes off, turn off the heat and leave the canner to cool. DO NOT open the canner.
- Allow the pressure to drop on its own; this will take some time. On our model, we know that the pressure has reduced once the air vent/cover lock has dropped. Your model may have a different "signal." Do not use the dial gauge as an indicator that the pressure has reduced, since the gauge can read zero while there is still an amount of pressure in the pot.
- When pressure has completely reduced and the air vent/cover lock has dropped, remove the pressure regulator from the vent pipe and allow the canner to cool for another 10 minutes before attempting to open.
- Remove the cover of your pressure canner. On our model, we turn the lid counter-clockwise until it cannot go any farther and lift towards us so that the steam is released in the opposite direction. If for some reason the cover sticks, do not force it open. Allow the canner to cool for 10 minutes more and try again. Repeat as necessary.
- With a jar lifter, remove the jars from the canner.
- Allow your jars to cool for 24 hours. Remove the round outer bands from your lids and test your seals by lifting the jar by the flat lid a few inches from the countertop. The jar should lift without any separation. Jars with good seals can be kept in a cool dark place for up to a year.
- A broken seal doesn’t mean that your product has gone bad, it just has a shorter shelf life. Those jars should be placed directly into the refrigerator and used within two weeks or until the product has spoilage, whichever occurs first.
Notes
- Before you start, you will need to purchase or borrow a pressure canning pot. I do not recommend using a regular pressure cooker; pressure canners are built larger with special inserts for canning.
- Note that this tutorial was written and photographed using a 16 Quart Pressure Canner and Cooker. While I have tried to keep the instructions somewhat general and broad to suit a variety of canners, it is very important that you refer to your pressure canner's specific instruction manual due to differences between brands and models.
- Pressure canning can be dangerous if you don't follow your manufacturer's instructions carefully; pressure cookers and canners can explode if not used properly. Electric pressure canning pots will have a different process than the one that appears here. Please use extreme caution.
Genuine Reviews
User Reviews
Overall Rating
5.0
12 reviews
Excellent
Other Recipes
You'll Also Love