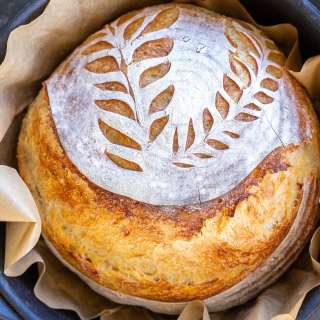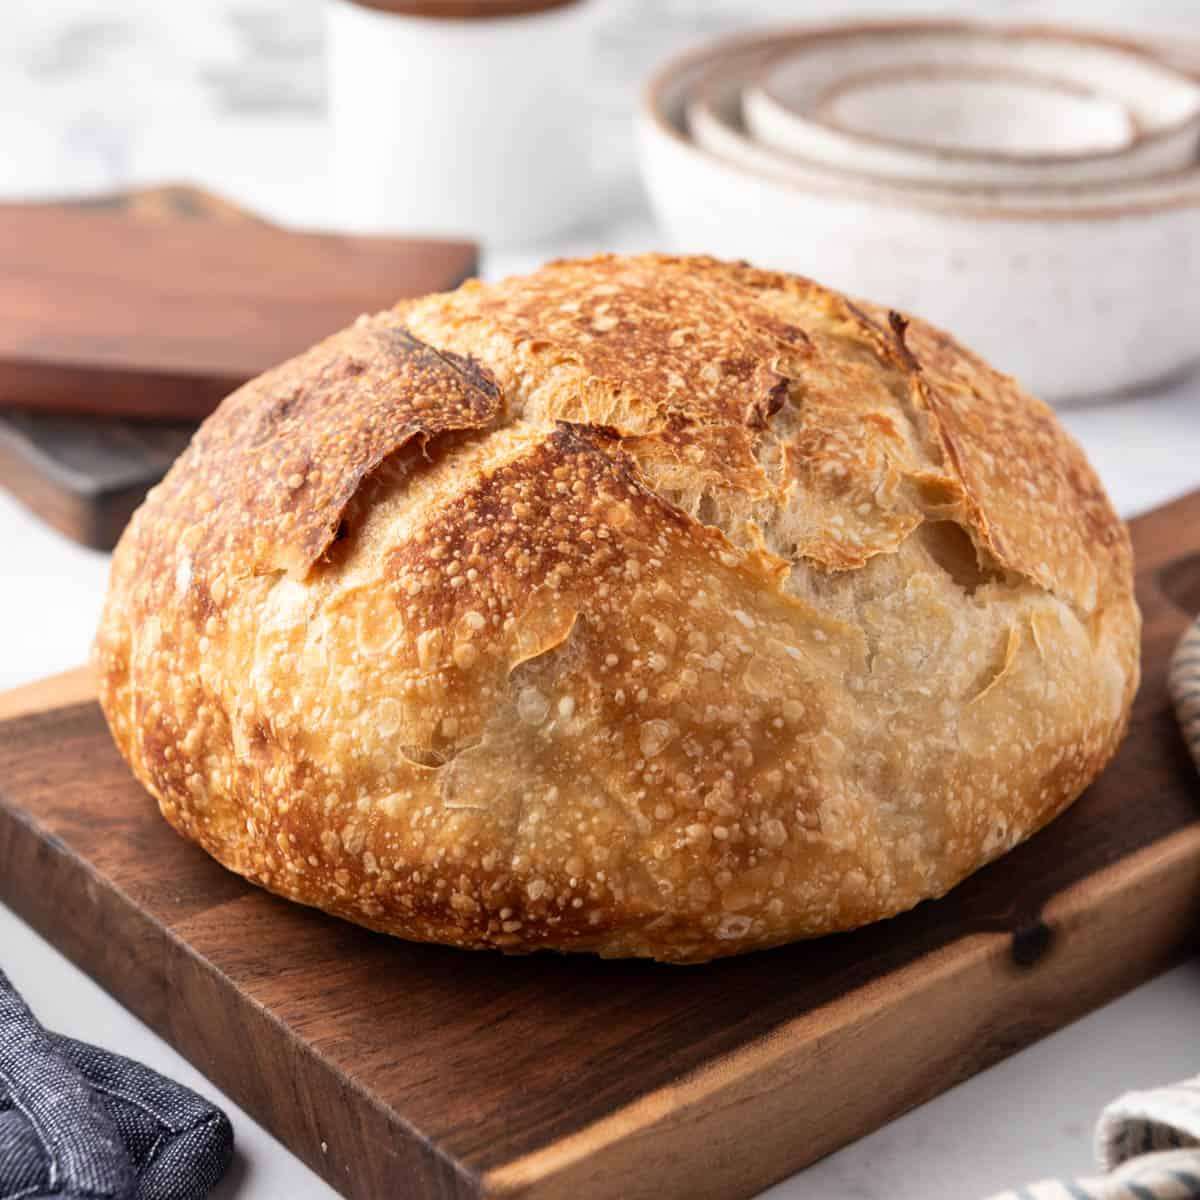
Homemade Sourdough Bread Recipe
User Reviews
5.0
6 reviews
Excellent
Homemade Sourdough Bread Recipe
Report
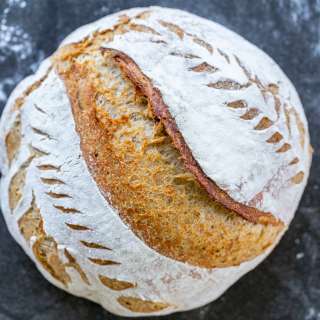
If you are new to sourdough and looking to bake your first loaf of deliciously crusty sourdough bread at home, you've come to the right place! Our easy Sourdough Bread recipe only needs 4 ingredients and I will walk you through the process with step-by-step photos.
Share:
Ingredients
- 1/2 cup active sourdough starter (113g)
- 1 1/3 cups room temperature water (338g)
- 3 2/3 cups bread flour or unbleached flour (450g)
- 2 teaspoons table salt
Instructions
- Add sourdough starter and water to a large bowl. Stir together with a fork to combine.
- Add flour and salt to the water and sourdough starter mixture. Stir until mostly coming together, although it's okay for the dough to look lumpy and shaggy.
- Rest 1 hour: Cover loosely with plastic wrap or a clean, damp cloth and let it rest for 1 hour. This is what's known as the "autolyze" which is just a fancy and intimidating sounding term for letting the flour hydrate completely. You won't see much of a visual change during this period, but just trust the process.
- Stretch & fold #1: Uncover the sourdough and moisten your fingers with water. Grab a hunk of the dough from one edge and stretch it out, then fold it back on top of the dough. Give the bowl a quarter turn and repeat the process of stretching the dough out and folding it on top of itself three more times. I know this might sound like a lot but it literally takes less than 2 minutes to do the stretch and folds. Cover the dough again and let it rest for 30 minutes.
- Stretch & fold #2: After 30 minutes rest, repeat the stretch and fold process again. This is replacing traditional kneading and you'll be amazed at how that lumpy dough starts turning smooth and normal looking with hardly any effort.
- Bench bulk: Cover the dough with plastic wrap and let it rest for 8 hours on the counter. It should increase in volume over that period of time.
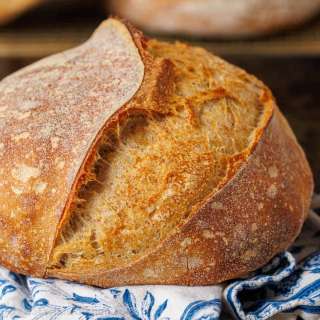
- Shape the dough: Turn the proofed dough onto a lightly floured surface. Flour your hands, then kind of cup them around the top of the bread. Pull the bread towards you while letting it sort of grip the counter. You should feel pressure and resistance from the bread like you are tightening it into a dense ball as you pull. Repeat this a few times to kind of tighten the dough into a ball shape, also known as a "boule". Transfer the shaped loaf to a bowl lined with a clean dish cloth that has been lightly dusted with flour or a banneton basket that has been dusted with flour. Make sure you place it with the rounded, pretty side down in the bowl so when you turn it out that's the side that will be on top eventually.
- Proof for another 1-2 hours OR refrigerate overnight. At this point you can let the dough rise for another 1-2 hours and bake right away, or if you want a stronger, more sour sourdough taste stick it in the fridge overnight. Lightly cover your dough and let it chill in the fridge for anywhere from 12 up to 72 hours. This is called a "cold ferment" and it helps the sourdough develop more of the tangy flavor that sourdough is known for. The longer it ferments, the more sour the bread will taste. I usually either bake after letting the loaf rise for an hour or two or bake it the next day after a slow, cold 12 to 24 hour rise time.
- Preheat oven. About 45 minutes to an hour before you are ready to bake your sourdough bread, start preheating your oven to 450°F so it's nice and hot.
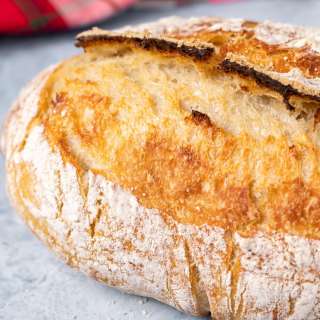
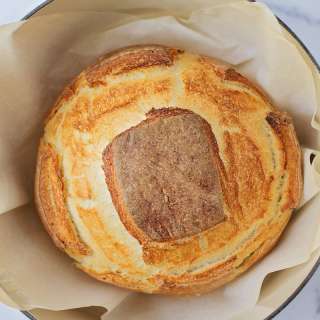
- Turn out the dough and score. Take the cold dough out of the fridge and turn it out onto a piece of parchment paper. Use a very sharp knife, razor blade, or lame tool to score an "X" or other decorative pattern about 1/4" deep over the top of your loaf. Lift parchment paper with the bread into a dutch oven. There is no need to let the dough come to room temperature or rise any more at this point.
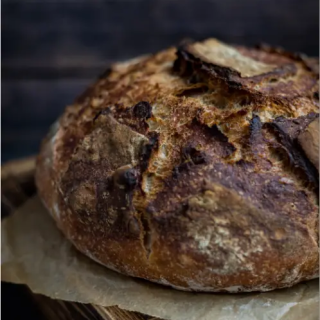
- Bake. Bake in the dutch oven with the lid on at 450°F in the preheated oven for 25 to 30 minutes, then uncover and bake the remaining 25 to 30 minutes until the loaf is a beautiful golden brown and the internal temperature registers 206°F to 208°F on a digital thermometer inserted into the center of the loaf.
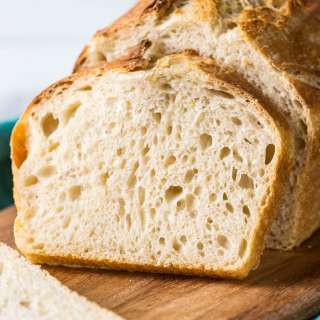
- Cool, then slice. Let the bread rest for at least 30 minutes to 1 hour before slicing.
Notes
- Storage: Sourdough bread is best enjoyed fresh, the day it is made. Leftovers make excellent grilled cheese or toast.
- Freezing: Sourdough bread freezes well for up to 2-3 months. After letting the loaf cool completely, wrap it in aluminum foil, then place in a freezer-safe ziploc bag. To reheat, thaw at room temperature for 6-8 hours. Remove the bread from the foil, then sprinkle it with a little water and wrap it back up in aluminum foil and bake at 400°F for 30 to 40 minutes to freshen it up.
Nutrition Information
Show Details
Calories
147kcal
(7%)
Carbohydrates
30g
(10%)
Protein
5g
(10%)
Fat
1g
(2%)
Saturated Fat
0.1g
(1%)
Polyunsaturated Fat
0.3g
Monounsaturated Fat
0.1g
Sodium
390mg
(16%)
Potassium
38mg
(1%)
Fiber
1g
(4%)
Sugar
0.1g
(0%)
Vitamin A
1IU
(0%)
Calcium
7mg
(1%)
Iron
0.3mg
(2%)
Nutrition Facts
Serving: 12slices
Amount Per Serving
Calories 147 kcal
% Daily Value*
| Calories | 147kcal | 7% |
| Carbohydrates | 30g | 10% |
| Protein | 5g | 10% |
| Fat | 1g | 2% |
| Saturated Fat | 0.1g | 1% |
| Polyunsaturated Fat | 0.3g | 2% |
| Monounsaturated Fat | 0.1g | 1% |
| Sodium | 390mg | 16% |
| Potassium | 38mg | 1% |
| Fiber | 1g | 4% |
| Sugar | 0.1g | 0% |
| Vitamin A | 1IU | 0% |
| Calcium | 7mg | 1% |
| Iron | 0.3mg | 2% |
* Percent Daily Values are based on a 2,000 calorie diet.
Genuine Reviews
User Reviews
Overall Rating
5.0
6 reviews
Excellent
Other Recipes
You'll Also Love