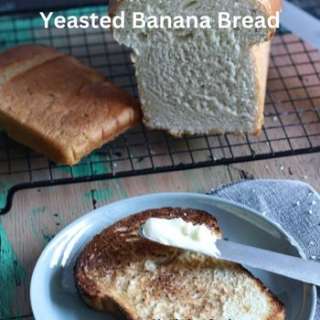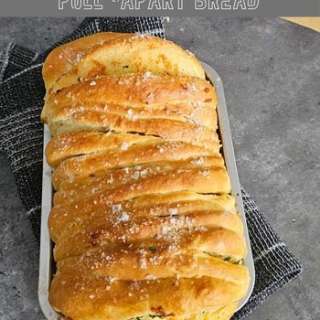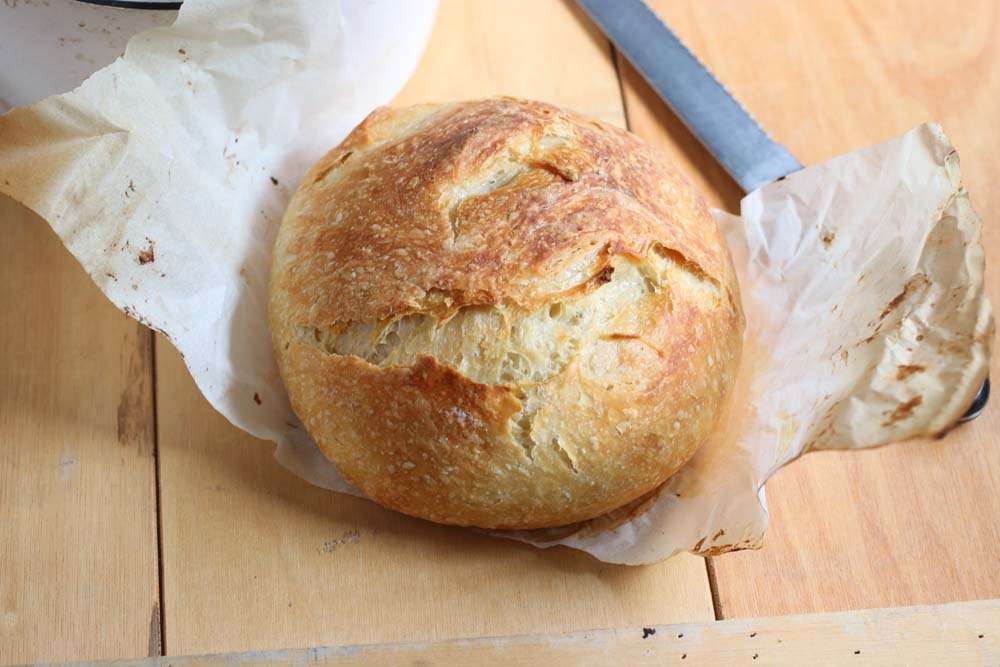
Bread the easy way. No starter. No Kneading
User Reviews
4.5
63 reviews
Excellent
-
Prep Time
10 mins
-
Cook Time
10 mins
-
Additional Time
1 d
-
Servings
6 serves
-
Course
Bread
-
Cuisine
Australian
Bread the easy way. No starter. No Kneading
Report
This is a recipe for bread that requires no starters. So no kneading and no failures. Perfect bread every time.
Share:
Ingredients
- 450 gm Flour, bakers plain, bread or pizza flour, 3 cups +tblsp
- 5 gm yeast, active dried 1 1/2 teaspoons
- 7 gm teaspoon salt (not flaked) 1 1/2 teaspoons
- 350 ml water, warm a bit less than 1 1/2 cups
- 1 Tablespoon olive oil ****optional
Instructions
- You will need a medium sized bowl. it can be stainless steel, glass or ceramic. Just as long as it is big enough to give the bread space to grow.I make the dough at the time I need it the next day. If you want it for breakfast or lunch make the base dough in the morning. If it is for dinner time then make it in the afternoon etc.You will also need baking paper and a Dutch Oven
- Put the flour, salt and yeast into the bowl and whisk together (or stir well)
- If you are using olive oil add it to the water then.....Add all the water at once and begin to stir with your hand (just one, the other one is holding the bowl). Mix from the outside collecting all the dry flour. You don't need to mix a lot it just needs to come together. There may still be bits and pieces around the bowl and it will not look smooth and mixed.
- Get rid of the excess from your fingers. Cover in plastic wrap well and put in a place where it will be undisturbed till tomorrow.
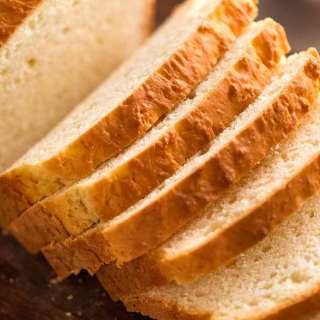
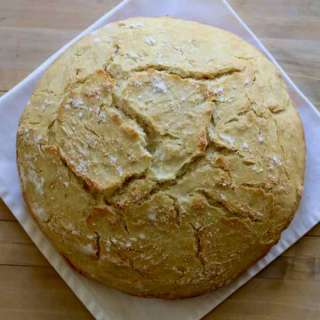
- Your dough will be a bubbly honeycomb mixture. Put some flour on the bench. Run your fingers around the top of the dough loosening the edges and then lift and fold the dough over itself a couple of times, then scrape the remainder out onto the floured bench, it will be very sticky. You DO NOT have to Knead it. Push it into a ball. Do this by using both hands to push the dough from the base inwards going around the base forming a circle. The dough will start to stretch and gather, pushing the dough towards yourself from the base works best. DONE (2-3 minutes)
- Lightly oil or spray a piece of baking paper 30 x 30 cm (12x12 in 0r just a round for the base of the baker). Put the dough ball onto the paper Lift the paper and put it into the Dutch oven. Cut the top of the dough with scissors. Cut very deep indets in around 3-4 places. This will allow the bread to expand. Put the lid on and set aside.
- Turn the oven and heat to 220C or 430 F. Leave for 10 minutes to heat and then put the baker into the oven. After about 20 minutes you will start to smell the bread baking. It will rise in this time so do not lift the lid before the first 30-35 minutes. Do not check until this time. Lift the lid swiftly. The bread should be well risen and some ears starting to form. If the bread is just shiny and not starting to rise and become rough put the lid back on for another 10 minutes before removing ***Caution when baking in a Dutch Oven. These are hot and heavy.
- The baking time will vary with different ovens. As a general rule after the first 30-40 minutes, you can take the lid off and let your bread brown. Final cooking time should be approximately another 15 minutes.Once you remove the lid If your oven is extra hot (that is your bread is browning very quickly) you can turn it down to around 190C / 375F and let the bread finish browning for another 15 minutes.
Notes
- Be sure to watch the video
- Olive oil adds flavour and sheen but it is not essential
- No kneading or knocking back is required
- Add flavours when you do the final folding and shaping
- To make whole-wheat bread swap out 1 cup (150 gm) of whole-wheat bakers flour in place of one cup of white flour
- You can use a thick pot with a lid if you don't have a dutch oven. Warning though the result is not quite as good...but it can be done
Genuine Reviews
User Reviews
Overall Rating
4.5
63 reviews
Excellent
Other Recipes
You'll Also Love