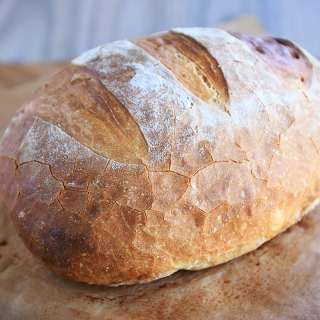
Dutch Oven No Knead Crusty Bread
User Reviews
4.9
6,093 reviews
Excellent
Dutch Oven No Knead Crusty Bread
Report
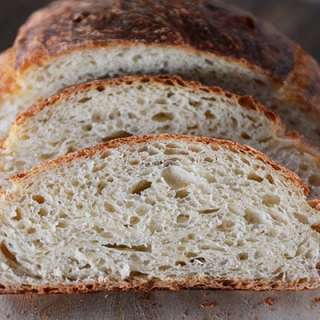
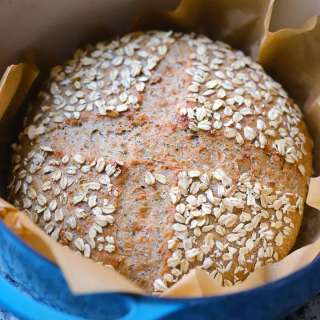
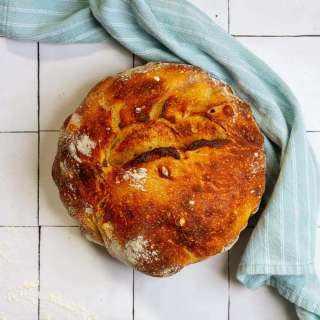
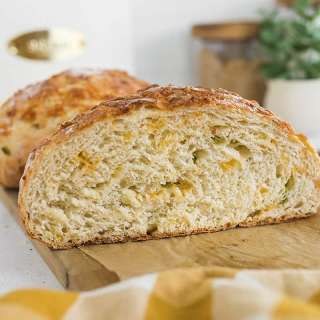
This Dutch Oven No Knead Bread recipe comes out perfectly crusty in under 3 hours - it's easy to make homemade artisan bread with 5 minutes of prep!
Share:
I Made This!
4,569 people made thisSave this
3,655 people saved thisIngredients
- 1 1/2 cups warm water (about 100 degrees F)
- 1 packet yeast (active dry, instant, or quick rise- 2.25 teaspoons)
- 1 ½ teaspoons fine grain salt (preferably NOT iodized, see notes, you can up the amount to 2 teaspoons if you like things really salty!)
- 3 1/4 cups all-purpose flour or bread flour, more if needed to get correct consistency, plus more for dusting (I use King Arthur AP flour - other flours may yield different results)
Instructions
- In a large bowl (or container), mix together the 1 1/2 cups warm water, 1 packet yeast (or 2.25 teaspoons), and 1 ½ teaspoons fine grain salt, until yeast and salt are fully or almost dissolved (I like using a whisk for this).
- Add the 3 1/4 cups all-purpose flour to the bowl all at once and stir together until a sticky dough forms. Don't worry about mixing it too much, just make sure everything is uniformly wet. It WILL be messy and sticky. You can scrape what's left on the spoon with a silicone spatula. (photo below provided for what the texture should look like - if it seems too wet, add 1-2 tablespoons more flour at a time until it is more like the photo. If it seems too dry, do the same thing with more water).
- Cover the bowl with a kitchen towel (or place the container to the lid on ajar). Leave it for 2-3 hours to rise in a somewhat warm place until it's doubled in volume, like photo in previous step (If it's cold out, I like to preheat my oven for a few minutes, then turn it off, then place the bowl in the oven, trapping the heat inside. If your house is warm just leave it out, or if it's warm outside you can place it there).
- After the two-three hour rise time when the dough has about doubled, you have two options: bake, or store in the fridge. See notes for how to store.
- 30 minutes to an hour before you are ready to bake, preheat your oven to 450 degrees F. Place your Dutch oven in the oven, with the lid ON, while the oven is preheating. Once the oven reaches 450, keep it preheating for another 20 minutes, so the Dutch oven gets good and hot.
- Scrape the dough into the edge of a piece of parchment paper dusted with flour. Make it into as much of a "loaf" shape as you can by folding the edges up on top of it (a silicone spatula works well for this).
- Then, use the edges of the parchment paper to flip the loaf over so the floured side is on top and the loaf is in the center of the parchment paper. Don't worry about it looking beautiful or smooth on top. My Dutch oven is an oval, so I made an oval shape. You can do a circle if yours is round.
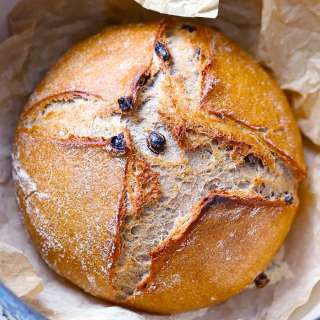
- Optional: use a very sharp knife or clean razor blade to cut a few slits across the top of the loaf about 1/2" deep, across the entire top. I did this in a cross shape for mine.
- Take out the preheated Dutch oven and take off the lid, carefully! Grab the parchment from the sides and place the loaf in your Dutch oven.
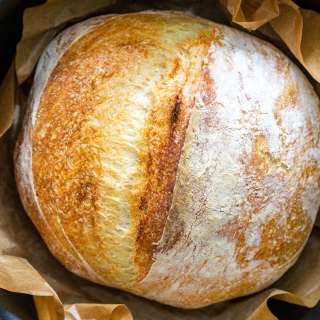
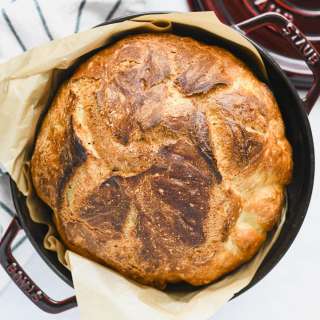
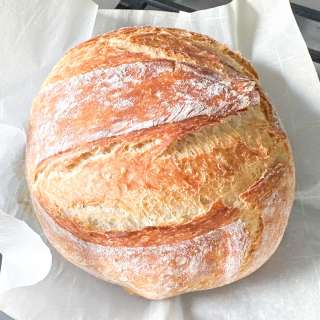
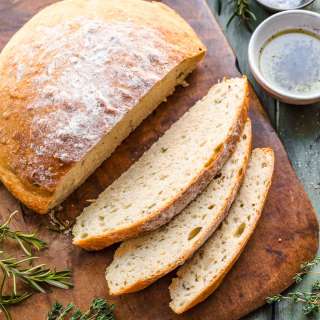
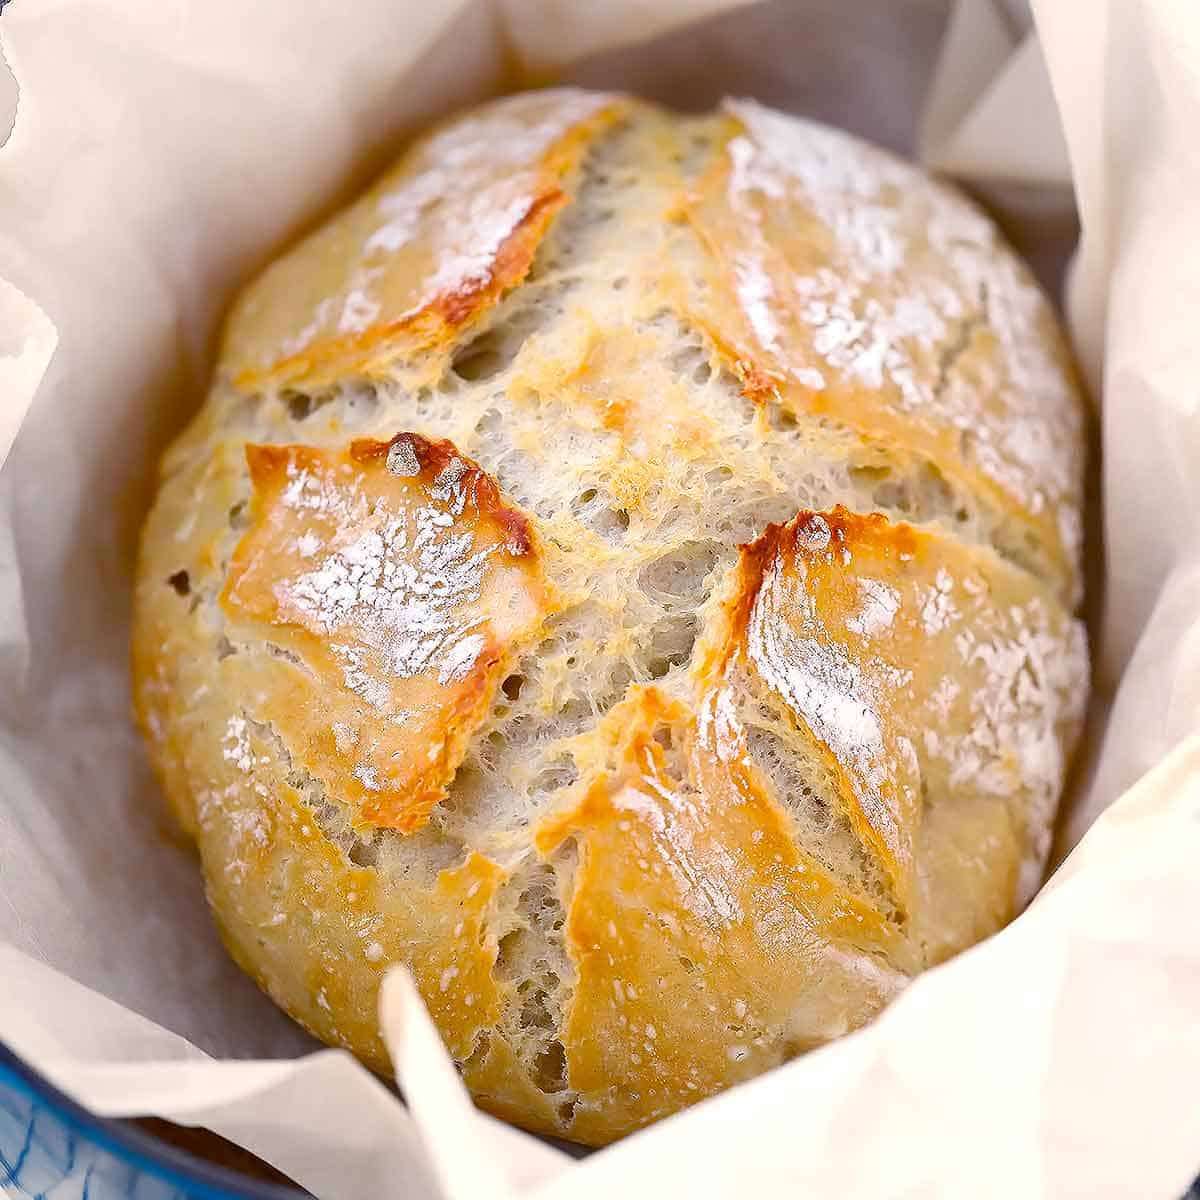
- Place the cover back on the Dutch oven and place in the preheated oven on the center rack. Bake for 35 minutes at 450 degrees F (40 minutes if dough was cold from the fridge). Remove the lid and bake for another 5-10 minutes, until a golden brown color forms- longer if necessary. Remove the loaf from the dutch oven (grabbing the sides of the parchment paper works well here) and place it on a wire rack or cutting board to cool for at least 10 minutes (preferably 30 minutes - an hour, if you have time) before slicing.
Equipments used:
Notes
- How to store dough in fridge: If storing in the fridge, leave the lid ajar or use loose plastic wrap covering the bowl so gasses can escape. Storing it in the fridge makes the sticky dough a bit easier to handle, and it also enhances the flavor, so I recommend refrigerating it for at least 12 hours. It can stay in the fridge for up to 7 days! After two days, you can seal the lid to the container or cover the bowl tightly with plastic wrap.
- Recent edit to the recipe instructions: I changed the amount of salt from 1/2 tablespoon to 1 1/2 (1.5) teaspoons, which is the exact same amount of salt (there are 3 teaspoons in a tablespoon), but there kept being confusion from readers from misreading tablespoons as teaspoons, resulting in too little salt being used. The recipe is the same, but the ingredient list has been changed from measuring in tablespoons to teaspoons! This is for anyone who has visited this recipe in the past and might be wondering why it says teaspoons instead of tablespoons now; if this is not you, you can ignore this :-)
- Dough too wet/dry: some readers have commented that the dough is too wet. This can happen based on a few variables, including type/brand of flour and accurate measurements. See photo in post and recipe instructions - if texture doesn't seem similar, add 1-2 more tablespoons flour or water as needed.
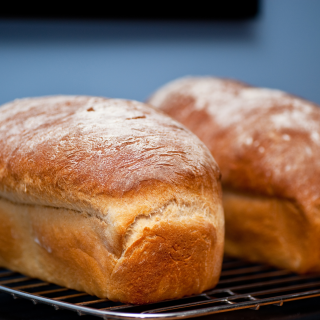
- Make two small loaves instead: You can make two smaller by using only half the dough at a time, saving some in the fridge for later. Once the dough has risen, you can take out half of it to divide it in half. Using a serrated knife to cut the dough in half directly in the bowl is a great way to do this, as it won't deflate the dough as much. I recommend cutting the cooking time to 20-25 minutes covered if you do this. Alternatively, you can double the recipe to make two large or four small loaves, leaving the extra dough in your fridge for fresh bread every few days! Use a serrated knife to cut the dough into pieces, trying your best not to squish it down as you handle it, and make sure you use a very large container or bowl for this.
- Fine grain salt can be fine sea salt, Himalayan salt, or any other salt you prefer.
- Iodized salt is not recommended, but can be used if that's all you have. The iodine in the salt may impart a bitter taste in the bread and it also may inhibit the growth of yeast, leading to a longer rise time.
- Kosher salt may be used instead of table salt- I recommend 2 teaspoons since it's a larger grain. Same goes with coarse sea salt.
- Avoid "gummy" bread by allowing it to cool for a longer time. I often can't resist and just tear into the thing after 10 minutes, but often the inside seems gummy, and almost raw, because it's too steamy to cut into. Waiting a whole hour, if you can manage, is ideal.
- Super hard, tough bottom crust? Next time, try putting a baking sheet on the bottom rack of the oven. It will help divert some of that high heat away from the bottom of the Dutch Oven as it bakes.
- Some Dutch Oven manufacturers recommend NOT preheating an enameled cast iron Dutch Oven empty. It may result in the enamel cracking. I've never had a problem with my Lodge Dutch Oven, but if you're nervous about it, you don't have to preheat the Dutch Oven. Just put the dough in the cold Dutch Oven and bake for 5-10 minutes longer covered, and you should be good to go!
- How to store dough in fridge: If storing in the fridge, leave the lid ajar or use loose plastic wrap covering the bowl so gasses can escape. Storing it in the fridge makes the sticky dough a bit easier to handle, and it also enhances the flavor, so I recommend refrigerating it for at least 12 hours. It can stay in the fridge for up to 7 days! After two days, you can seal the lid to the container or cover the bowl tightly with plastic wrap. The taste of the bread will get funkier the longer it stays in your fridge. By the 7th day, it will taste more like sourdough.
- Since cold dough is easier to handle, you can place the dough in the fridge for 30 minutes or so after the two hour rise time, just before baking, so it's easier to scrape out and form.
- If using cold dough from the fridge, I recommend baking for 5-10 minutes longer with the lid on (40-45 minutes instead of 35 minutes).
- Dutch Oven Alternatives: The Dutch oven does a really good job of trapping the steam, ensuring a crusty, golden brown loaf. If you don't have a dutch oven, you can bake this bread on a baking sheet or in a cast iron skillet. I recommend adding some water to a rimmed baking sheet, or other oven-safe dish, and placing it in the oven on the lower rack, to add steam to the oven and help develop a crusty crust.
- Freeze the baked bread by slicing it first, then storing it in a zip-top bag, squeezing out as much air as possible. The bread should be completely cool before freezing. You can also freeze a whole or half loaf without slicing, wrapped tightly in plastic wrap, but you'll need to wait to defrost the whole thing before slicing into it.
- Dutch Oven Size: I use my oval 5.5 qt. Dutch Oven or my 6 qt. round Dutch Oven for this recipe. There is some wiggle room, so you can go a little smaller if you like, especially if the parchment paper comes up the sides to prevent sticking. And you can definitely go bigger if you want.
- Parchment paper trick: crumple up the parchment before using it, to help it mold to the shape of the Dutch oven better.
- Sticking to the parchment paper: A few readers have noted that their bread sticks to the parchment after baking. This usually does NOT happen, as parchment paper is non-stick. However, after doing some research, I found that sometimes using a very cheap brand of parchment paper can result in the bread sticking. I recommend using a "nicer" brand of parchment paper, or brushing or spraying it with a little bit of oil or nonstick spray before placing the shaped loaf on the paper and baking it.
- Parchment paper at high temperatures: Some readers have expressed concern over the high temperature used for parchment paper. I've used parchment rated to 420 degrees for this recipe with no issue, but you can buy a parchment paper rated to 450 degrees if you are concerned. Here's a great article about using parchment paper at high temperatures. As a general rule, keep an eye on what you are cooking, for any recipe!
- Avoid too much flour on the outside of the bread: You can use a pastry brush to brush away any thick layers of flour - before baking is best but after works too! You can also spritz the outside of the loaf with some water from a spray bottle, which also can add some lovely blisters to the crust.
- For a hard, too crusty bottom of the loaf: try putting a baking sheet on the bottom rack of the oven while baking. It helps deflect some of that direct intense heat away from the bottom of the Dutch Oven, resulting in a softer bottom to the loaf.
- Dry dough? Some readers have commented that their dough is dry, not wet and sticky. If this happens, it may have something to do with the brand or type of flour, or measuring discrepancies. Jut add a little more water until it's a little looser and you should be good to go!
- High Altitude? A reader did this at a high altitude and she said she just added a little more water to the dough (about 1 tablespoon) and kept the towel damp during the rise time.
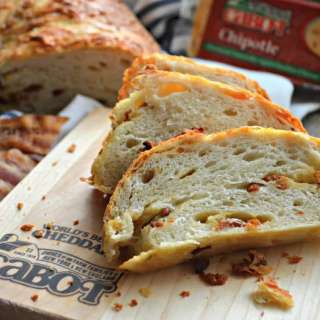
- Adding other ingredients: Feel free to mix in other ingredients, like herbs, roasted garlic, parmesan cheese, etc. with the rest of the ingredients! Then let it rise, shape, and bake according to instructions. See more about this in the body of the post with flavor suggestions.
- Dough not rising? This is likely a yeast issue. Yeast is a living organism. Sometimes, if using an old batch of yeast, or just a dud batch, the yeast is not alive anymore and won't work. Also, if using too hot water, the yeast may die and cause the dough to not rise. If you are unsure if your yeast is good, there are two things you can do. 1) You can go buy a fresh batch! or 2) You can test it. Just add 2.25 teaspoons (1 packet) of yeast to 1.5 cups warm (110 degrees F) water, as directed in the recipe. Don't add the salt yet; instead, add 1/2 - 1 teaspoon of sugar or honey. Stir until the yeast is dissolved and leave for 5-10 minutes. If the mixture turns foamy and has a bready aroma, your yeast is good, and you can continue with the recipe by adding the salt and flour. If it does not, your yeast is not good anymore, and you should go buy another fresh batch.
Nutrition Information
Show Details
Calories
188kcal
(9%)
Carbohydrates
39g
(13%)
Protein
6g
(12%)
Fat
1g
(2%)
Saturated Fat
1g
(5%)
Sodium
437mg
(18%)
Potassium
63mg
(2%)
Fiber
2g
(8%)
Sugar
1g
(2%)
Calcium
8mg
(1%)
Iron
2mg
(11%)
Nutrition Facts
Serving: 8servings
Amount Per Serving
Calories 188 kcal
% Daily Value*
| Calories | 188kcal | 9% |
| Carbohydrates | 39g | 13% |
| Protein | 6g | 12% |
| Fat | 1g | 2% |
| Saturated Fat | 1g | 5% |
| Sodium | 437mg | 18% |
| Potassium | 63mg | 1% |
| Fiber | 2g | 8% |
| Sugar | 1g | 2% |
| Calcium | 8mg | 1% |
| Iron | 2mg | 11% |
* Percent Daily Values are based on a 2,000 calorie diet.
Genuine Reviews
User Reviews
Overall Rating
4.9
6,093 reviews
Excellent
Other Recipes
You'll Also Love