Easy Chipa 4 Quesos
User Reviews
5
-
Prep Time
45 mins
-
Cook Time
15 mins
-
Total Time
1 hr
-
Servings
24
-
Calories
276 kcal
-
Course
Bread
-
Cuisine
Paraguayan
Easy Chipa 4 Quesos
Description
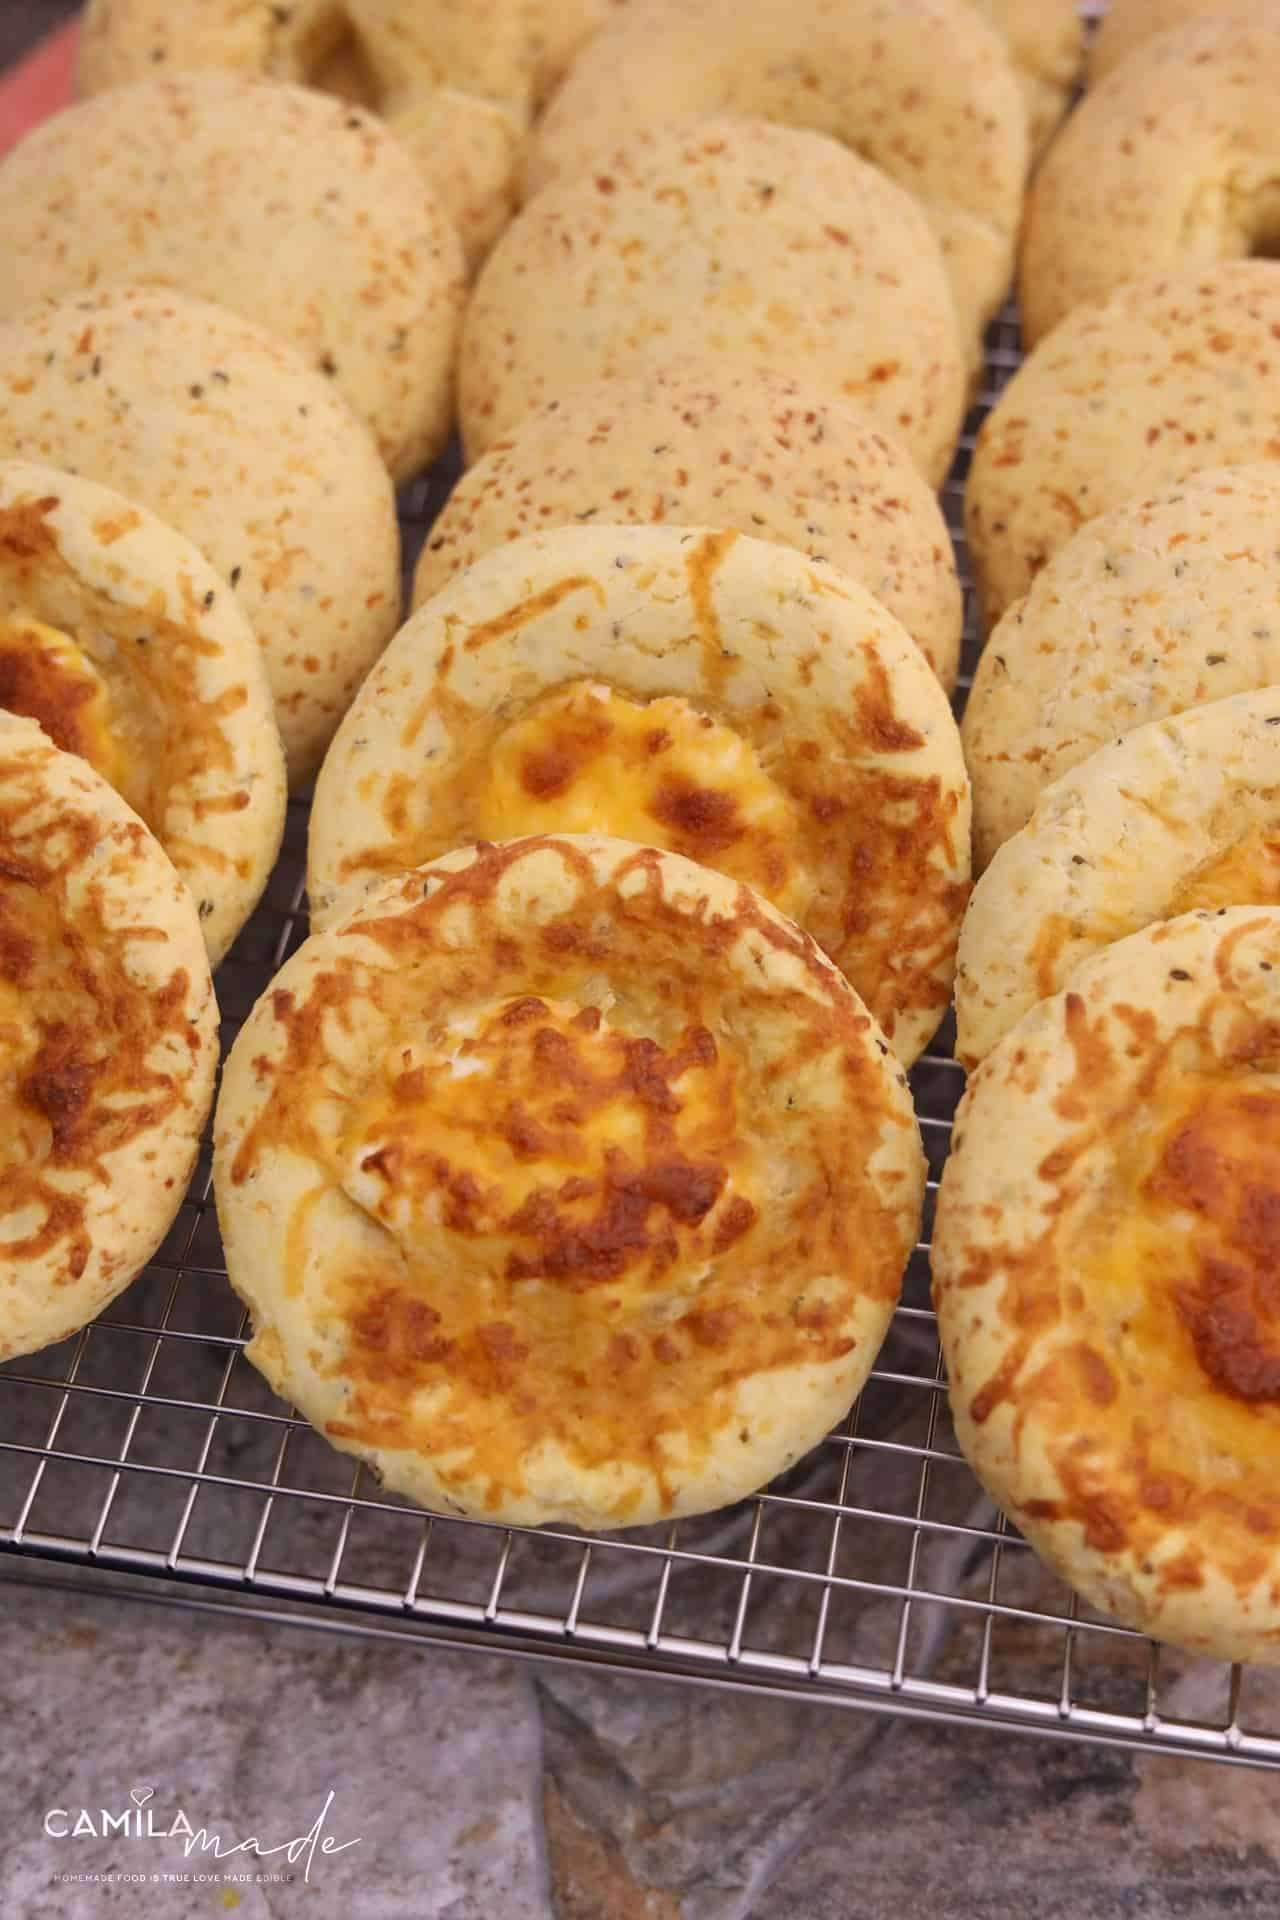
Easy Chipa 4 Quesos is a cheese bread preparation featuring yuca starch as its base, providing a gluten-free alternative to wheat flour. A blend of Mexican cheeses enriches the dough alongside butter, eggs, buttermilk, and aromatic anise seeds, giving a unique flavor profile. The dough is carefully combined and kneaded until moist and compact, then baked at 375°F until golden and cooked through.
The inclusion of baking powder helps to make the bread lighter, and the anise seeds add a subtle licorice note that complements the creamy cheese blend. The texture is tender but firm enough to hold together for serving as a snack or side.
These chipas are best served fresh from the oven to retain their softness and warmth. They can accompany meals or act as standalone treats paired with coffee or tea. Proper storage involves airtight containers at room temperature or refrigeration to maintain freshness over several days.
To extend use, the dough can be prepared ahead and refrigerated or frozen before baking. Reheating wrapped in foil preserves moisture and soft texture, ensuring the bread remains enjoyable after storage.
Ingredients
For the Chipa 4 Quesos:
- 1 kg yuca starch
- 300 gr butter , softened
- 6 large egg room temperature
- 3 teaspoons kosher salt (to taste)
- 250 ml buttermilk or whole milk
- 700 gr Mexican cheese blend shredded, 4 cheese blend
- 20 gr anise seed 2 tablespoons, to taste
- 1-½ tablespoons baking powder I use it in my Chipa Almidon recipe because it produces a better result by making it lighter and less dense, non-aluminum
For the Cream Cheese & Mexican 4 Cheese Mixture:
- 1 (8 oz) cream cheese Softened, full fat
- 100 g Mexican 4 cheese blend , shredded
Instructions
- Preheat the oven to 375°F (190°C) and line one 13x18x1-inch baking sheet with parchment paper.
- In an extra-large bowl, mix the yuca starch, self-rising flour, and baking powder.
- Rub the anise seeds between your palms to release their flavor, then stir them into the dry mixture. Create a well in the center of the dry ingredients. Add the softened butter and eggs into the well, then cream them with your fingers. You want to make that as much a homogeneous mixture as you can without bringing too much of the tapioca mixture into the fold just yet.
- Once you get it together, start adding the dry ingredients to the wet mixture and mix until a coarse crumb forms. The crumb should be loose but should hold together when pressed.
- Add the cheese and mix until they are evenly distributed.
- Slowly add buttermilk, just enough to make the dough easy to knead but not too firm. Knead by hand until the dough is compact and moist. Note: You may not need to use all the buttermilk; if the dough becomes too soft, add a little more tapioca starch.
- Knead the dough by using the heel of your hand to push it away, then gather it back using a bench scraper. Continue until the dough is homogeneous and no longer sticks to the work surface and your hands, for about 4-5 minutes. The dough should have a smooth, playdough-like consistency when done.
- Cover the dough with a clean kitchen towel and let it rest for 15-20 minutes.
- Meanwhile, in a medium bowl, combine the cream cheese and Mexican cheese for the filling.
- Divide the dough into balls, approximately 125 g each. Flatten each ball into a small disk about 4 inches in diameter. Add a tablespoon of cream cheese to the center, then fold the edges of the dough around the filling to enclose it. Gently press it to flatten it to about 4 inches in diameter and 1 inch thick.
- Alternatively, flatten a ball into a 4-inch disk with thick edges. Make a well in the center, add a tablespoon of cream cheese, and sprinkle Mexican cheese on top.
- Arrange the shaped dough on the prepared baking sheets, spacing them 1 inch apart. Bake for 15 to 17 minutes or until golden brown with cheese spots appearing on the surface. Remove from the oven and let the chipas cool for a few minutes before serving.
Notes
- Store finished chipas in an airtight container at room temperature for up to 3 days or refrigerate for up to 5 days.
- Reheat gently in a microwave or oven wrapped in foil to avoid toughness.
- Dough can be made ahead, refrigerated up to 24 hours before baking.
- Chipas can be frozen after shaping; bake from frozen, adjusting cooking time slightly.
User Reviews
Overall Rating
5
You'll Also Love