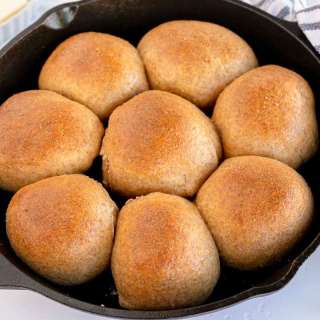
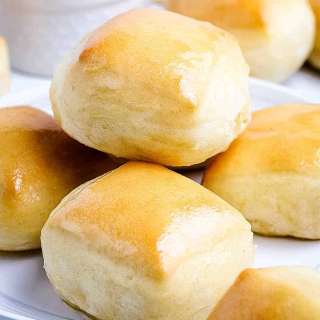
Hawaiian Dinner Rolls
User Reviews
5.0
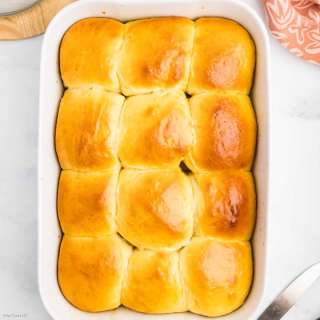
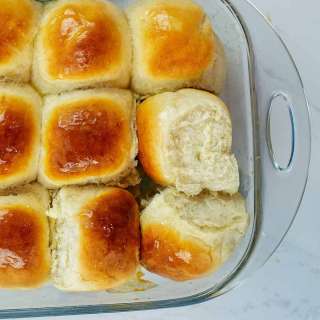
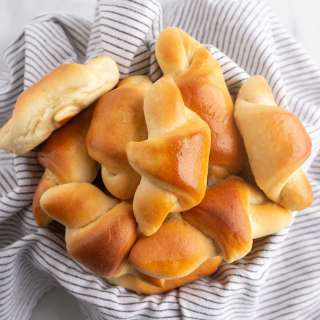
Hawaiian Dinner Rolls
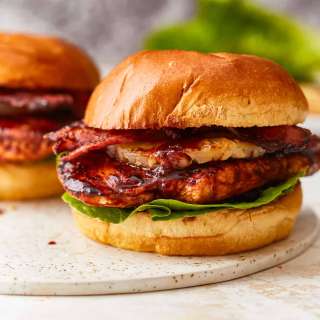
Sweet, soft, fluffy Hawaiian dinner rolls with a subtle pineapple flavor that make the BEST sliders, sandwiches and bread rolls ever! And these fluffy buns never become hard the following day. INTERMEDIATE - This recipe is actually very easy for an enriched dough. But, if you have limited experience baking bread, the bread consistency might seem strange at first, as it's a sticky and slack dough. But it WILL come together, so trust the process!Recipe makes 15 slider buns that can be baked in a 9 x 13 inch pan.US based cup, teaspoon, tablespoon measurements. Common Measurement Conversions. Weight measurements are recommended for accurate results.
Ingredients
- 180 mL pineapple juice ¾ cup
- 15 mL fancy molasses 1 tbsp (see recipe notes below)
- 7 g yeast 2 - 2¼ tsp
- 120 g bread flour 1 cup (spooned and leveled, this is for the sponge)
- 2 large eggs
- 66 g sugar ⅓ cup
- 20 g milk powder 2 tbsp
- 15 mL vanilla 1 tbsp
- 70 g unsalted butter 6 tbsp (melted and cooled)
- 300 g bread flour 2.5 cups (spooned and leveled)
- 10 g fine sea salt 1 tsp
- extra salted butter melted (to brush on)
Instructions
Making the sponge
- Heat the pineapple juice just for a few seconds until it's just lukewarm (between 80 - 90°F / 27 - 32°C). It should only be slightly warm on your skin. Place the juice in a medium-sized bowl or jug that is at least 3 cup capacity.
- Add the molasses (if using), and stir to mix in.
- Add the yeast and the first measure of flour (about 1 cup). Whisk to form a smooth paste.
- Loosely cover with plastic wrap and place the bowl in a warm place for about 30 minutes.
- The yeast should be activated, and the sponge dough should be bubbly and at least double in size. Now you’re ready to make the Hawaiian bread dough.
Making the bread dough
- In your stand mixer bowl, place the eggs, vanilla, sugar, and milk powder. Scrape all of the sponge into the mixture as well.
- Add the flour on top, followed by the salt. Make sure the salt is not in direct contact with the sponge.
- Use a dough whisk or a spatula to mix the dough to form a shaggy looking dough. Place the bowl in your stand mixer with the dough hook attached. Keep the paddle attachment close by, as you may need it later.
- Knead the dough for about 5 minutes on medium speed (4 - 5). Don't leave the mixer unattended.
- The dough should start to look a little smooth as the gluten develops. Make sure to scrape the bowl halfway through the kneading time.
- After 5 minutes, scrape the dough from the sides and bottom of the bowl. Then add the melted and cooled down butter into the dough.
- Switch from the dough hook to the paddle to help mix the butter into the dough. Mix on low speed at first, and as the butter starts to mix in, increase the speed to medium - medium high speed. This will take about 2 - 4 minutes.
- Once the butter is mixed in, switch to the dough hook again. The dough will look like thick cake batter. Please do not add any extra flour as the dough SHOULD be very wet and sticky at this stage.
- Switch back to the dough hook. Knead the dough on medium speed (4 - 5) for about 10 - 15 minutes. Making sure to scrape the bowl periodically to ensure that the dough is mixing evenly. I like to scrape the bowl at least twice during a 5 minute period.
- The dough should look like thick, lumpy cake batter after adding the butter, and then the dough should start to look smooth and shiny and form a more cohesive shape. The dough should go from being sticky on the sides of the bowl as you're kneading it, to pulling away and leaving very little on the sides of the bowl.
- Periodically (every 5 minutes or so), check if enough gluten has developed. To check this, take the dough hook and use it to “hook and lift” the dough out of the bowl. If the dough comes out of the bowl fairly cleanly, leaving very little behind in the mixer bowl, the gluten has developed well.
First proof
- Turn the dough out onto a very lightly floured surface. The dough will be very soft and a little sticky. Keep your hands lightly greased with oil or butter to prevent the dough from sticking.
- Fold the edges of the dough towards the middle to form a tight ball of dough. Pinch the edges to seal and turn the dough over to make sure the surface is tight and smooth.
- Lightly grease the mixer bowl and place the dough back in the greased bowl. Cover loosely with plastic wrap and let it proof in a warm place (between 75 - 80°F), until doubled in size. This will take 1 - 2 hours, depending on the temperature.
Portioning, shaping, and final proofing
- Butter and line a 9 x 13 inch metal baking pan with parchment paper. You can also use a 9 x 13 quarter sheet pan, but the taller sides will help keep the rectangle shape as the bread rolls rise.
- When the dough has proofed, turn it out onto your work surface. The dough should not stick to the surface, though it will be tacky.
- Gently flatten or fold the dough over on itself to gently de-gas it. Use a dough cutter / knife to portion the dough into 15 equal pieces. Each portion should weigh between 50 - 58 g. There might be a small portion left over depending on the weight of the dough. Keep the dough portions covered with plastic wrap to prevent them from drying out.
- Take each portion and gently flatten it to make sure there are no large gas bubbles. Fold in the edges of the dough towards the middle, and repeat until the dough ball feels tight. Pinch the seams to seal and to create a small tight ball of dough.
- Holding the dough by the pinched seams (the bottom), tap the surface of the dough on a light dusting of flour. Place it back on the work surface, floured side up, and with a cupped palm, roll the ball to help tighten and shape the dough into a smooth round ball (see video in the post for reference). Make sure the bottom seam is pinched and sealed, and place the dough in the prepared baking pan.
- Repeat with the remaining 14 portions, and arrange the dough balls in a 5 x 3 configuration, inside the baking pan. Make sure the rolls are evenly spaced out.
- Cover the pan loosely with plastic wrap and let it proof one more time before baking. Ideally the proofing temperature should be between 75 - 80°F.
- To check if the buns are ready to be baked, the buns should proof to about double the initial size. Mostly importantly, check with the finger indentation test to see if the bread is properly proofed.
Baking
- When the dough is ready to be baked, preheat the oven to 350°F / 180°C (conventional oven).
- OPTIONAL - Brush the tops of the buns with an egg wash (a whisked egg), or cream wash (heavy cream), or melted butter. You can also leave the buns plain as well.
- Once the oven is preheated, place the buns in the oven (in the middle rack where there is even heating), and bake for about 25 minutes. The bake time can vary depending on the baking pan you use or your oven, so keep an eye on them.
- The buns are baked when the crust is a lovely golden brown color, and the internal temperature registers between 200 - 205°F.
- Remove the buns from the oven and brush the tops with salted butter or unsalted butter with a sprinkling of salt on top (optional).
- Let the Hawaiian rolls cool down in the pan for about 10 minutes, and then gently move them onto a wire rack to cool down completely.
- Serve at room temperature or slightly warmed.
Notes
- You can skip the molasses and replace the sugar with dark brown sugar if you like. The molasses add some flavor AND give the Hawaiian buns a lovely color.
- You can use instant yeast or active dry yeast. Substitute 1:1.
- You can substitute the flour in the sponge with AP flour instead of bread flour if you like. But making these dinner rolls with 100% bread flour will produce great results IF the recipe is followed and the hydration level is maintained and gluten is developed properly.
- Substitute the butter with a good quality vegan butter that is NOT spreadable margarine.
- Substitute the eggs with soy milk or oat milk. 50 mL / 50 g per 1 egg.
- Use a plant-based milk powder (like soy milk powder or oat milk powder) instead of the milk powder. Or you can leave it out.
- The bread rolls can be shaped and placed in the baking dish, and then stored in the fridge overnight - up to 24 hours (covered).
- However, the dough will not proof properly in the fridge, and therefore must be proofed at room temperature the following day before baking. Otherwise, the rolls will be dense and dry.
- Recipe tips and troubleshooting
- How to shape the bread rolls
- The dough consistency change, before and after kneading
- Step by step recipe with images
- How to store the bread rolls for later
- Finger indentation test
Nutrition Information
Show DetailsNutrition Facts
Serving: 15slider
Amount Per Serving
Calories 182 kcal
% Daily Value*
| Serving | 1bread roll / bun | |
| Calories | 182kcal | 9% |
| Carbohydrates | 28g | 9% |
| Protein | 5g | 10% |
| Fat | 5g | 8% |
| Saturated Fat | 3g | 15% |
| Polyunsaturated Fat | 0.5g | 3% |
| Monounsaturated Fat | 1g | 5% |
| Trans Fat | 0.2g | 10% |
| Cholesterol | 36mg | 12% |
| Sodium | 275mg | 11% |
| Potassium | 98mg | 2% |
| Fiber | 1g | 4% |
| Sugar | 7g | 14% |
| Vitamin A | 166IU | 3% |
| Vitamin C | 1mg | 1% |
| Calcium | 26mg | 3% |
| Iron | 0.5mg | 3% |
* Percent Daily Values are based on a 2,000 calorie diet.
User Reviews
Overall Rating
5.0
You'll Also Love