Potato Focaccia (Focaccia Pugliese) - No Knead, No Mixer!
User Reviews
5.0
15 reviews
Excellent
Potato Focaccia (Focaccia Pugliese) - No Knead, No Mixer!
Report
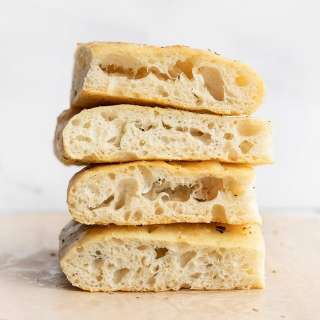
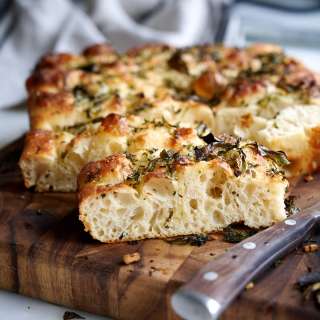
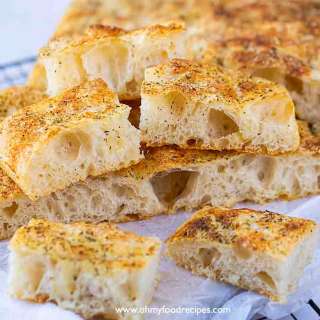
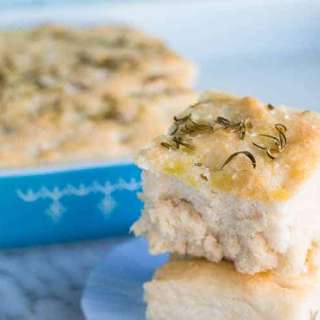
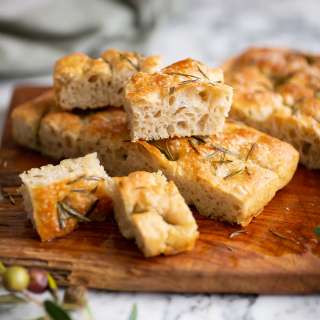
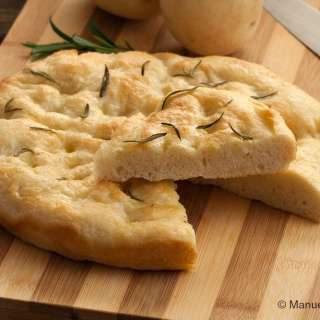
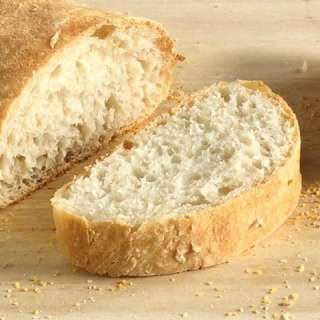
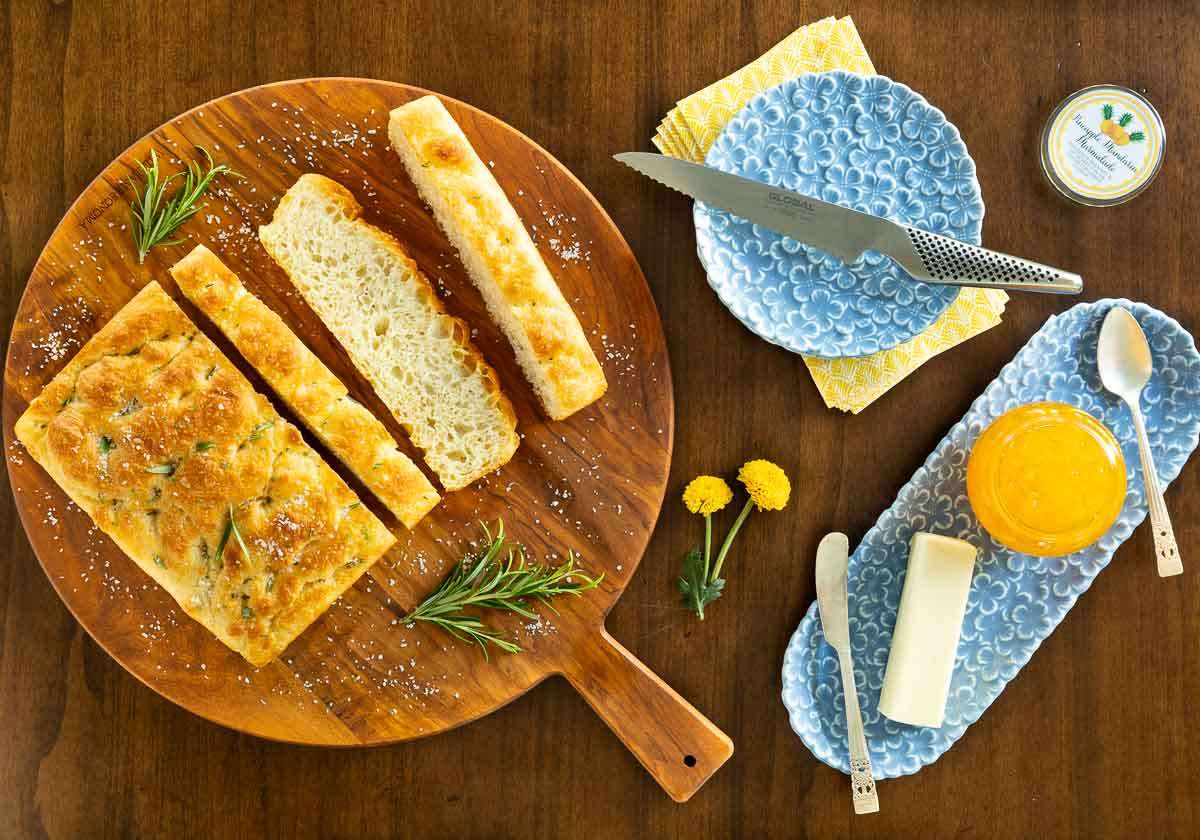
This Potato Focaccia, aka Focaccia Pugliese, is a beloved bread from the sunny heel of Italy with a fluffy interior, large artisan air holes and a crisp, golden crust. Normally an overnight affair, this recipe uses a few secret tricks so it can be made in an afternoon with minimal hands-on time!
Share:
Ingredients
For the dough:
- 2⅔ cups hot tap water maybe more
- ⅔ cup instant potato flakes I like Bob's Red Mill brand
- 3 tablespoons honey
- 2 tablespoons extra virgin olive oil divided
- 4¼ cups bread flour all-purpose flour can also be used
- 2 ¼ teaspoons instant yeast
- 2 teaspoons kosher salt
For the pans:
- 2 teaspoons soft butter
- 2 tablespoons extra virgin olive oil
Before baking:
- 2 tablespoons extra virgin olive oil
- flaky or coarse sea salt or kosher salt if desired for topping
Instructions
For the dough:
- Combine the hot tap water, potato flakes (instant potatoes), honey and 1 tablespoon of oil in a medium-size bowl. Stir for 15-20 seconds until well combined. (If you measure the oil before the honey, the honey will easily slide out of your tablespoon.) Allow this mixture to sit while you prep the other ingredients.
- Combine the flour, yeast and salt in a large bowl (at least 10 cup size). Stir well with a sturdy spatula or wooden spoon to combine.
- Add approximately half of the potato water mixture (no need to measure). Stir well to incorporate the liquid. The mixture will be shaggy and dry at this point. Add the remaining potato water and stir again until the water is well incorporated and there is no dry flour.
- Flour and potato flakes can vary in their level of “thirstiness”. If there are still pockets of flour after mixing well, drizzle in a little more water, one tablespoon at a time until you have a thick, shaggy, wet dough with no pockets of dry flour.
- Drizzle the other tablespoon of oil over the dough and stir just until it’s incorporated but there’s still a thin layer of oil coating the dough.
For rising and stretch and fold technique:
- Cover tightly with plastic wrap and place the bowl in a warm, cozy place (see the post for suggestions) for 15 minutes.
- After 15 minutes, remove the cover and, using a spatula or a wet hand, pick up one side of the dough, stretch it up, fold it over the dough and tuck in down on the other side. Turn the bowl one-quarter turn and repeat the stretch and fold. Repeat the stretch and fold 3-4 more times, turning the bowl one-quarter each time. If your fingers get sticky, re-wet them between stretch and folds.
- Cover the bowl and let the dough rise again in a warm place for 15 minutes, followed by another series of stretch and folds. Repeat this 15-minute rise followed by a stretch and fold one more time. (You will have had 3 15-minute rises, each followed by a series of stretches and folds.)
- After the 3rd stretch and fold, cover the dough and let it rise for 30 minutes or until doubled in size. (The time will vary depending on the yeast and temperature of the area where the dough is rising.)
For the pans:
- During the 30-minute rise, use your fingers or a piece of paper toweling to rub 1 teaspoon of butter over the bottom and up the sides of 2 8-inch square pans OR 2 9-inch round pans. (You can also use a 9x13-inch cake pan - use all of the butter to grease the pan.)
- Line each pan with a square, circle or rectangle of parchment paper, depending on what type of pan you’re using. Drizzle one tablespoon of olive oil over the bottom of each pan (two, if you’re using a 9x13-inch pan). Rub the oil with your hand to coat the bottom and sides of the pan. Set aside.
To continue:
- When the dough has doubled in size, divide it into 2 portions with a silicone spatula or an oiled hand. Place each portion in one of the prepared pans. Flip the dough over to coat it with oil and spread it out with oiled fingers in the pan. If it doesn’t cover the entire pan at this point, no worries. Spread it out as much as you can to cover the bottom of the pan.
- Set the pans back in your warm place for 30 minutes or until doubled in size.
- Generously oil your fingers (both hands) and start at the center of the dough, dimpling and stretching it towards one end of the pan. At this point, you’re trying to evenly fill the pan to the edge and into the corners. Be gentle (to keep from deflating the dough too much), but reach down to the bottom of the pan as you dimple. Return to the center and dimple and stretch the dough out towards the opposite edge. If the dough seems resistant at any point, let it rest for a few minutes before proceeding.
- Once you’ve completed the dimpling, set the pan aside to rest (again in your warm area) while you preheat the oven.
To finish and bake:
- With one rack in the center position, preheat the oven to 450˚F.
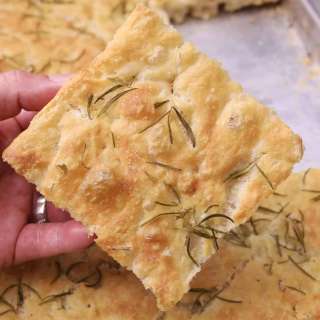
- Once the oven reaches 450, drizzle the dimpled dough with 1 tablespoon extra virgin olive oil. Finish off with a light sprinkle of flaky sea salt (I love Maldon sea salt) or kosher salt. Sometimes I also use a teaspoon of finely chopped fresh rosemary.
- Bake on the center rack in the oven for 14-18 minutes or until nicely golden brown. Turn the oven off and remove the focaccia to a wire cooling rack.
- If the bread seems to be stuck to the sides of the pan, run a small thin-bladed knife around the edges of the pan, putting pressure towards the pan, not the bread.
- Remove the focaccia from the pan with a metal spatula. Cool on a wire cooking rack for 10 minutes, then return to the oven (turned off) for 10 minutes to crisp the exterior crust.
- Let the focaccia cool for 10-15 minutes before slicing. Enjoy the bread warm or allow it to cool completely before storing it.
To serve:
- I like to warm the bread again before serving. I preheat the oven to 325 and put the loaf right on the center rack for 10 minutes. The crust will get nice and crisp again.
To store:
- Store in an airtight zippered bag.
- You can also freeze this bread.. I like to slice it in 1-1½-inch wide strips before freezing so I can pull out as many pieces as I want without thawing the whole thing.
- I drizzle each side of the frozen slices with a little olive oil, then toast until golden in the air fryer or oven. So delicious with soups, salads, and entrés!
Notes
- See Café Tips above in the post for more detailed instructions and tips to ensure success.
- If you prefer to use Metric measurements there is a button in each of our recipes, right above the word “Instructions”. Just click that button to toggle to grams, milliliters, etc. If you ever come across one of our recipes that doesn’t have the Metric conversion (some of the older recipes may not), feel free to leave a comment and I will add it.
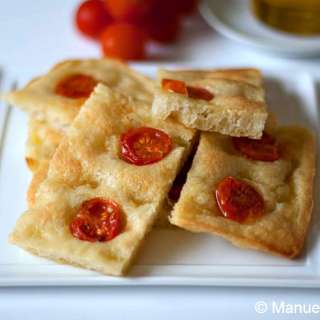
- Each 8-inch square of 9-inch round pan yields 16 servings (I cut the square loaves into 8 strips, then cut each strip in half.
- *If you happen to have leftover mashed potatoes, that will also work. Just add 1 cup of mashed potatoes to the hot water instead of the potato flakes.
Nutrition Information
Show Details
Calories
99kcal
(5%)
Carbohydrates
15g
(5%)
Protein
2g
(4%)
Fat
3g
(5%)
Saturated Fat
1g
(5%)
Polyunsaturated Fat
0.4g
Monounsaturated Fat
2g
Trans Fat
0.01g
Cholesterol
1mg
(0%)
Sodium
150mg
(6%)
Potassium
40mg
(1%)
Fiber
1g
(4%)
Sugar
2g
(4%)
Vitamin A
8IU
(0%)
Vitamin C
1mg
(1%)
Calcium
3mg
(0%)
Iron
0.2mg
(1%)
Nutrition Facts
Serving: 32servings
Amount Per Serving
Calories 99 kcal
% Daily Value*
| Calories | 99kcal | 5% |
| Carbohydrates | 15g | 5% |
| Protein | 2g | 4% |
| Fat | 3g | 5% |
| Saturated Fat | 1g | 5% |
| Polyunsaturated Fat | 0.4g | 2% |
| Monounsaturated Fat | 2g | 10% |
| Trans Fat | 0.01g | 1% |
| Cholesterol | 1mg | 0% |
| Sodium | 150mg | 6% |
| Potassium | 40mg | 1% |
| Fiber | 1g | 4% |
| Sugar | 2g | 4% |
| Vitamin A | 8IU | 0% |
| Vitamin C | 1mg | 1% |
| Calcium | 3mg | 0% |
| Iron | 0.2mg | 1% |
* Percent Daily Values are based on a 2,000 calorie diet.
Genuine Reviews
User Reviews
Overall Rating
5.0
15 reviews
Excellent
Other Recipes
You'll Also Love