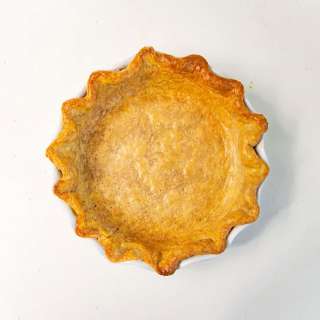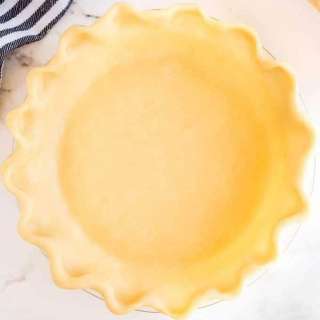
Easy Flaky All Butter Pie Crust
User Reviews
4.8
93 reviews
Excellent
-
Prep Time
10 mins
-
Cook Time
10 mins
-
Chill Time
1 hr 15 mins
-
Total Time
1 hr 44 mins
-
Servings
2 crusts
-
Calories
81 kcal
-
Course
Baked Goods
-
Cuisine
American
Easy Flaky All Butter Pie Crust
Report
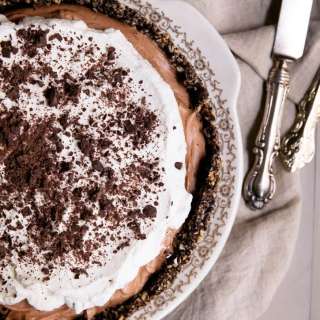
This perfect pie crust is so FLAKY and BUTTERY! It's EASY, no-fuss, and foolproof! It's great pre-baked to use in no-bake pies or for double-crust pies! 💛😋
Share:
Ingredients
- 2 ½ cups 12 ½ ounces all-purpose flour, divided
- 1 teaspoon salt
- 1 tablespoon sugar optional (omit for savory pies)
- 1 cup very cold unsalted butter, cut into tablespoon slices
- 5- 7 tablespoons very cold ice water
- 2 tablespoons egg whites lightly beaten for brushing on the crust
Instructions
Making the Crust:
- To the canister of a large food processor, combine 1 ½ cups flour, salt, sugar and pulse 1 or 2 times to combine.
- Add the sliced butter cubes to the food processor and pulse for approximately 50 seconds, or until a paste forms. Break up and distribute the clumps evenly around the processor canister.
- Add in the remaining 1 cup flour and pulse another 3 or 4 more times until the flour is in approximately pea-sized pieces.
- Add 5 tablespoons of water and pulse combine.
- Optionally, add the remaining 2 tablespoons water and pulse 2 or 3 times. Do not add this additional water if your dough has already come together and seems sufficiently moist.
- Remove the dough and form a ball.
- Divide the dough into two equal portions.
- Roll each portion into a ball and wrap tightly in plastic wrap.
- Press down to form a thick disk. Repeat with the second portion of dough.
- Refrigerate for 1 hour, then allow to sit on the counter for 10 minutes before rolling out for the crust.
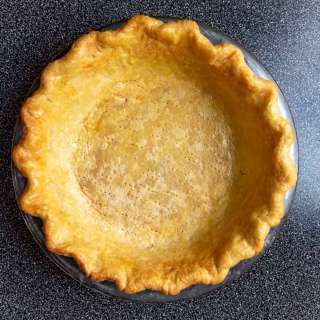
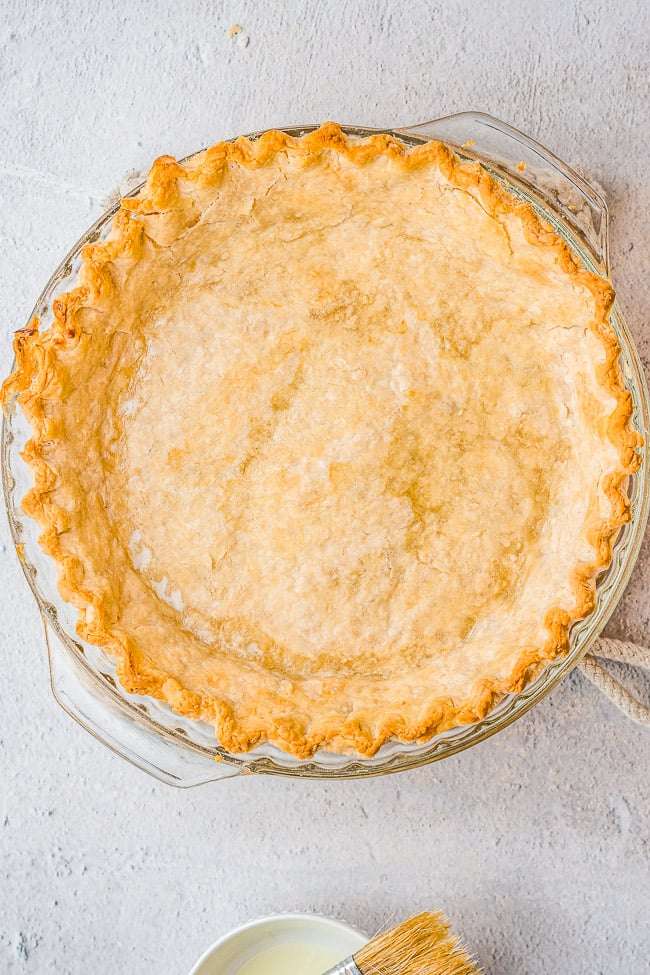
Blind Baking the Crust:
- If you are using a recipe that needs a blind bake (baking the crust first before adding any filling), preheat the oven to 450°F.
- To bake a single crust, roll the dough out slightly thicker than you normally would.
- Roll the crust up over the rolling pin, then gently unroll over the pie pan.
- Press it into the base of the pie pan.
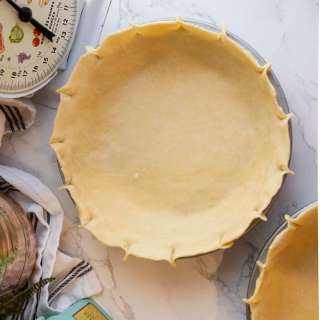
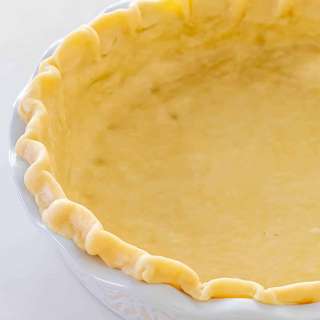
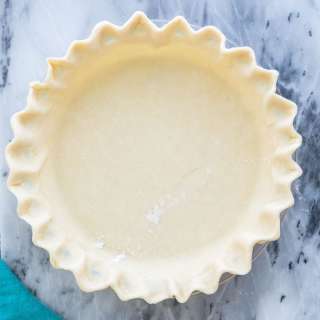
- Trim the crust 1-inch over the edge.
- Fold the extra crust under the edge to make the edges thicker.
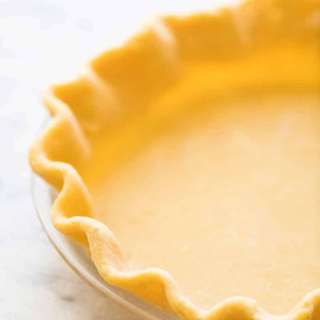
- Then using your first finger and thumb on one hand and a first finger on the other, press the doughwith one finger into the middle of the other two fingers gently creating a ridge around the crust. This is an easy way to edge the crust but note there are many ways to edge crust.
- Optionally, if you have time, return the pie dish with the crust in it to the fridge for approximately 30 minutes to chill once again. This will produce an even flakier, lighter crust because of how the cold butter in the dough will behave in the hot oven.
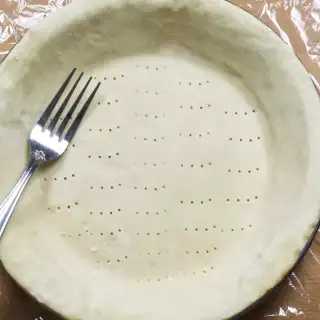
- Cover the dough with aluminum foil and fill with dry beans or pie weights if you have them. This will prevent the pie from bubbling up in the middle. Additionally, you can also prick the bottom of the crust with a fork a few times before covering with foil and adding the dry beans.
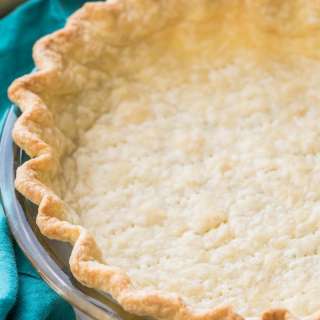
- Bake for 15 minutes, then brush with egg whites.
- Return to the oven and bake for an additional 3 to 4 minutes. This helps set the crust.
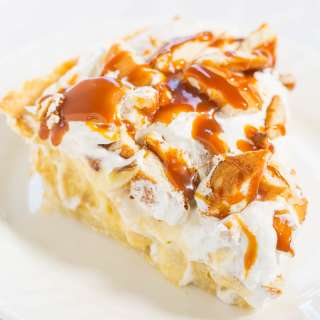
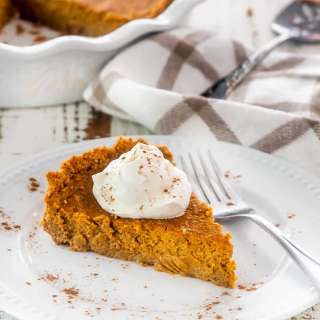
- Fill with your favorite pie filling.
For Recipes That Don't Require Blind-Baking:
- Roll out the dough to approximately 12-inches in diameter.
- Roll the crust up over the rolling pin, then gently unroll over the pie pan.
- Press it into the base of the pie pan.
- Trim the crust 1-inch over the edge.
- Fold the extra crust under the edge to make the edges thicker.
- Then using your first finger and thumb on one hand and a first finger on the other, press the doughwith one finger into the middle of the other two fingers gently creating a ridge around the crust. This is an easy way to edge the crust but note there are many ways to edge crust.
- Fill with your favorite pie filling
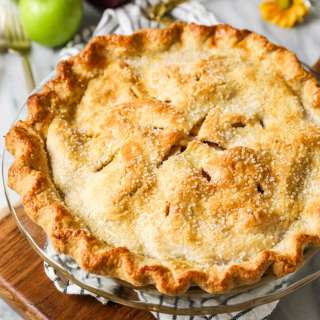
For Pies Requiring a Double Crust:
- If you're baking a classic apple or cherry pie for example, or another type of double-crusted pie, proceed with likely blind baking the crust
- Add the filling.
- Rolling out the second crust to approximately 12-inches in diameter.
- Roll the crust up over the rolling pin, then gently unroll over the top of the pie pan.
- Trim the crust 1-inch over the edge.
- Then using your first finger and thumb on one hand and a first finger on the other, press the doughwith one finger into the middle of the other two fingers gently creating a ridge around the crust. This is an easy way to edge the crust but note there are many ways to edge crust.
- Vent the pie in the center with a paring knife by making a few slits for the hot steam and air to escape. Alternatively, you can research online how to make pretty design cutouts with a paring knife.
Notes
- Crust Make-Ahead and Storage Options:
- Please note that the Nutritional Information provided is provided purely as a courtesy. Being that this recipe makes two 9 to 9.5-inch pie crusts, and if one pie crust makes or serves approximately 8 slices of pie, two crusts make 16. However, if you're making a double-crust pie, then the stats provided double in value.
- You can make the crust in advance and it will keep airtight in the refrigerator for up to 3 days. Let it sit out on the counter for a bit before rolling out.
- Alternatively, you can make the crust in advance and it will keep airtight in the freezer for up to 3months. Thaw before rolling.
Nutrition Information
Show Details
Serving
1
Calories
81kcal
(4%)
Carbohydrates
16g
(5%)
Protein
2g
(4%)
Fat
1g
(2%)
Cholesterol
2mg
(1%)
Sodium
136mg
(6%)
Fiber
1g
(4%)
Sugar
1g
(2%)
Nutrition Facts
Serving: 2crusts
Amount Per Serving
Calories 81 kcal
% Daily Value*
| Serving | 1 | |
| Calories | 81kcal | 4% |
| Carbohydrates | 16g | 5% |
| Protein | 2g | 4% |
| Fat | 1g | 2% |
| Cholesterol | 2mg | 1% |
| Sodium | 136mg | 6% |
| Fiber | 1g | 4% |
| Sugar | 1g | 2% |
* Percent Daily Values are based on a 2,000 calorie diet.
Genuine Reviews
User Reviews
Overall Rating
4.8
93 reviews
Excellent
Other Recipes
You'll Also Love