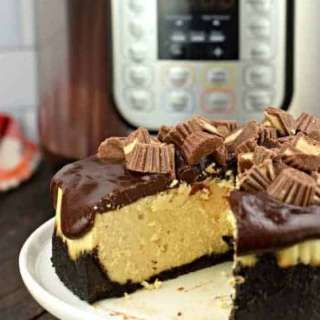
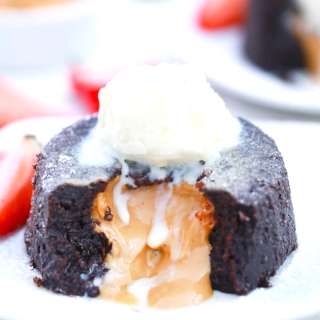
Instant pot peanut butter and caramel cheesecake
User Reviews
5.0
27 reviews
Excellent
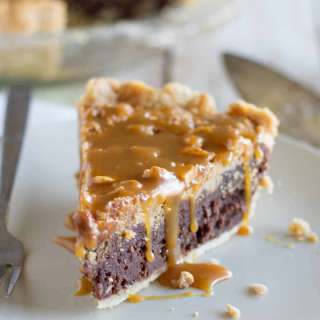
Instant pot peanut butter and caramel cheesecake
Report
This peanut butter and caramel cheesecake is easy to make and tastes totally heavenly! Make sure to bring ingredients to room temperature before using and avoid over mixing the filling.
Share:
Ingredients
For the crust
- 12 Oreo cookies peanut butter flavour or original
- 2 tbsp melted butter
For the filling
- 450 g (16oz) full-fat cream cheese at room temperature
- 100 g (1/2 cup) granulated sugar
- 125 g (1/2 cup) smooth peanut butter
- 2 tbsp caramel or dulce de leche
- 60 g (1/4 cup) sour cream
- 1 tsp vanilla paste or extract
- 2 large eggs at room temperature
Chocolate ganache
- 115 g (4oz) dark chocolate chips
- 120 ml (1/2 cup) double (heavy) cream
Caramel whipped cream
- 120 ml (1/2 cup) double (heavy) cream
- 50 g (1/2 cup) icing sugar
- 1-2 tbsp caramel or dulce de leche
- chocolate sprinkles
- cocoa powder to dust optional
Instructions
- Place a piece of aluminium foil on your counter top and place a kitchen towel square in the centre. Position your cheesecake tin over the kitchen towel and tightly wrap the foil around the base.
- Spray the tin with cake release and line the bottom and sides with greaseproof paper.
- Grind the Oreos to a powder using a food processor. Mix with the melted butter.
- Press the crust over the bottom of the prepared pan in an even layer and put in the freezer.
- Put the cream cheese and sugar in a bowl and briefly mix together with a hand mixer on low speed until it is smooth and creamy.
- Add the peanut butter and caramel and mix again until smooth.
- Add the sour cream and vanilla and mix once more.
- Add the eggs and mix until combined – do not over mix at this stage!
- Pour the filling over chilled crust and gently tap the pan on counter so that it settles.
- Cover the top of the pan with a piece of foil.
- Pour 350ml (1 1/2 cups) water into your pressure cooker and place the trivet in the bottom of the pot. If your trivet doesn’t have handles, create a foil ‘sling’ by folding a long piece of foil in half lengthwise and place your cheesecake over it to lower (and lift) out of the pot. Tuck the foil sling edges down the side of the pan.
- Set vent to ‘sealing’, choose ‘manual’ and set cooking time for 50 minutes at high pressure.
- Allow pressure to release naturally for 10 minutes and then manually release.
- Lift the pan out of the pressure cooker and carefully remove the foil. The cheesecake should have a bit of jiggle in the centre, but if it seems really jiggly then cover and return to the cooker for a further 5 minutes high pressure cooking (+ 10 mins NPR then manual release).
- Remove the foil from the bottom of the pan and place on a cooling rack for a couple or hours.
- Place in the fridge for 8 hours or overnight. To remove the cheesecake from the pan run a small knife around the edge to loosen the paper. Place the pan over a tin and gently push the tin downwards to release the middle. Peel the paper off the sides and gently remove the bottom of the cake pan. Transfer the cheesecake to a platter or cake stand.
- Make the ganache: place the chocolate and cream in a bowl and microwave for 30 second bursts, stirring after each, until completely melted and smooth.
- Spoon (or use a piping bag) the ganache over the perimeter of the cheesecake, encouraging it to drizzle down the sides. Spread the remaining chocolate over the cheesecake to cover.
- Whisk the cream, icing sugar and caramel together until it forms peaks. Transfer to a piping bag fitted with a large star tip and pipe over the cheesecake.
- Add chocolate sprinkles and a dusting of cocoa powder and serve.
Notes
- I used a 6L /Q Instant Pot in this recipe and a 7''/18cm push pan.
- Make sure that the ingredients are at room temperature and avoid over mixing the filling, especially once the eggs are added.
- You can use store-bought caramel (or salted caramel) or Dulce De Leche. If you want to make your own salted caramel follow this recipe here. The caramel needs to be totally cool before using so if you are making your own it would be best to make a day ahead and store in the fridge in a sealed jar (once it has cooled down).
Nutrition Information
Show Details
Calories
535kcal
(27%)
Carbohydrates
38g
(13%)
Protein
9g
(18%)
Fat
39g
(60%)
Saturated Fat
21g
(105%)
Cholesterol
124mg
(41%)
Sodium
337mg
(14%)
Potassium
288mg
(8%)
Fiber
1g
(4%)
Sugar
27g
(54%)
Vitamin A
1115IU
(22%)
Calcium
114mg
(11%)
Iron
2mg
(11%)
Nutrition Facts
Serving: 10slices
Amount Per Serving
Calories 535 kcal
% Daily Value*
| Calories | 535kcal | 27% |
| Carbohydrates | 38g | 13% |
| Protein | 9g | 18% |
| Fat | 39g | 60% |
| Saturated Fat | 21g | 105% |
| Cholesterol | 124mg | 41% |
| Sodium | 337mg | 14% |
| Potassium | 288mg | 6% |
| Fiber | 1g | 4% |
| Sugar | 27g | 54% |
| Vitamin A | 1115IU | 22% |
| Calcium | 114mg | 11% |
| Iron | 2mg | 11% |
* Percent Daily Values are based on a 2,000 calorie diet.
Genuine Reviews
User Reviews
Overall Rating
5.0
27 reviews
Excellent
Other Recipes
You'll Also Love
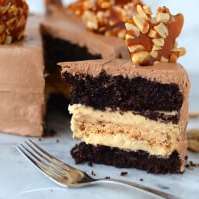
Chocolate Peanut Butter Cake (with Caramel Peanut Butter Nougat Filling and Chocolate French Buttercream Frosting)
European, American, Canadian
4.7
(9 reviews)


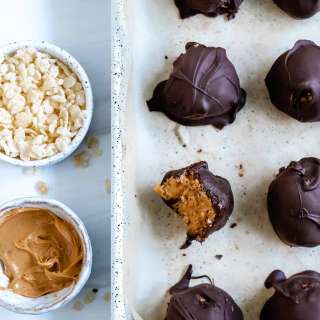
Vegan No-Bake Chocolate Peanut Butter Balls With Rice Krispies (Peanut Butter Bon Bons)
American
5.0
(204 reviews)

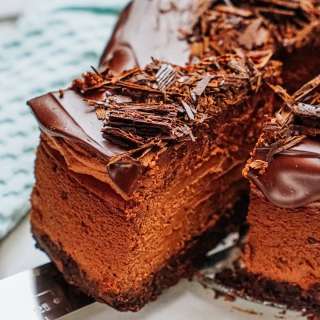
5-Layer Dark Chocolate Cheesecake (Cheesecake Factory Godiva Chocolate Cheesecake Recipe)
American
0.0
(0 reviews)