Pane Francese
User Reviews
4.2
18 reviews
Good
Pane Francese
Report
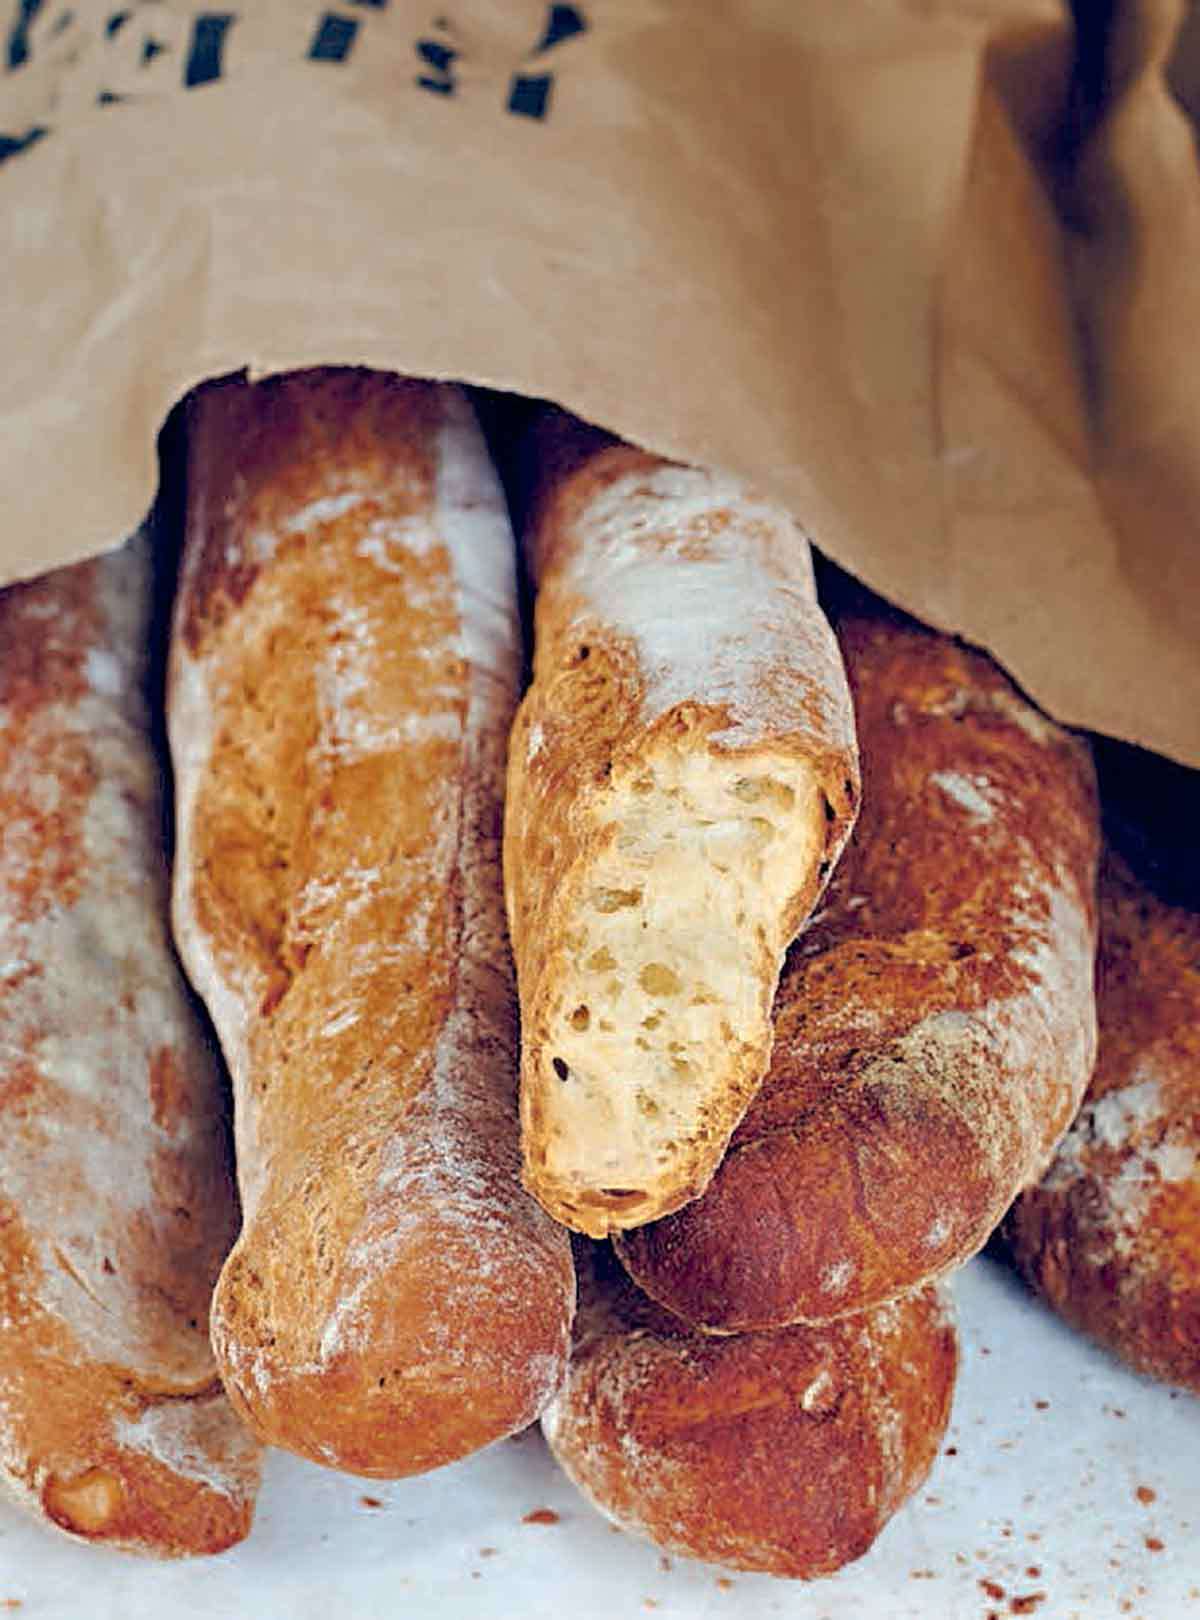
This pane francese recipe turns out a northern Italian bread that's crusty and chewy and all sorts of incredible. Looks like a baguette, tastes like a ciabatta.
Share:
Ingredients
For the starter
- 2 cups plus 2 tablespoons all-purpose flour
- Pinch instant yeast
- 1 1/4 cups warm water at about 60°F (15°C)
For the pane francese dough
- 3 1/2 cup plus 1 tablespoon all-purpose flour plus more for working the dough
- 1 tablespoon plus 1/4 teaspoon fine sea salt
- 1/4 teaspoon instant yeast
- 3/4 cup plus 3 tablespoons cold whole milk
- 1/4 cup plus 1 1/2 tablespoons extra-virgin olive oil
For the dusting mixture
- 1 tablespoon fine semolina flour
- 5 tablespoons all-purpose flour
Instructions
Make the starter
- Dump the flour in a medium storage container, preferably with a lid.
- Pour the water into a 2-cup measuring cup, sprinkle the yeast on top, and then stir to combine.
- Pour the yeast mixture over the flour and mix with your fingers, pressing the mixture into the sides, bottom, and corners of the container, until all the flour is wet. Cover the container and let it rest at room temperature for 12 to 15 hours. The starter will be at its peak at around 13 hours.
Make the pane francese dough
- In a medium bowl, stir together the flour, salt, and yeast.
- Grab your container of starter and slowly pour about 1/3 of the milk all around the sides to release the starter from the container. Transfer the starter and milk to an extra-large bowl along with the remaining milk and the olive oil. Using a wooden spoon, gently break the starter up to distribute it in the liquid.
- Add the flour mixture to the starter and milk mixture, slowly mixing in the flour mixture with a spoon and reserving about 1/6 of the flour mixture along one edge of the bowl. Continue to mix with the spoon until most of the flour mixture has been combined with the starter mixture, except for the reserved flour along the edge. Mix until everything except the last 1/6 of the flour mixture is incorporated. The dough will be sticky to the touch.☞ TESTER TIP: As the dough stiffens, switch to a plastic bowl scraper and, if needed, your hands.
- Now, you have a decision to make. You can either knead the dough as you typically do, incorporating that last 1/6 of the flour mixture when your hands or the work surface becomes sticky and stopping when the dough becomes stiff and difficult to work, or you can knead the dough the way the author prefers you do, which is a method he calls rolling and tucking.* (You can read all about rolling and tucking at the bottom of this post.)
- With cupped hands, tuck the sides of the dough under itself, toward the center of the ball of dough. Place the dough, seam side down, in a clean bowl, cover the top of the bowl with a clean kitchen towel, and let rest at room temperature for 1 hour.
- Lightly dust the work surface, your hands, and a 9-by-13-inch (23-by-33-centimeter) baking pan with all-purpose flour. Using the plastic bowl scraper, release the dough from the bowl and place it, seam side down, on your lightly floured work surface. Gently stretch the dough from the center outwards into a roughly rectangular shape about 10 by 12 inches (25 by 30 centimeters).
- Fold the dough in thirds from top to bottom as if you were folding a sheet of paper to put in an envelope. You will have 3 layers of dough. Repeat the folding but working from left to right. You will have 9 layers. With cupped hands, tuck the sides under toward the center. Place the dough, seam side down, in the floured baking pan, cover the pan with the towel or plastic wrap stretched tight, and let rest for 1 hour. This was your first stretch and fold.
- For the second and final stretch and fold, repeat the first stretch and fold, then return the dough to the pan, cover with the towel or plastic wrap, and let rest for 1 hour.
Make the dusting mixture
- Mix together the semolina and all-purpose flours. Line a half sheet pan or baking sheet with a clean kitchen towel and dust it fairly generously with the dusting mixture. (The semolina, which is slightly coarser, helps keep the dough from sticking. Use this dusting mixture only for lining the surfaces against which the dough will come in contact. Don’t use this mixture during mixing, rolling and tucking, stretching and folding, or shaping.)
- Lightly dust the work surface and your hands with all-purpose flour. Turn the dough onto the work surface and let it spread, then gently stretch it to form a 9-by-7-inch (23-by-18-centimeter) rectangle. Using a bench scraper, divide the dough into 4 equal portions, each measuring about 2 1/4 by 7 inches (5.5 by 18 centimeters). Gently stretch each portion into a rectangle measuring about 2 by 12 inches (5 by 30 centimeters). Transfer to the lined pan, positioning the loaves across the width rather than lengthwise. Dust the top and sides of the loaves with the dusting mixture. Fold the towel to create support walls on both sides of each loaf, then fold any extra length of the towel over the top or grab another clean kitchen towel to cover it. Let it rest at room temperature for 30 minutes.
- Transfer the pan to the refrigerator for 12 to 16 hours.
- Slide a cast-iron skillet onto the floor of the oven and preheat the oven to 500°F (260°C).
- Using the towel, lift and gently flip the loaves off the pan and onto a transfer peel, seam side down. Slide the loaves, still seam side down, onto a baking peel dusted with all-purpose flour. Using a sharp knife, make a few diagonal slashes a couple inches long on the top of the loaves.
- Working quickly but carefully, transfer the loaves to the stone using heavy-duty oven mitts or potholders. Pull the hot cast-iron skillet partway out of the oven, add about 3 cups ice cubes to the skillet, and then quickly slide it back in and immediately close the oven door. (This will create steam.) Lower the oven temperature to 460°F (240°C). Bake the bread, switching the positions of the loaves about 2/3 of the way through baking, until the surface is golden brown, about 25 minutes.
- Using the baking peel, transfer the loaves to a cooling rack. Tap the bottom of each loaf. It should sound hollow. If not, return the bread to the baking stone and bake for 5 minutes longer.
- Let the bread cool completely before slicing and eating, at least 4 hours but preferably 8 to 24 hours.
Notes
- To roll and tuck the dough, push the dough to one side of the bowl or turn it onto a lightly floured work surface. Coax it into a somewhat rectangular shape with a short end facing you. Slide your fingers or scraper 3 inches (8 centimeters) under the far end of the dough and lift it up. Roll it towards you, allowing it to fold onto the rest of the dough, and then push down lightly with the side of your hand, tucking the folded-over end into the mass of dough. Repeat several times until the dough is all rolled up, giving a slight push down on the last roll to leave the dough seam side down. Rotate the dough 90 degrees so the short side is once again facing you. Flip it over, seam side up, and press gently on the seam with your palm hand or the flat side of a scraper to create a roughly rectangular shape, adding the reserved last 1/6 of the flour mixture and, if needed, a small amount of additional all-purpose flour to the bowl or work surface and your hands as needed if the dough is sticky. You should have 3 or 4 rolls along the length of dough. That is one roll and tuck. If the dough is quite sticky at first, have patience, it will strengthen and become more manageable with each roll and tuck. As the dough strengthens, you’ll notice that it begins to resist further rolling. A general rule of thumb is that when the dough becomes difficult to fold and begins to tear, it’s time to stop. Continue rolling and tucking until the dough until it begins to resist any further rolling, about 10 complete roll and tucks.
Nutrition Information
Show Details
Serving
1portion
Calories
103kcal
(5%)
Carbohydrates
19g
(6%)
Protein
3g
(6%)
Fat
2g
(3%)
Saturated Fat
1g
(5%)
Monounsaturated Fat
1g
Cholesterol
1mg
(0%)
Sodium
177mg
(7%)
Fiber
1g
(4%)
Sugar
1g
(2%)
Nutrition Facts
Serving: 40servings
Amount Per Serving
Calories 103 kcal
% Daily Value*
| Serving | 1portion | |
| Calories | 103kcal | 5% |
| Carbohydrates | 19g | 6% |
| Protein | 3g | 6% |
| Fat | 2g | 3% |
| Saturated Fat | 1g | 5% |
| Monounsaturated Fat | 1g | 5% |
| Cholesterol | 1mg | 0% |
| Sodium | 177mg | 7% |
| Fiber | 1g | 4% |
| Sugar | 1g | 2% |
* Percent Daily Values are based on a 2,000 calorie diet.
Genuine Reviews
User Reviews
Overall Rating
4.2
18 reviews
Good
Other Recipes
You'll Also Love