Taiyaki
User Reviews
5.0
9 reviews
Excellent
Taiyaki
Report
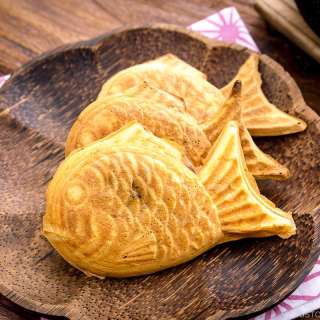
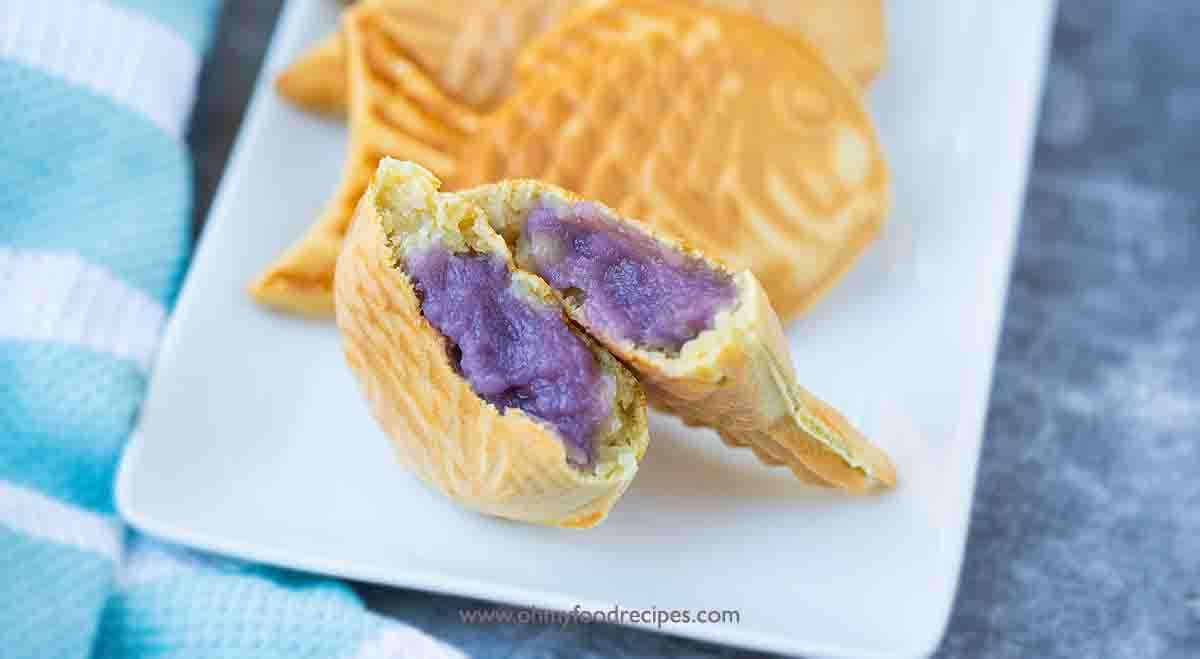
Taiyaki is a beloved and iconic street food from Japan. Now, it has become popular around the world. This delicious treat consists of a crispy, waffle or pancake-like exterior enveloping a warm and indulgent sweet filling.
Share:
Ingredients
Batter:
- 1 cup all purpose flour
- ⅛ teaspoon salt
- ¼ teaspoon baking powder
- ¼ teaspoon baking soda
- ⅓ cup sugar
- 2 tablespoons wheat starch
- ½ cup & 1 tablespoon water
- ½ cup coconut milk
- 1 teaspoon vanilla extract
- 1 large egg
Filling:
- ½ cup & 2 tablespoons coconut milk
- 1 large egg
- 2 tablespoons Taro boba powder
- 2 tablespoons cornstarch
- ½ cup sugar
- 2 tablespoons butter
Instructions
- Put 1 cup of all purpose flour into a bowl.
- Then, add ⅛ teaspoon of salt, ¼ teaspoon of baking powder, ¼ teaspoon of baking soda, ⅓ cup of sugar, 2 tablespoons of wheat starch. Mix it well.
- After that, crack 1 egg, pour ½ cup of coconut milk, ½ cup and 1 tablespoon of water, and 1 teaspoon of vanilla extract into the bowl.
- Mix it well, make sure no lumps and smooth. Let the batter sit for 15-30 minutes while working on the filling. (*This allows the flour to fully hydrate, resulting in a lighter and fluffier texture.)
- For the filling, pour ½ cup and 2 tablespoons of coconut milk into the pot. Then, crack 1 egg.
- Next, put 2 tablespoons of taro boba powder, 2 tablespoons of cornstarch and ½ cup of sugar.
- Stir and mix it well, no lumps and smooth.
- After, put the pot over the stove and turn on a small fire. Add 2 tablespoons of butter.
- Keep stirring it until it thickens. Don't overcook it, the bottom will burn. Once it thickens, turn off the fire.
- Keep stirring it until it thickens. Don't overcook it, the bottom will burn. Once it thickens, turn off the fire.
- Spray some vegetable oil on the non-stick taiyaki pan.
- Brush the oil and evenly coat it on the taiyaki pan. Then, use a paper towel to lightly wipe the excess oil on the pan. (My pan is non-stick material, too much oil will not make the batter crispy outside.) Only need to do it one time brushing oil will be ok to make the rest of taiyaki.
- Preheat the taiyaki pan over the stove with a small medium fire for 2-3 minutes. Then, turn the fire to small, when you pour 1 tablespoon of batter into each of the taiyaki pan. Spread it a little bit from the head to the middle belly of the fish pan.
- Scoop 1 tablespoon of taro filling from step 10 onto batter in the middle. (*I usually spread it a little bit to make sure the head and tail will have filling as well.)
- After that, pour 2 tablespoons of batter, cover the filling and fill the rest area in the fish shaped pan.
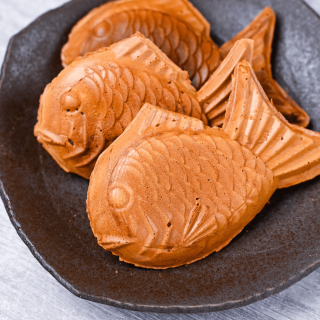
- Slightly close it and flip the other side, let it cook for 3-5 minutes at a small medium fire. Flip it again and cook for 3-5 minutes until it’s golden brown. (*In general each side is 3-5 minutes at a small medium fire. You may need to adjust the time according to your tool and stove.)
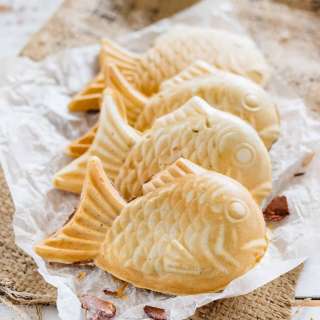
- When it is done, take it out. You can use scissors to trim the extra waffle on the sides to make them look nicer.
- Lastly, put it on the wire rack to let it cool off a little bit, but still warm to enjoy it. (*Remember to allow them to cool slightly before serving to avoid burning your mouth.)
Notes
- In a large bowl, whisk together the flour, wheat starch, baking powder, baking soda, sugar and salt. This helps to ensure an even distribution of the dry ingredients.
- Then, add wet ingredients like water, egg, coconut milk and vanilla extract. Mix it well and make sure no lumps.
- After that, let the batter rest for about 15-30 minutes while working on the filling. This allows the flour to fully hydrate, resulting in a lighter and fluffier texture.
- I like to add wheat starch instead of cornstarch in the batter because wheat starch makes the outer layer waffle texture crispy especially when you warm them up in the air fryer.
- My mom taught me the secret ingredient for crispy waffles is wheat starch because she used to sell bubble waffles and waffles in Hong Kong as a street food vendor when I was little.
- Besides, preheating the taiyaki maker is important. This can help achieve a crisp exterior.
- Make sure to grease the mold with a small amount of oil or non-stick spray to prevent sticking. Then, use a paper towel to lightly wipe off the excess oil on the pan. You don’t need to spray oil every time if you have a non-sticky mold. Just spraying some at the start will be ok for the rest of taiyaki.
- Avoid overfilling the molds with batter, as it can lead to uneven cooking and difficulty in sealing the taiyaki.
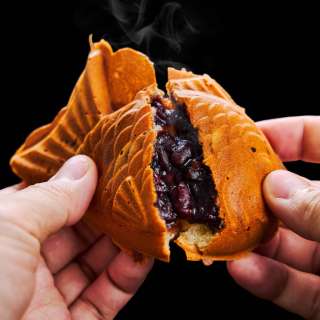
- Ensure an even distribution of filling in each taiyaki. This helps balance the flavors throughout the waffle. You can use other filling like the classic red bean paste, or the modern popular custard and chocolate (nutella).
- If you like the custard filling, try to use 2 tablespoons of custard powder and 1 tablespoon of cornstarch instead because custard powder contains some cornstarch thickening. The custard filling is similar to the custard buns.
- Preheat your taiyaki maker before adding the batter. This ensures that the taiyaki cook evenly and achieve a golden brown color.
- Pay attention to the temperature of your taiyaki maker. Cooking at the right temperature helps ensure a crispy exterior while maintaining a fluffy interior. Make sure to use a small medium fire.
- Close the taiyaki maker gently to avoid squeezing out the batter. This helps maintain the shape of the fish.
- The cooking time may vary depending on your specific appliance, but it typically takes 3-5 minutes each side with small medium fire. Check for a golden brown color and adjust the time accordingly.
- Place the cooked taiyaki on a cooling rack instead of a plate to prevent the bottoms from becoming soggy after cooking.
- You can use scissors to trim the extra waffle on the sides to make them look nicer.
- Taiyaki is best enjoyed fresh and warm. Serve them fresh for the crispiest texture. Remember to allow them to cool slightly before eating to avoid burning your mouth.
- If the taiyaki sticks to the molds, try adding a bit more oil or non-stick spray. You can also use a silicone brush to coat the molds evenly. Then, use a paper towel to lightly wipe the excess oil if you have a non-stick taiyaki pan.
- Rotate the taiyaki maker or flip the taiyaki halfway through the cooking process if you notice uneven browning.
- Remember that making the perfect taiyaki may take a bit of practice, so don't be discouraged if your first attempts are not flawless. Enjoy the process, experiment with flavors, and have fun creating these delicious fish-shaped treats!
Nutrition Information
Show Details
Calories
230kcal
(12%)
Carbohydrates
38g
(13%)
Protein
4g
(8%)
Fat
7g
(11%)
Saturated Fat
5g
(25%)
Polyunsaturated Fat
0.4g
Monounsaturated Fat
1g
Trans Fat
0.1g
Cholesterol
54mg
(18%)
Sodium
114mg
(5%)
Potassium
104mg
(3%)
Fiber
1g
(4%)
Sugar
21g
(42%)
Vitamin A
158IU
(3%)
Vitamin C
0.3mg
(0%)
Calcium
20mg
(2%)
Iron
1mg
(6%)
Nutrition Facts
Serving: 8Serving
Amount Per Serving
Calories 230 kcal
% Daily Value*
| Calories | 230kcal | 12% |
| Carbohydrates | 38g | 13% |
| Protein | 4g | 8% |
| Fat | 7g | 11% |
| Saturated Fat | 5g | 25% |
| Polyunsaturated Fat | 0.4g | 2% |
| Monounsaturated Fat | 1g | 5% |
| Trans Fat | 0.1g | 5% |
| Cholesterol | 54mg | 18% |
| Sodium | 114mg | 5% |
| Potassium | 104mg | 2% |
| Fiber | 1g | 4% |
| Sugar | 21g | 42% |
| Vitamin A | 158IU | 3% |
| Vitamin C | 0.3mg | 0% |
| Calcium | 20mg | 2% |
| Iron | 1mg | 6% |
* Percent Daily Values are based on a 2,000 calorie diet.
Genuine Reviews
User Reviews
Overall Rating
5.0
9 reviews
Excellent
Other Recipes
You'll Also Love