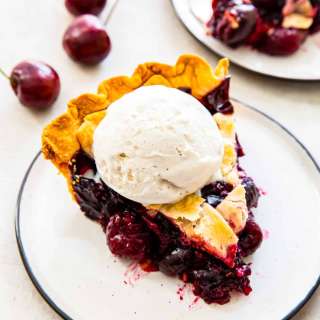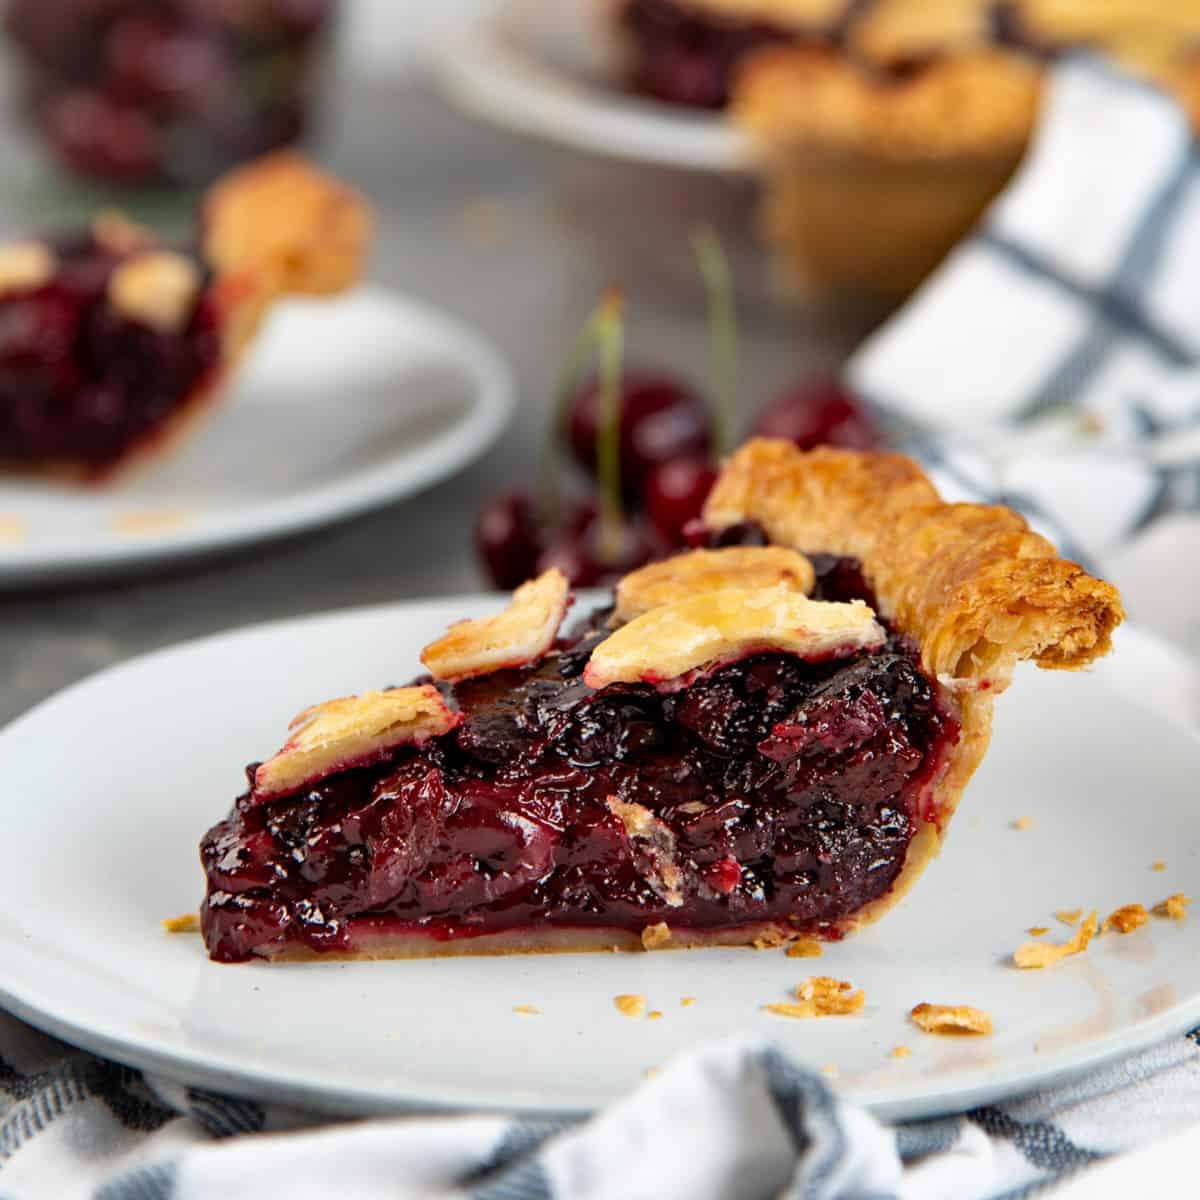
The BEST Homemade Cherry Pie
User Reviews
5.0
3 reviews
Excellent
-
Prep Time
2 hrs 20 mins
-
Cook Time
1 hr 20 mins
-
Additional Time
3 hrs 30 mins
-
Total Time
7 hrs 30 mins
-
Servings
12 slices
-
Calories
321 kcal
-
Course
Dessert, Baked Goods
-
Cuisine
North American, American, Canadian
The BEST Homemade Cherry Pie
Report
My favorite cherry pie recipe with easy homemade cherry pie filling, all encased in a flaky, all butter pie crust. The cooked cherry pie filling is the star, with so much extra flavor!EASY - Easy recipe, especially with the step by step guide for making pie crust. But you can use a storebought pie crust for convenience as well. While I do recommend making the cooked cherry pie filling because of the additional flavor, I also provide the recipe for a simpler no-cook cherry pie filling option.US based cup, teaspoon, tablespoon measurements. Common Measurement Conversions. Weight measurements are recommended for accurate results.
Share:
Ingredients
Pie crust
- 1 recipe double pie crust for 9 inch pie dish
- 1 egg for the egg wash
Cherry pie filling
For an extra juicy, flavorful pie filling
- 1600 g pitted sweet cherries approximately 10 cups
- 200 g sugar 1 cup
- 45 g cornstarch 4 ½ tbsp (packed)
- 1 pinch sea salt
- 30 ml lemon juice 2 tbsp
- 80 mL red wine ⅓ cup
OR for an easy cherry pie filling
- 1000 g pitted sweet cherries approximately 6 cups
- 2 oranges zest only
- 35 g cornstarch 3 ½ tbsp (packed)
- 150 g sugar ¾ cup
- 1 pinch sea salt
- 30 mL lemon juice 2 tbsp
Instructions
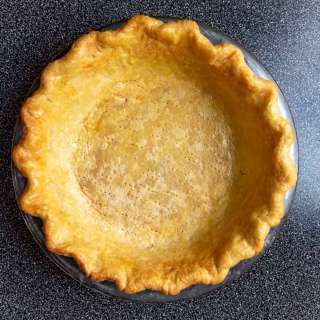
Pie crust
- Follow my detailed all butter pie crust recipe. This recipe makes 2 pie crusts that will be used as the bottom and top crusts for this pie.
- Once the dough is divided into two, wrap and chill (as explained in the pie crust recipe). You can start making the cherry pie filling at this point, while the dough is chilling.
- Roll out 1 portion of chilled pie crust to fit the bottom of the pie plate. The pie crust should be about 3 mm in thickness.
- Line a 9 - 9.5 inch deep pie pan with the pie crust, being careful not to stretch the dough to fit the pan. Instead, carefully lift and place the crust inside the pan to fit.
- Trim the excess pie crust while leaving a ½ in overhang. Do not fold the overhang under, as this is a double crusted pie.
- Chill the pie crust for about 30 minutes. The cherry pie filling should be ready after the pie crust has been chilled.
Pre-cooked, extra flavorful cherry pie filling
- Follow my recipe for homemade cherry pie filling to make the precooked cherry filling. Due to a portion of cherries being cooked down to form a jam-like base, along with wine, this filling has a more concentrated, complex flavor profile.
- This recipe can be made while the pie is chilling in the fridge, or the day before.
- Allow the pie filling to cool down to room temperature, or let it chill in the fridge overnight.
OR easy cherry pie filling
- This pie filling is easier to make. It makes a very thick, sweet pie filling with lovely orange flavor notes. As the filling will be thickened in the oven, I don’t recommend adding red wine to the filling, since this can create too much liquid.
- Pit the sweet cherries and place them in a large bowl.
- Whisk the salt, sugar, and cornstarch together in a separate bowl. Add this to the cherries.
- Next, add the orange zest and lemon juice and mix well to combine.
- The pie filling is now ready to be added to the pie crust.
Assembling the pie
- Preheat oven to 425°F / 220°C. Place a baking tray in the bottom third oven rack in your oven. The baking tray must be preheated for a minimum of 30 minutes. This is important to achieve a flaky pie crust.
- Take the second portion of pie dough from the fridge. On a lightly floured surface, roll out the pie crust to about a 3 - 5 mm thickness.
- Once the pie crust has been rolled out, cover it and place it in the fridge while you get the pie ready.
- Take the chilled bottom pie crust from the fridge.
- Fill the crust with the cherry pie filling.
- Top the pie with the second rolled out pie crust. You can either cut the pie crust into strips to create a lattice topping, or a solid pie crust (with vents), or cut out shapes and top the filling with abstract shapes as a decoration (see pictures in the post for reference).
- Press down on the edges of the pie crust with a fork to seal the top crust to the bottom crust. You can also use a little water to help the crusts stick together.
- Trim the excess of the top crust to match the bottom. Now, roll or fold the excess crust under to create a thick pie edge and to properly seal the edges.
- Place the pie in the fridge for about 30 - 60 minutes for the pie crust to become firm again.
Baking the pie
- Whisk an egg for the egg wash. Brush the top of the pie crust with the egg wash with a pastry brush. This will create a lovely golden sheen when baked.
- OPTIONAL - Sprinkle raw sugar on top.
- If you topped your cherry pie with a solid pie crust, use a knife to cut a few vents, to allow excess air and moisture to escape.
- Place the pie pan on top of the preheated pizza stone or baking tray, and close the oven door.
- Lower the heat to 350°F / 180°C, and bake the pie for 45 - 60 minutes. If the pie crust is at risk of burning at any point, cover the top with aluminum foil.
- Once baked, remove the pie from the oven and let it cool down and rest until the pie is at room temperature.
- As the filling cools down, it will set better. If the pie is warm, the filling will be more liquidy.
- Cut the pie into slices and serve.
Notes
- The pie filling (cooked version), and the homemade pie dough can be made 1 - 2 days ahead of time and kept in the fridge.
- You can also line your pie pan with the dough and keep it in the fridge for about 1 - 2 days. But make sure the whole pan is covered well with plastic wrap, because any exposed areas will dry out and become crumbly.
- Pie leftovers can also be kept in the fridge for up to 5 days (assuming the pie filling was made a day ahead). Just make sure the slices are stored in an airtight container.
Nutrition Information
Show Details
Serving
1slice
Calories
321kcal
(16%)
Carbohydrates
58g
(19%)
Protein
3g
(6%)
Fat
9g
(14%)
Saturated Fat
3g
(15%)
Polyunsaturated Fat
1g
Monounsaturated Fat
4g
Sodium
140mg
(6%)
Potassium
340mg
(10%)
Fiber
4g
(16%)
Sugar
34g
(68%)
Vitamin A
86IU
(2%)
Vitamin C
10mg
(11%)
Calcium
25mg
(3%)
Iron
1mg
(6%)
Nutrition Facts
Serving: 12slices
Amount Per Serving
Calories 321 kcal
% Daily Value*
| Serving | 1slice | |
| Calories | 321kcal | 16% |
| Carbohydrates | 58g | 19% |
| Protein | 3g | 6% |
| Fat | 9g | 14% |
| Saturated Fat | 3g | 15% |
| Polyunsaturated Fat | 1g | 6% |
| Monounsaturated Fat | 4g | 20% |
| Sodium | 140mg | 6% |
| Potassium | 340mg | 7% |
| Fiber | 4g | 16% |
| Sugar | 34g | 68% |
| Vitamin A | 86IU | 2% |
| Vitamin C | 10mg | 11% |
| Calcium | 25mg | 3% |
| Iron | 1mg | 6% |
* Percent Daily Values are based on a 2,000 calorie diet.
Genuine Reviews
User Reviews
Overall Rating
5.0
3 reviews
Excellent
Other Recipes
You'll Also Love