Caramel Apples Recipe
User Reviews
5.0
6 reviews
Excellent
Caramel Apples Recipe
Report
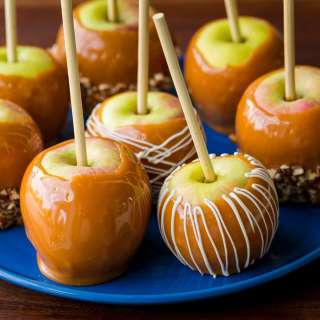
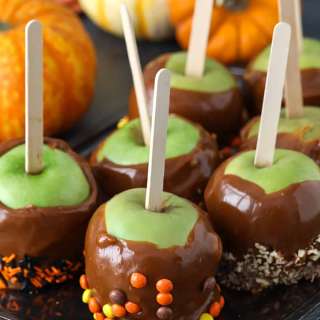
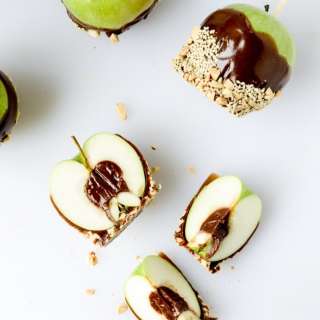
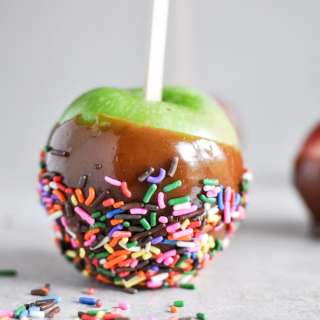
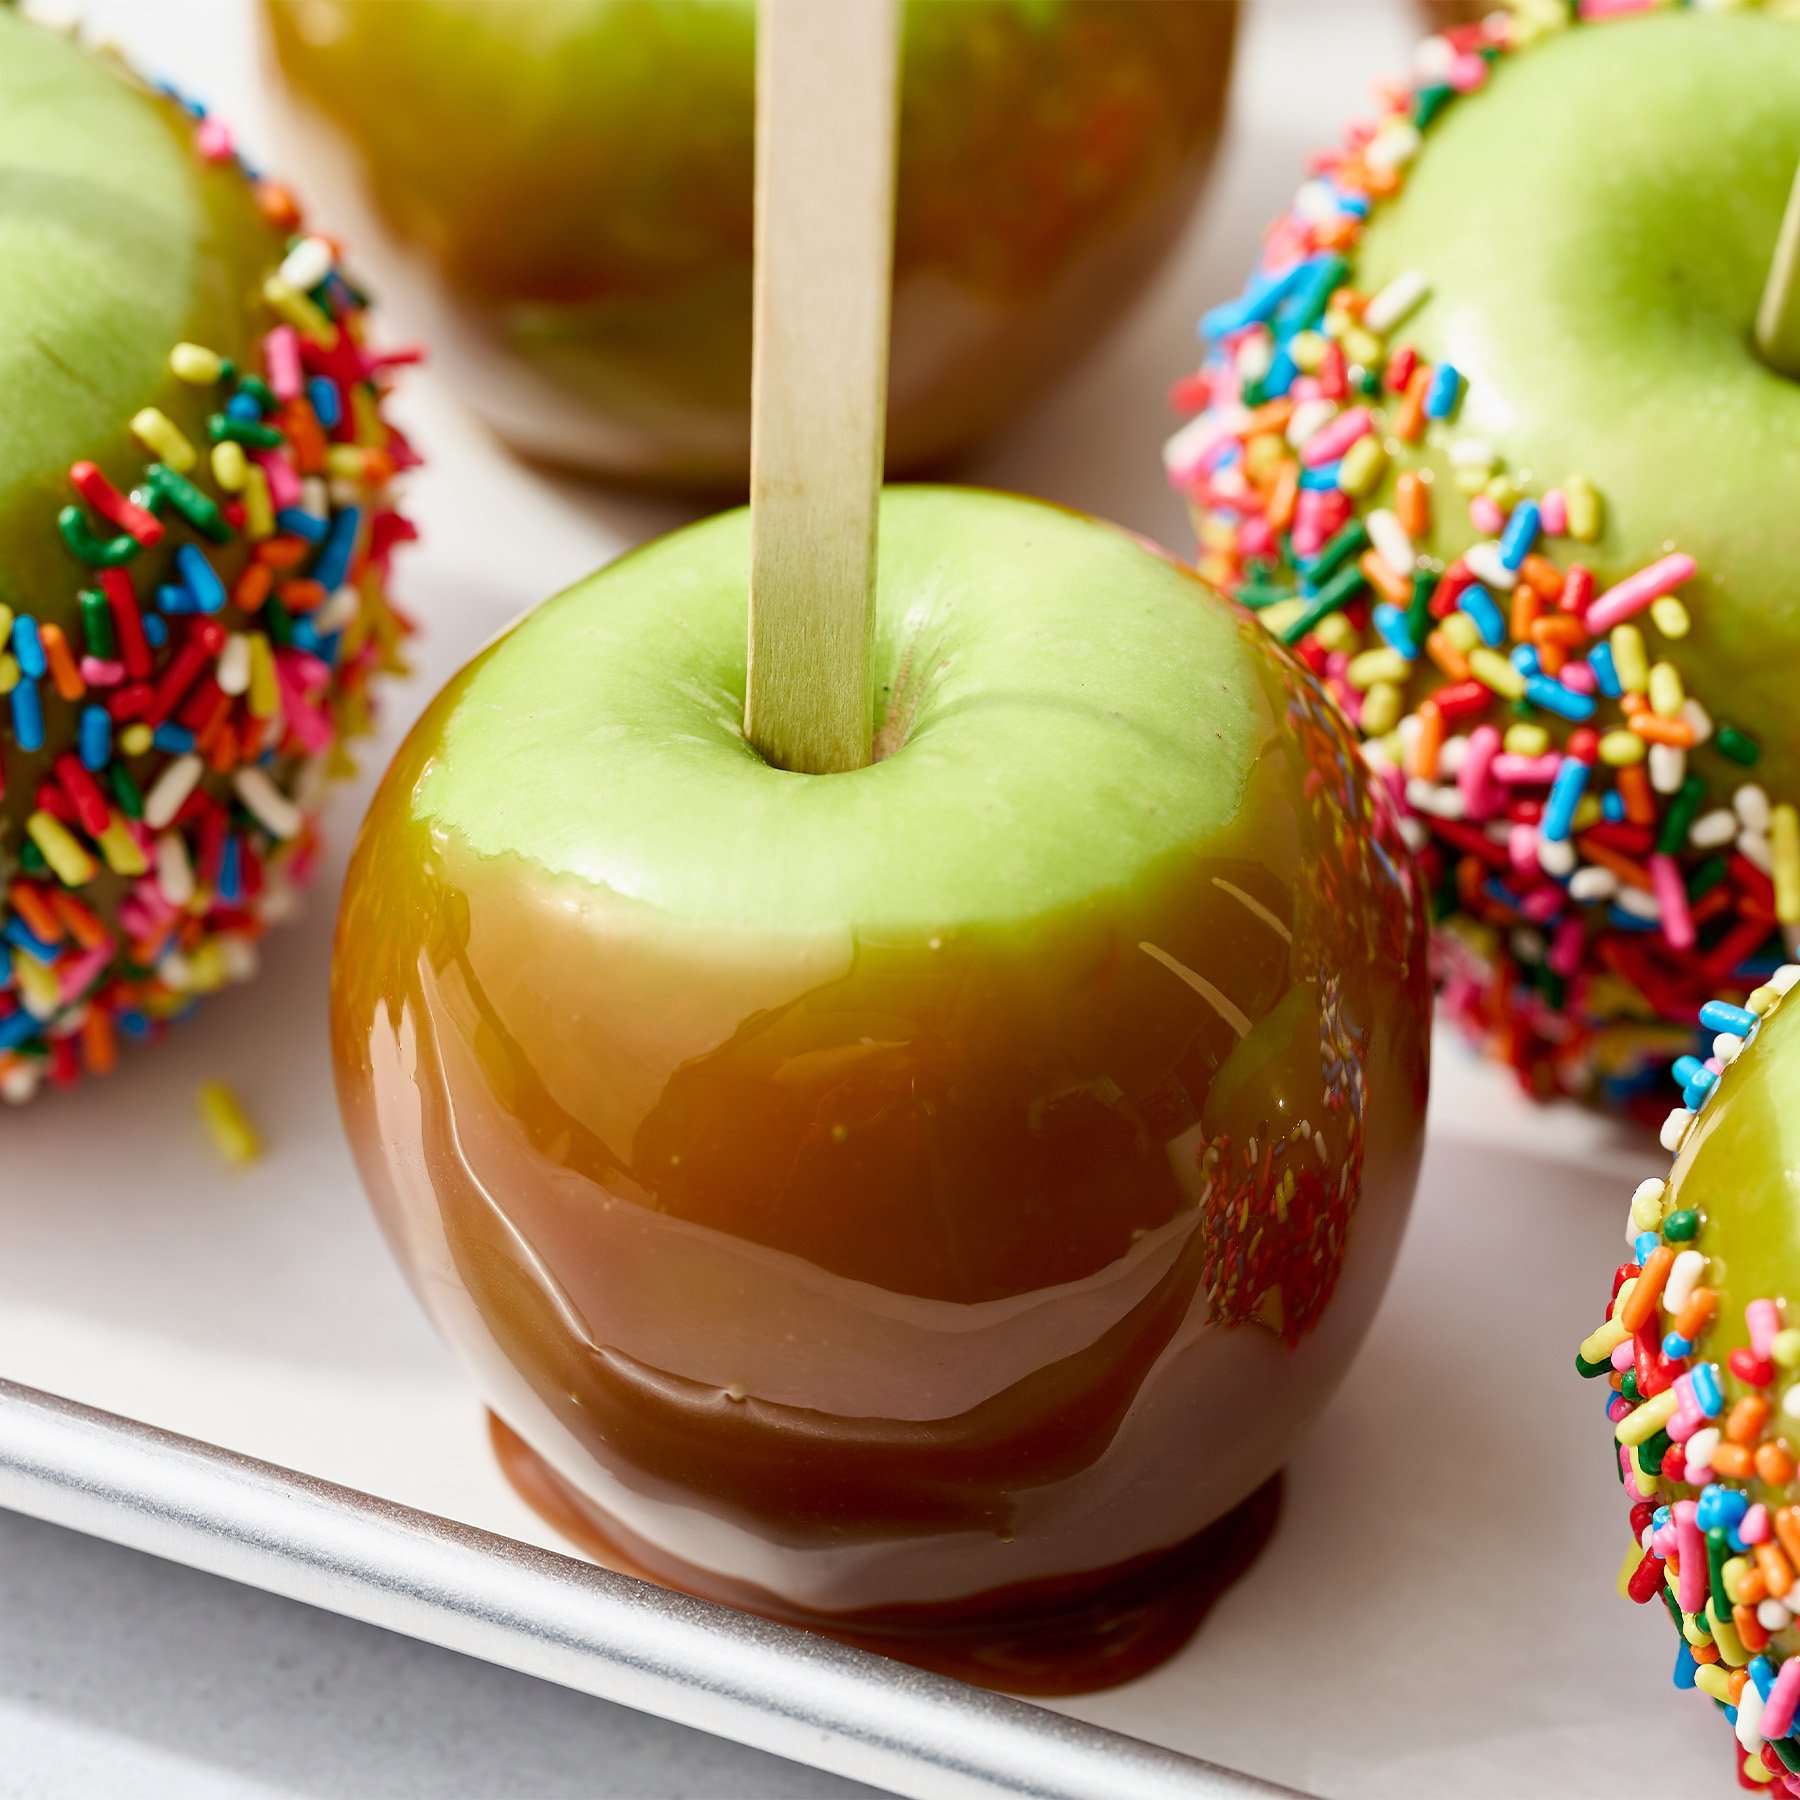
How to Make Caramel Apples! The decadent caramel against the slightly tart, crunchy apple is so much fun to enjoy in the fall. This easy Caramel Apples recipe uses a scratch-made caramel that sets perfectly, without being sickly sweet or annoyingly sticky. Add chocolate, nuts, sprinkles, crushed Oreos, or any other toppings you desire!
Share:
Ingredients
For the caramel apples:
- 6-7 apples (such as Granny Smith or Honeycrisp), refrigerated until cold (amount of apples used may vary due to differences in size)
- 1/2 cup (115 grams) water
- 1 ⅓ cups (255 grams) granulated sugar
- 1 teaspoon kosher salt
- 1 cup + 2 tablespoons (255 grams) heavy cream, cold
- 1 teaspoon vanilla
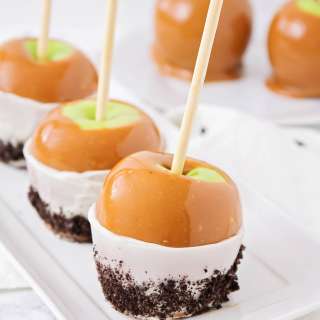
Topping ideas:
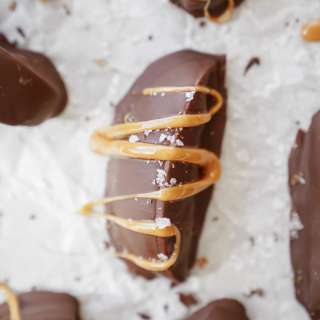
- Melted chocolate
- Reese's Pieces
- M&Ms
- Oreos
- Rainbow sprinkles
- mini chocolate chips
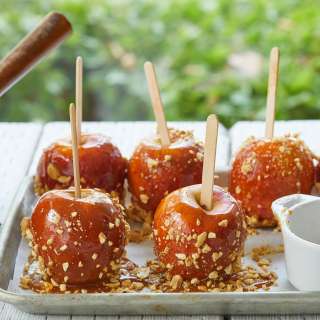
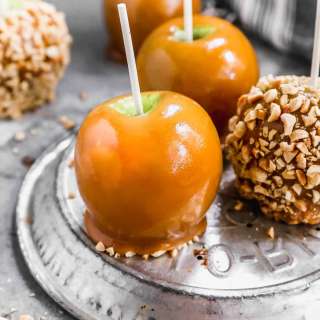
- chopped nuts
Instructions
Prepare the apples:
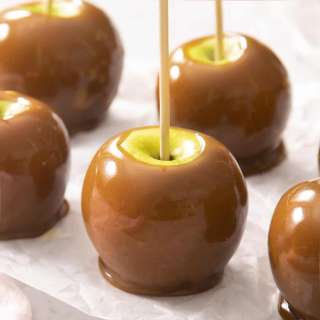
- Line a baking sheet with parchment paper. Over high heat, bring a large pot of water to a boil (the water should be deep enough in the pot to submerge an apple). As the water heats, remove the apple stems from each apple and insert a popsicle stick about 3/4 down into each apple. Once the water has come to a boil, turn off the heat. Submerge each apple for 15-20 seconds while holding onto the popsicle stick. This won’t cook the apples at all, but will remove any wax on the apples, helping the caramel adhere to the apples. Place the apples on the parchment-lined baking sheet.
- Once they're just warm to the touch, thoroughly dry the apples with a paper towel. Store in the fridge until the caramel is ready for dipping.
Make the caramel:
- In a medium stainless steel heavy-duty saucepan, combine water, sugar, and salt over medium heat. Stir frequently with a whisk until the sugar has dissolved completely. The mixture should begin to boil after approximately 4 minutes.
- Once the mixture has come to a boil, attach a candy thermometer to the pan, making sure it’s not touching the bottom of the pan. Let the mixture simmer without stirring until the syrup has become dark brown in color and the temperature is about 315°F (8-10 minutes).
- Carefully add the cold heavy cream to the pan. The mixture will begin to pop and bubble at this point. Constantly stir the mixture with a silicone whisk until the caramel reaches 250°F (about 7-9 minutes).
- Remove caramel from heat and carefully stir in the vanilla. The mixture will bubble slightly as the vanilla is added. Be careful not to stir too much as this can create air bubbles in the caramel. Carefully transfer the caramel to a heat-resistant bowl. Cool for 5-10 minutes, or until just warm.
- As the caramel cools, prepare your additional toppings, if using.
Dip the apples:
- Holding the caramel apple stick, quickly dip the cold apples one at a time into the just-warm caramel, tilting the apple as needed to coat all sides of the apple. Let the excess caramel fall off by either swirling the apple around or gently scraping the bottom of the apple against the edge of the bowl. Place the apple back on the parchment-lined sheet tray to fully set. Repeat with the remaining apples.
- If you wish to add additional toppings (such as nuts, crushed Oreos, sprinkles, etc.), immediately roll the freshly-dipped apples in the toppings after coating in caramel, as the caramel will set quickly. If you’d like to dip your caramel apples in chocolate, allow 10 minutes for the caramel to fully set before dipping in or drizzling with chocolate.
- If at any point you notice your caramel beginning to thicken (the cold apples can cool the caramel quickly), reheat in the microwave for about 10 seconds before dipping the remaining apples.
- Allow caramel apples to fully set. If not enjoying immediately, store the apples wrapped individually in plastic wrap in the fridge. Apples can be stored in the fridge for up to 1 week, tasting just as fresh as the day they were made. Allow to sit at room temperature for about 10 minutes before enjoying.
Equipments used:
Notes
- Don't skip lining your baking sheet with parchment paper! Wax paper or foil will stick to the caramel. Placing the wet caramel apple on a baking sheet without parchment paper will result in caramel apples that are completely stuck to the tray.
- Keep a silicone pastry brush and a small bowl of water nearby as you make the caramel. If you start to notice crystalized bits hardening on the sides of your saucepan, brush them away with the wet pastry brush, to avoid the crystalized bits ending up on your caramel apples. More info on this, and preventing seized caramel, in the Sprinkle of Science box (above the recipe).
Genuine Reviews
User Reviews
Overall Rating
5.0
6 reviews
Excellent
Other Recipes
You'll Also Love