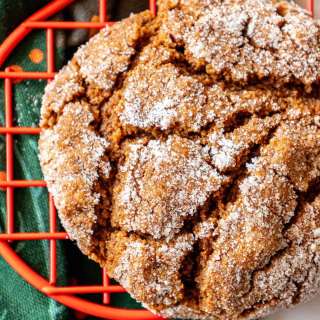
Classic Chewy Gingerbread Cookies
User Reviews
4.9
30 reviews
Excellent
-
Prep Time
2 hrs
-
Cook Time
mins
-
Chill Time
1 hr
-
Total Time
3 hrs 8 mins
-
Servings
30
-
Calories
222 kcal
-
Course
Baked Goods
-
Cuisine
American
Classic Chewy Gingerbread Cookies
Report
Soft and chewy cutout gingerbread cookies filled with plenty of ginger and warming spices! Decorated with a sweet, soft royal icing and topped with cinnamon candies, these gingerbread men are a nostalgic favorite Christmas cookie that everyone adores!
Share:
Ingredients
Gingerbread Cookies
- 1 cup unsalted butter softened to room temp
- ⅔ cup light brown sugar packed
- ⅓ cup granulated sugar
- 1 cup unsulphered molasses
- 2 large egg yolks whites discarded or saved for another use
- 1 teaspoon vanilla extract
- 5 cups all-purpose flour
- 3 ½ teaspoon ground ginger or to taste
- 2 teaspoon ground cinnamon
- 1 teaspoon salt
- ½ teaspoon baking powder
- ½ tsp baking soda
- ¼ teaspoon allspice
- ¼ teaspoon ground nutmeg
Royal Icing:
- 1 ⅔ cup confectioners' sugar sifted
- ¼ teaspoon salt
- 1 ½ teaspoon light corn syrup
- ½ teaspoon vanilla extract
- 3 tablespoons milk
- Red and green food coloring gel recommended
- red cinnamon candies optional but recommended
- Red and green sprinkles or sanding sugar optional but recommended
Instructions
Cookie Dough
- To the bowl of a stand mixer fitted with a paddle attachment, or large bowl and heavy duty handheld electric mixer, add the butter, brown sugar, sugar, and beat on medium-high speed for 3-4 minutes or until smooth and creamy. Scrape the sides down.
- Add the molasses, egg yolks, vanilla, and beat on medium-high speed for another minute to fully incorporate; set aside.
- To a separate, medium sized bowl, whisk together the flour and the remaining dry ingredients.
- Once combined, add to the wet ingredients.
- Mix on medium-low speed to avoid whipping flour everywhere for about 1 minute or until the flour is just incorporated and then mix just until the flour is incorporated. Do not overmix as the cookies will become hard rather than soft and chewy.
- Remove the dough from the mixing bowl and roll into a rough disc-like patty shape, about 3 or 4 inches thick. Wrap tightly in plastic wrap and place it in the fridge to chill for at least one hour, or up to overnight.
Rolling Out The Dough
- Once the dough has chilled, remove it from the fridge, preheat the oven to 350F, and prep several baking sheet pans by lining them with Silpat liners or parchment paper and spraying them with baking spray; set aside.
- Place the dough disc onto a lightly floured surface. For the first roll out, you can lightly sprinkle the top of the disc with flour. Using a rolling pin, roll out into a rough rectangle about ⅛” thick.
- Using a 3.75-inch gingerbread cookie cutter, cut as many cookies out of the dough as you can. Be sure not to overlap the cutter onto any of the previously cut out cookies. If you accidentally cut out one cookie on top of another, simply roll them back into the dough after you have removed all of the other good cookies.
- Once you have cut out all the cookies possible, gently remove all of the remaining dough from around the cookies. Doing this makes it easier to pick the cookies up.
- Place all of the cut out cookies onto the prepared baking sheets ensuring to space them about ½” apart.
- Roll the remaining dough back into a ball to roll out again.
- Cut out as many cookies as possible before repeating the same steps until all of the cookie dough is used. I don't re-roll the dough additionally after this second roll out because there's usually hardly enough left to bother. But do as you see fit for the amount of dough you have leftover.
Baking
- Place into the oven to bake for 8-9 minutes. The cookies will still be soft and may not be browned around the edges when they are baked, this is fine. The longer you bake these cookies, the harder and crunchier they get. Tip - For optimal results, bake one sheet of cookies at a time, in the center rack, rotating once midway though cooking. If you have the space for it in your fridge, place the cookie sheets in waiting in the fridge; if not that's fine. Cold dough always spreads less than warm dough.
- Once baked, remove from the oven and place onto a cooling rack to cool completely. Cool cookies completely before icicng them. While you wait, make the icing.
Royal Icing
- In a medium-sized mixing bowl, whisk together the confectioners' sugar and salt.
- Add the corn syrup, vanilla, and whisk.
- Add the milk and whisk extremely well until a smooth frosting has formed. This will take a few minutes so don’t get impatient with it and add milk. The consistency of the frosting should be that of toothpaste. It should be thick enough to have to use some pressure to push it out of a piping bag and should not be thin enough to spill out.
- Equally divide the icing into 3 bowls.
- Add a little bit of red food coloring to one bowl and green food coloring to another bowl. Whisk together well to fully and evenly color all of the icing.
- Once the icing is colored, spoon into 3 separate piping bags. Tip - You can use plastic baggies however they are more fragile and more prone to bursting or rupturing with squeezing pressure so use at your own risk.
Decorating
- Snip a small hole in the bottom of each piping bag. Tip - The larger the hole you snip into the bag, the more icing will come out. When the hole is large and the icing comes out very thick, it makes it harder to be precise. So start with a small snip before cutting it larger. To make it easier for decorating, place each of the bags of frosting upright into 3 separate cups. Doing this will keep the frosting in the bags and not drizzle or leak out.
- To ice, hold the piping bag at a slightly tilted angle about ⅛” away from the cookie. Gently squeeze the piping bag to pipe the frosting in whatever design you so desire. See Notes Below for 6 Decorating Ideas.
Storage
- Gingerbread cookies keep amazing well airtight at room temp for up to one month. If you don’t seal them in an airtight container or ziptop bag, they could actually become too soft to the point of getting soggy. Just seal them well and you will be fine.
- I don’t freeze the cookies because they do keep so well at room temp, I’ve never felt the need to freeze them, or the unbaked dough, although both are possible.
Notes
- Six Decorating Ideas:
- Pipe a thin, white border slightly inside of the cookie edge around the entire cookie. Add two eyes, a smile, and 3 dots that will act as glue for buttons. Add 3 red candies onto each dot for buttons. Pipe scalloped green line halfway in on the arms and legs.
- Pipe a thin, white border slightly inside of the cookie edge around the entire cookie. Add two eyes and a smile. Alternate using the green and red frosting for the buttons. Add a scalloped red line halfway in on the arms and legs. Add a scalloped green line next to the red line.
- Pipe a thin, white border slightly inside of the cookie edge around the entire cookie. Fill the entire cookie with frosting. Do not skip adding the border as just filling the cookie with frosting will cause it to lose its shape and frosting may spill off of the cookie. Use a toothpick if necessary to join the inside frosting to the border or to eliminate any bumps or bubbles. Pipe a thin red border around the entire cookie. Add two red eyes, a smile, some buttons and scalloped lines on the arms and legs.
- Use the white frosting to pipe two eyes, a smile, and some scalloped lines on the arms and legs. Add green dots for buttons.
- Use the white frosting to pipe two eyes, a smile and some scalloped lines on the arms and legs. Pipe a red scalloped line next to the white scalloped lines on the arms and legs. Pipe another white scalloped line next to the red lines. Pipe three green dots for buttons.
- Pipe a border for a glove on each arm. Start by piping a smooth edge around the sides before adding a scalloped edge at the top closer to the body. Fill in with white frosting. If necessary, use a toothpick to smooth out any bumps or gaps in the frosting. Sprinkle with red sprinkles. Repeat the same steps using the white frosting for boots. Sprinkle with green sprinkles. Add a green scalloped edge next to the red scalloped edge for the gloves. Add a red scalloped edge next to the green scalloped edge for the boots. Add three red dots for glue for the buttons. Place three red candies onto the dots. Add a white smile and eyes.
- When making the dough, do not add any extra flour even if the dough seems too soft. Adding more flour will cause them to be hard and crunchy cookies. The dough should be soft and will firm up when in the fridge.
- If the cookie dough seems to be extremely difficult to roll out (stiff and hard), simply let the dough rest and warm up for a few minutes. This makes it more pliable.
- Do not let the dough get too warm however as when you cut the cookies, they can get stuck to the cookie cutter and lose their shape easier.
- When rolling the cookies out, if they are sticking to the rolling pin, the dough may be too warm. Leave it on the cutting board and pop it back into the fridge for 10 minutes to chill. If they still seem to stick, you can very lightly sprinkle the top with some flour.
- If your royal icing is too thin, add in powdered sugar a tablespoon at a time ensuring that you whisk really well each time. You do not want such a thick icing that it cannot be piped.
- If your royal icing is too thick, add in a ½-1 tsp of milk and whisk well each time so as not to thin it down too much.
- Remember when adding the food coloring to the royal icing, if you are using a liquid and not a gel coloring, it will thin down the icing so avoid adding too much. This is why I recommend gel food coloring, apart from the better and more vibrant color results. Be sure to mix well after each addition of coloring.
Nutrition Information
Show Details
Serving
1
Calories
222kcal
(11%)
Carbohydrates
38g
(13%)
Protein
3g
(6%)
Fat
7g
(11%)
Saturated Fat
4g
(20%)
Polyunsaturated Fat
2g
Cholesterol
35mg
(12%)
Sodium
130mg
(5%)
Fiber
1g
(4%)
Sugar
21g
(42%)
Nutrition Facts
Serving: 30Serving
Amount Per Serving
Calories 222 kcal
% Daily Value*
| Serving | 1 | |
| Calories | 222kcal | 11% |
| Carbohydrates | 38g | 13% |
| Protein | 3g | 6% |
| Fat | 7g | 11% |
| Saturated Fat | 4g | 20% |
| Polyunsaturated Fat | 2g | 12% |
| Cholesterol | 35mg | 12% |
| Sodium | 130mg | 5% |
| Fiber | 1g | 4% |
| Sugar | 21g | 42% |
* Percent Daily Values are based on a 2,000 calorie diet.
Genuine Reviews
User Reviews
Overall Rating
4.9
30 reviews
Excellent
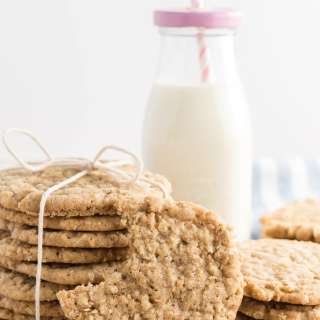
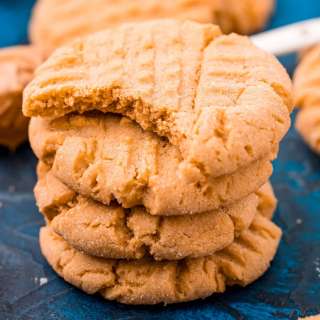
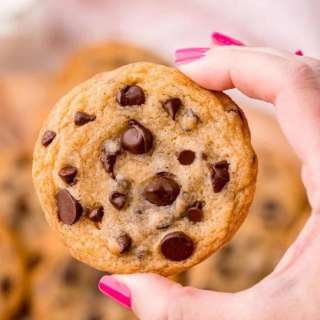
Other Recipes
You'll Also Love