DIY Fall Leaf Bowl
User Reviews
4.2
102 reviews
Good
-
Cook Time
30 mins
-
Additional Time
3 hrs
-
Total Time
3 hrs 30 mins
-
Servings
1 Bowl
DIY Fall Leaf Bowl
Report
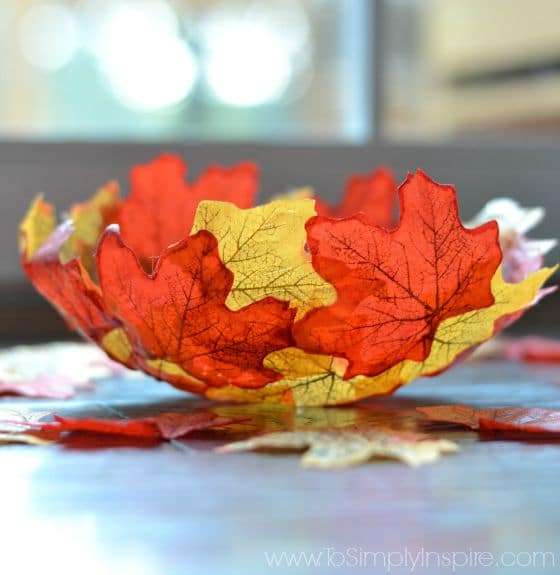
This DIY Fall Leaf Bowl uses a balloon base coated with Modge Podge to attach artificial leaves, creating a decorative bowl with a seasonal look. The technique produces a lightweight container suitable for holding small items like candy or pine cones. The bowl's texture reflects the layering of leaves fused together, suitable as autumn decor rather than a functional dishware piece.
Description
The DIY Fall Leaf Bowl combines an inflated balloon as a mold with adhesive and artificial leaves to shape a decorative container. The method starts by partially coating the balloon with glue and carefully pressing leaves onto the surface, forming a semi-rigid shell once dried. Popping the balloon releases the formed bowl, which reveals a textured leafy outer surface. Finished, it serves well as a centerpiece or holder for lightweight seasonal items like candies or pine cones. The use of Modge Podge secures the leaves firmly, offering durability to the craft. Drying time is key to ensure the bowl maintains its shape when removing the balloon.
Share:
Ingredients
- Balloon
- Modge Podge
- Artificial leaves
Instructions
- Blow up the balloon and tie it.
- Insert it, top-down into the bowl.
- We made a little plate out of aluminum foil to put the Mod Podge on. (You would also use a bowl or cup)
- Spread the Mod Podge onto the balloon, starting at the top and working the way down about ¼ of the way down (or however "deep" you want your bowl).
- Apply the leaves one at a time, applying more Mod Podge to each leaf as you apply.
- Cover the entire area you want for your bowl. Be sure not to leave any open spots.
- Let it dry for a couple of hours. We let ours dry for about 3 hours.
- Then, simply pop the balloon and carefully peel it away from the leaves.
- Fill it with candy or display little pine cones!
Genuine Reviews
User Reviews
Overall Rating
4.2
102 reviews
Good
Other Recipes
You'll Also Love