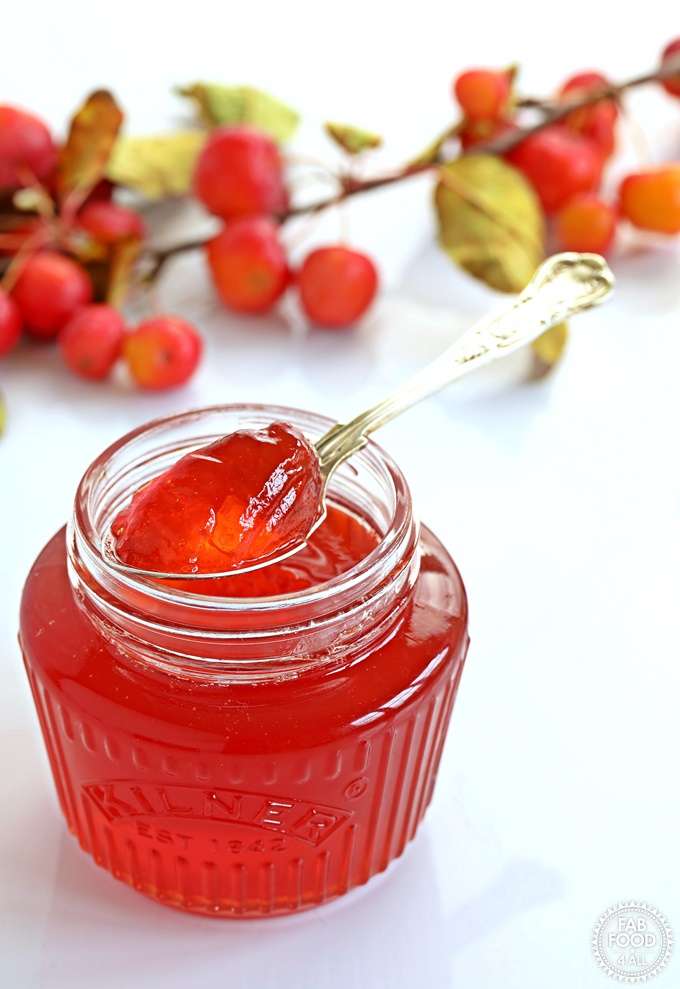
Easy Crab Apple Jelly
User Reviews
5
-
Prep Time
40 mins
-
Cook Time
1 hr
-
Additional Time
12 hrs
-
Total Time
13 hrs 40 mins
-
Servings
8 small jars
-
Course
Breakfast, Condiments
-
Cuisine
British
Easy Crab Apple Jelly
Description
This recipe starts by simmering halved crab apples and lemon slices in water until the fruit breaks down and releases pectin, crucial for jelly setting. After cooking, the mixture is strained through a jelly bag or suitable substitute without squeezing to keep the jelly clear. The collected juice is measured precisely, and sugar is added at roughly 78% of the juice weight to ensure proper gelling during boiling.
The juice and sugar mixture is gently heated with stirring to dissolve all crystals, then brought to a rolling boil until reaching the jelling point. The controlled boiling is essential to achieve a firm jelly that holds shape once cooled. Sterilized jars are prepared beforehand for safe storage, ensuring freshness and preventing spoilage.
The resulting crab apple jelly offers a bright tartness balanced with sweetness and a smooth texture suitable for toast or accompanying savory dishes, capturing the seasonal fruit's flavor.
Ingredients
- 2 kg crab apples halved (washed & drained, beards removed, leave stems in tact)
- 1 lemon sliced, unwaxed
- 1.365 kg granulated sugar approx., will vary, see instructions below
- 2.5 L water
Instructions
- Place the halved crab apples, lemon slices and 2.5 litres of water into a preserving pan or similar.
- Bring to the boil and then simmer for 25 – 30 mins until pulpy. Use a potato masher or side of a wooden spoon to squash the crab apples as they cook.
- Pour the fruity liquid into a jelly bag (or see my hacks in Notes section if you don’t have one) and leave to drain over a large pan or bowl overnight. Do not, repeat not, squeeze the bag or you will have cloudy jelly.
- The next day, measure the juice (mine yielded 1.75 L).
- Pour juice into a preserving pan with 450 g of granulated sugar for every 575 ml of juice. The easiest way to work this out is to calculate 78% or your juice figure which will give you your sugar weight. Tip: ask Google to do the maths!
- Place the pan over a gentle heat and stir until all the sugar has dissolved. The pan must not bubble. Drag a wooden spoon over the pan to check there are no more sugar crystals.
- Bring the pan to a rolling boil, stirring frequently until setting point is reached, which is 105 C. My jelly reached this stage at 21 mins but this will vary so if you don’t have a digital thermometer best to check a few minutes before.
- Remove the pan from the heat and test for set by placing a few drops of jelly on a chilled sauce and place in fridge for 30 seconds.
- The jelly is ready if a crinkle forms when you push your finger through it. If it’s not ready, carry on boiling for a minute at a time and re-test until set is achieved.
- Put the jelly on a low heat and remove any scum with a slotted spoon as the jelly otherwise the jelly will start to set and this process will become difficult.
- Keep over a low heat and pots up into sterilised jars to stop the jelly setting before it reaches the jars. Small jars are best, I filled nearly 8.
- Place lids on immediately and allow to cool.
- Store in a cool, dark place where it will keep for 1 year. Once open store in the fridge and use within a few months.
Notes
- Sterilize jars and lids by washing with hot soapy water, rinsing with boiling water, and warming in a 140°C oven for 20 minutes before filling.
- To make a jelly strainer without a jelly bag, line a colander with clean net curtains, muslin, or a tea towel secured tightly, ensuring it is sterilized before use.
- Do not squeeze the jelly bag during draining to avoid cloudy jelly; allow it to drip naturally overnight for best clarity.
User Reviews
Overall Rating
5
You'll Also Love