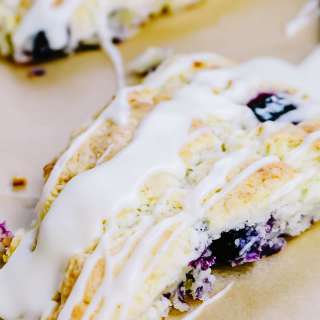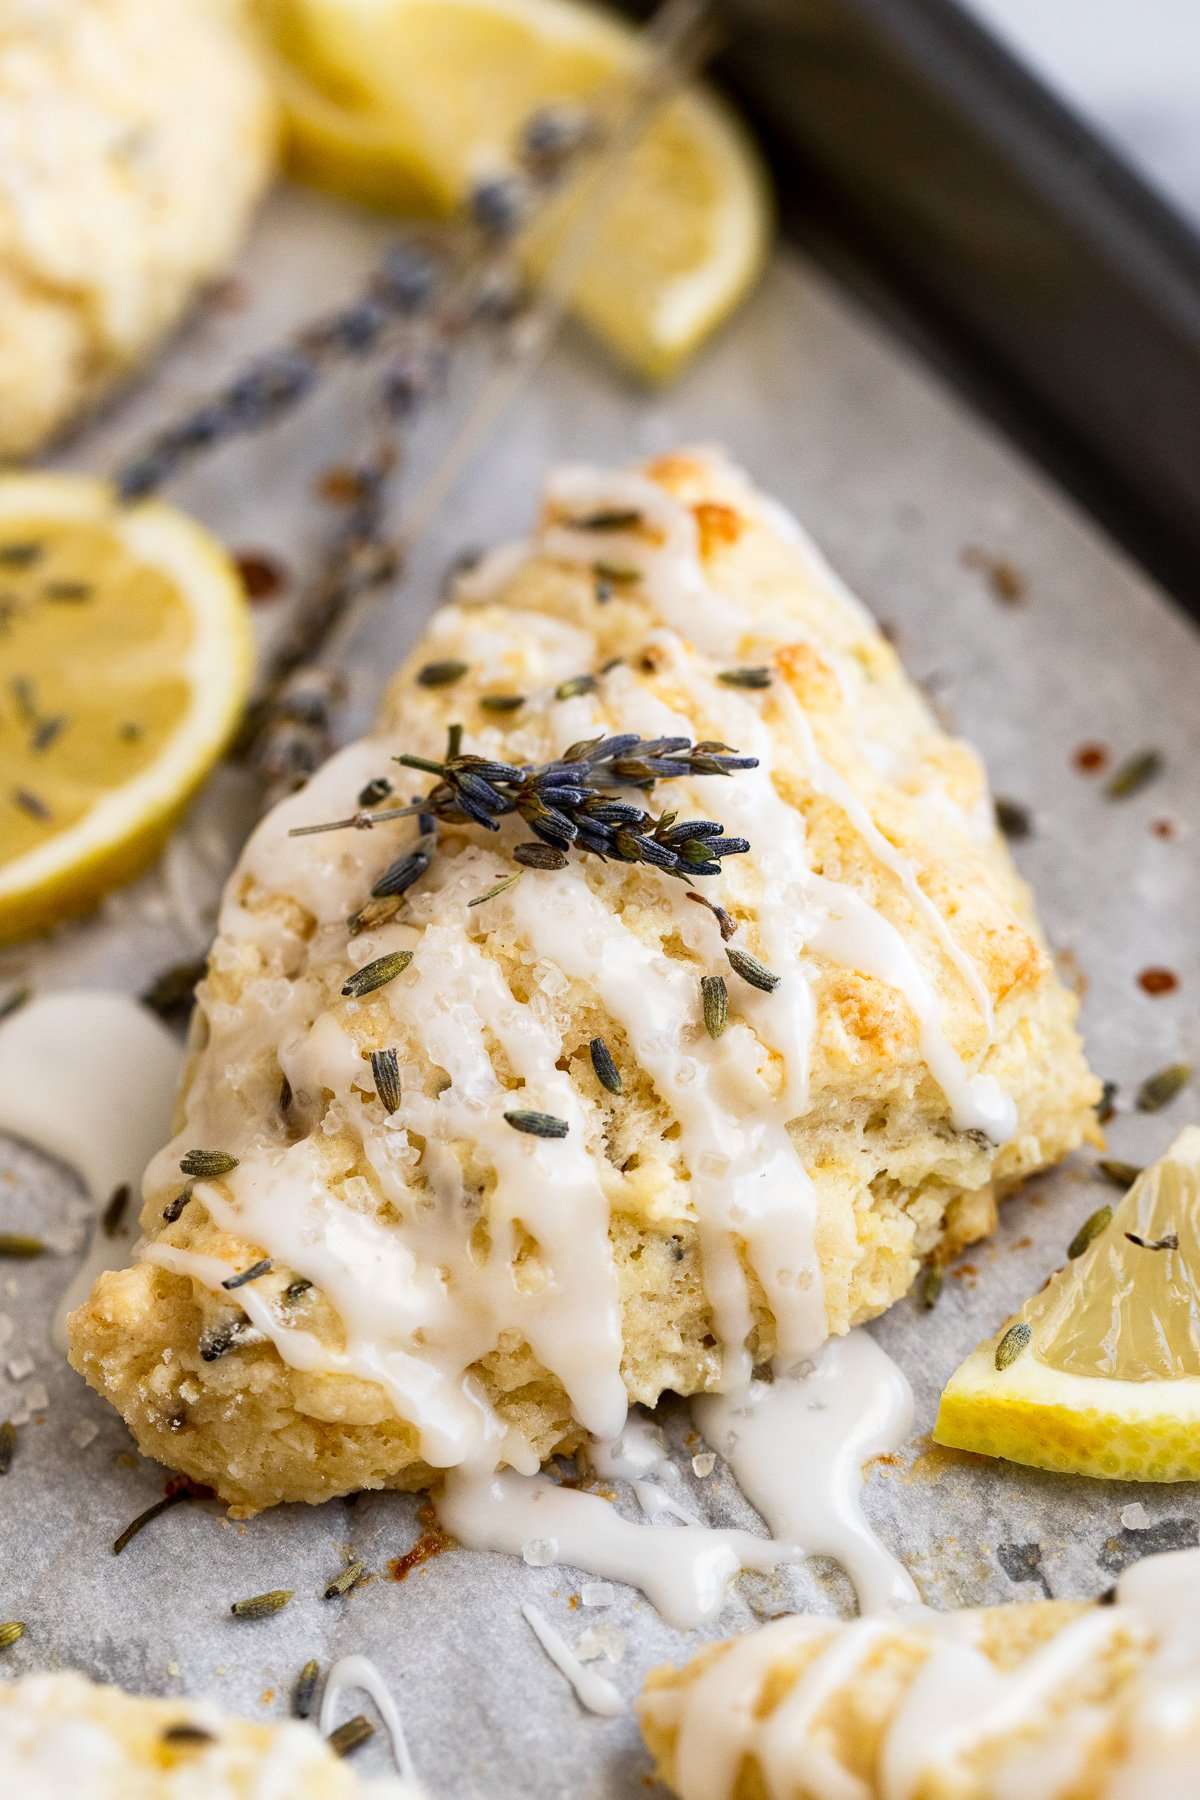
Get the Recipe Lemon Lavender Scones
User Reviews
5.0
Get the Recipe Lemon Lavender Scones
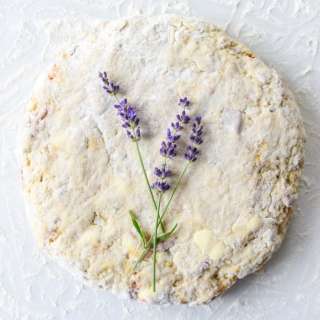
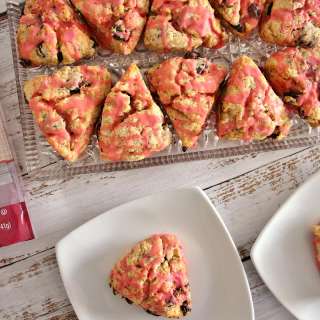
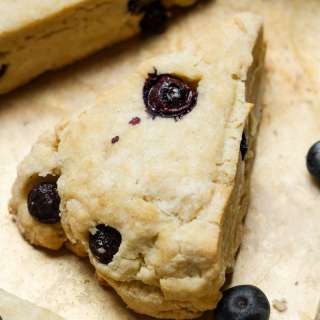
Lemon Lavender Scones are an elegant, bright addition to any spring brunch! Warm and aromatic dried culinary lavender is lightly infused throughout the scones, with a burst of fresh lemon, for the perfect flavor combination. They're soft, tender, and moist, and you'll love the drizzle of sweet icing for an extra special touch. They're also egg-free!
Ingredients
- 1/2 /2 cup cold butter 1 stick, small cubed, see notes
- 1/4 /4 cup granulated sugar
- 2 Tablespoons lemon zest ~3 lemons
- 3/4 /4 cup milk + more for brushing
- 1/4 /4 cup fresh lemon juice
- 1/2 /2 teaspoon vanilla extract
- 2 1/2 /2 cups all-purpose flour
- 1 Tablespoon baking powder
- 1/2 /2 teaspoon baking soda
- 1/2 /2 teaspoon fine sea salt
- 2 1/2 /2 teaspoons dried culinary grade lavender flowers
ICING:
- 1 cup powdered sugar
- 1 - 1 ½ Tablespoons milk sub with lemon juice for extra lemon flavor - but don't use both
- 1 teaspoon lemon zest optional
Instructions
- Preheat the oven to 375°F and line a large baking sheet with parchment paper. Cut the butter into small cubes now and place in the fridge or freezer. Alternatively, grate frozen butter and place back in the freezer until ready to use.
- In a small bowl, combine sugar and lemon zest, rubbing between your clean fingers until a coarse, wet sand-like mixture forms. This step helps infuse the lemon flavor!
- In a separate bowl, combine milk, lemon juice, and vanilla extract. This will form a "buttermilk" like consistency. Place it in the fridge until you're ready to use so it stays cold.
- In a large bowl, whisk together the flour, baking powder, baking soda, salt, dried lavender, and the lemon-sugar mixture.
- Cut the cold butter cubes (or grates) into the flour mixture until a small, pea-sized mixture forms. If needed, you can use your fingers to press it together, but if so, put it back int he fridge to chill the dough before proceeding. You want the dough as cold as possible.
- Gently stir the milk mixture into the flour until just combined and everything is moist. Do not overmix or you'll end up with tough scones.
- Transfer the dough to a lightly floured surface and gently form it together into a ball. Again, do not over-knead it, just gently push the dough together. Press it into a rectangle and fold the two horizontal sides over each other, as though you're folding a pamphlet. This will help form layers.
- Then, press the dough into an 8 x 5 inch rectangle. Cut the rectangle down the middle, lengthwise, to have two long rectangles.
- Then make two horizontal cuts, into thirds horizontally, to create 6 squares.
- Cut each square in half diagonally to form two triangles. This will result in 12 small triangles.
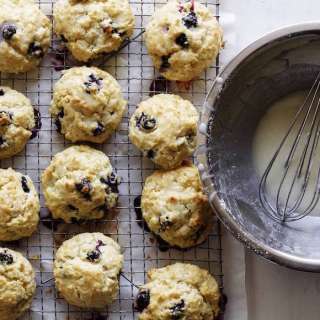
- Use a thin spatula to transfer the scones to the baking sheet. Leave plenty of space in between each one, around 2-3 inches (they will expand when they bake). Brush the tops and sides of the scones evenly with a bit of additional milk to add color as they bake. If using coarse sugar to top, sprinkle on now.
- Bake the scones for 18-22 minutes until the bottoms and tops are slightly golden brown. Remove and let cool slightly before transferring to a cooling rack to cool completely.
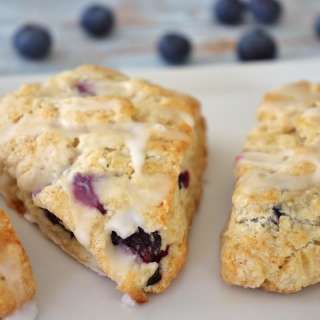
- Icing (optional, but recommended): Stir together powdered sugar, milk (or lemon juice & zest, if substituting it), until combined into a thick but drizzle-able icing. Drizzle on cooled scones and enjoy!
- Store leftovers in an airtight container at room temperature for up to 3 days, or see the notes below for freezing.
Notes
- This recipe was originally published in 2019; the photos and text were updated in 2023 with no changes to the actual recipe.
- Cold Ingredients: Keep all ingredients cold, especially the butter! Cut it into small cubes before beginning the process, and store it in the fridge or freezer. You can also grate frozen butter to spend less time cutting it into the dough.
- Food Processor: You can use a food processor, just be sure to not overwork the dough. The food processor tends to chop the lavender up more, so I like to add a little extra if I'm making the scones this way.
Freezing: they freeze well before and after baking.
Before Baking: Do not brush with milk. Freeze the scones spread apart on a baking sheet, for 1-2 hours. Once they're frozen, transfer them to an airtight, freezer-safe bag for bulk storage. You can bake them from frozen, adding a few minutes to the cooking time, or thaw them overnight in the fridge. After Baking: Do not drizzle the scones with icing if you plan on freezing them after baking. Let them cool completely before freezing. Place them in a freezer-safe bag or airtight container. Thaw at room temperature for a few hours, or place in the microwave on defrost for about 1 minute. You can also warm a batch in the oven at 275°F for 10-12 minutes.
- Before Baking: Do not brush with milk. Freeze the scones spread apart on a baking sheet, for 1-2 hours. Once they're frozen, transfer them to an airtight, freezer-safe bag for bulk storage. You can bake them from frozen, adding a few minutes to the cooking time, or thaw them overnight in the fridge.
- After Baking: Do not drizzle the scones with icing if you plan on freezing them after baking. Let them cool completely before freezing. Place them in a freezer-safe bag or airtight container. Thaw at room temperature for a few hours, or place in the microwave on defrost for about 1 minute. You can also warm a batch in the oven at 275°F for 10-12 minutes.
Nutrition Information
Show DetailsNutrition Facts
Serving: 12scones
Amount Per Serving
Calories 154 kcal
% Daily Value*
| Serving | 1scone | |
| Calories | 154kcal | 8% |
| Carbohydrates | 35g | 12% |
| Protein | 3g | 6% |
| Fat | 0.4g | 1% |
| Saturated Fat | 0.1g | 1% |
| Polyunsaturated Fat | 0.1g | 1% |
| Monounsaturated Fat | 0.04g | 0% |
| Cholesterol | 0.4mg | 0% |
| Sodium | 251mg | 10% |
| Potassium | 40mg | 1% |
| Fiber | 1g | 4% |
| Sugar | 14g | 28% |
| Vitamin A | 6IU | 0% |
| Vitamin C | 3mg | 3% |
| Calcium | 69mg | 7% |
| Iron | 1mg | 6% |
* Percent Daily Values are based on a 2,000 calorie diet.
User Reviews
Overall Rating
5.0
You'll Also Love