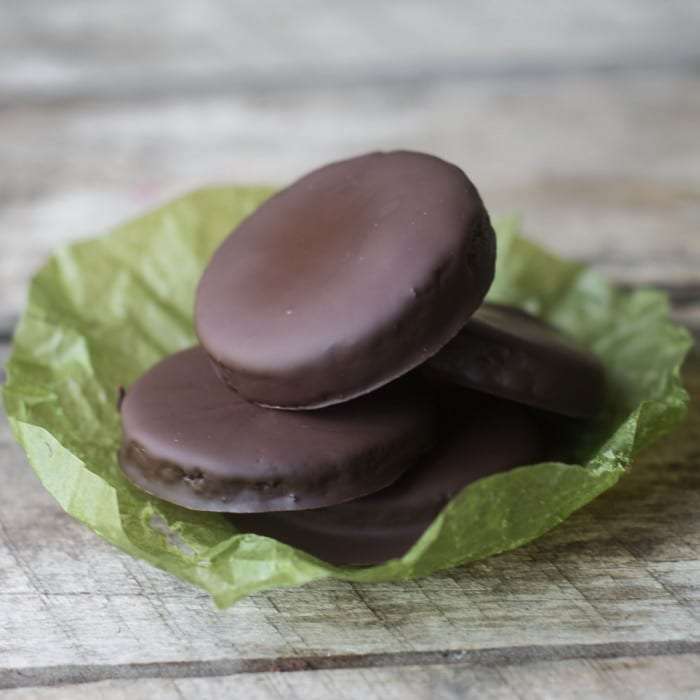
Gluten Free Thin Mint Cookies
User Reviews
3.7
Gluten Free Thin Mint Cookies
Description
These gluten free Thin Mint Cookies start with creaming unsalted butter and sifted confectioners sugar to a fluffy texture, then mixing in salt, vanilla extract, and cocoa powder. Incorporating gluten-free flour binds the dough, which is chilled shortly to allow it to firm enough for rolling. Rolled thin and cut into rounds, the cookies bake crisp in about 10 minutes. Once cooled, they are dipped in a tempered dark or semi-sweet chocolate and vegetable oil blend, flavored with oil-based peppermint extract to avoid chocolate seizing.
The result is a tender yet firm cookie with a rich chocolate layer finished by bright mint notes. Keeping these cookies refrigerated maintains their texture, with some enjoying them slightly frozen. Selecting an oil-based peppermint flavoring is essential to achieve a smooth coating. Handling chocolate carefully also prevents clumping during melting.
These cookies offer a gluten free treat reminiscent of a favorite classic, suitable for sharing or storing in cool conditions. A light dusting of confectioners sugar during mixing and precise chilling times ensure proper texture and ease of handling dough.
Ingredients
- 1 cup butter unsalted, at room temperature, 8 ounces (2 sticks
- 1 cup confectioners sugar sifted
- 1/2 tsp salt
- 1 tsp vanilla extract
- 1 cup cocoa powder sifted, unsweetened
- 1 gluten-free flour 1/2 cup; e.g. Bob's Red Mill Gluten Free Baking Mix
Chocolate coating
- 16 ounces dark chocolate either baking chocolate or chocolate chips (if using the baking squares, cut them into very small pieces before melting, or semi-sweet chocolate
- 1 tsp vegetable oil or coconut oil
- 1/2 --- 3/4 tsp peppermint oil to taste (be sure to use an OIL BASED product, not a water based flavoring, flavoring
Instructions
- Set oven to 350F
- Cream the butter and powdered sugar in the bowl of a stand mixer until fluffy. Beat in the salt, vanilla, and cocoa powder.
- Blend in the flour and combine until fully mixed.
- Turn the dough out onto a floured board and bring together into a flat disk. Wrap in plastic wrap and put in the freezer for 15 minutes. Don't leave it in longer than 15 minutes or it will be too stiff to roll out.
- Roll out the dough on a floured surface to about 1/8 --- 1/4 inch, depending on how thick you like your cookies. Keep the dough moving on the board to prevent sticking. Cut out cookies with a 2" cookie cutter. Place on an unreleased cookie sheet and bake for 10 minutes.
- Cool the cookies completely on a rack before coating.
- Melt the chocolate and vegetable oil in a microwave safe bowl for one minute. Remove and stir to melt. Add another 30 seconds if necessary. Stir until the chocolate is smooth and silky. Sometimes it helps to let the hot chocolate sit for a minute to completely melt all the little lumps. Add the peppermint oil and stir again. If the chocolate seems too thick, add a touch more vegetable oil and microwave another 15 seconds.
- Dip each cookie into the chocolate head first, then flip, and remove using a fork to balance the cookie. Gently rap the handle of the fork against the side of the bowl several times to let the excess chocolate drip off. Set the cookies on a parchment lined surface to firm up. I like to set them in the fridge to completely harden.
- Store the cookies in the refrigerator for best flavor.
Notes
- Use an oil-based peppermint extract or oil to avoid seizing when mixing with melted chocolate.
- Chill dough briefly (15 minutes) to make it easier to roll but not too long to cause stiffness.
- Keep coated cookies refrigerated to maintain crispness; they can also be enjoyed frozen.
- When melting chocolate, ensure utensils and bowls are dry to prevent seizing.
- If crumbs contaminate melted chocolate, melt in two batches to keep coating smooth.
- Butter must be at room temperature for proper dough consistency.
- Bob's Red Mill Gluten Free Baking Mix is recommended but substitutes may work.
User Reviews
Overall Rating
3.7
You'll Also Love











