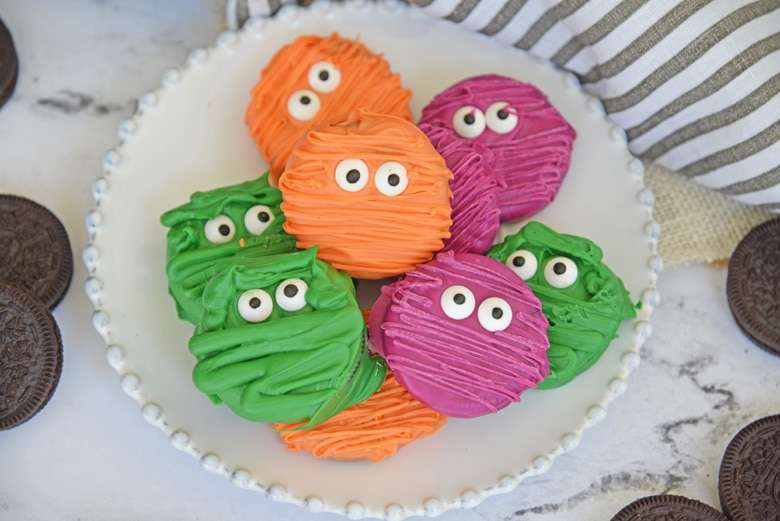
Oreo Mummy Cookies
User Reviews
5
Oreo Mummy Cookies
Description
The assembly of Oreo Mummy Cookies involves melting chocolate wafers and dipping Oreo cookies to coat them completely. Excess chocolate is scraped off before placing the cookies on parchment paper. Candy eyeballs are applied while the chocolate is still tacky to adhere well.
Additional melted chocolate is piped in horizontal lines across each cookie to mimic mummy wrappings, with room for creativity such as adding mouths using icing or other decorations while the chocolate remains tacky. The chocolate coating adds a smooth texture contrasting with the crunchy cookie and creamy filling inside.
These decorated Oreos make for an eye-catching dessert suitable for gatherings or gifting. The process is done in batches to maintain chocolate consistency, and various wafer colors allow for customization of the mummy look.
Ingredients
- 20 Oreo cookies
- 8 ounces chocolate melting wafers , assorted colors or white
- 40 Candy Eyeballs
- candy piping bags
- parchment paper
Instructions
- Working with one color at a time, melt the chocolate according to package directions. If you are using candy wafers (tempered chocolate) then you'll place it in a microwave safe bowl and heat at 50% power for 1 minute, stir and then continue in 15 second intervals at 50% power until smooth and dippable.
- Working batches of 3-4 by dipping each cookie, turning it over to fully coat.
- Place it on a spoon while removing and scrape off excess chocolate from the bottom. Place onto a piece or wax or parchment paper.
- While chocolate it still tacky, attach candy eyeballs.
- Continue with the rest of your cookies.
- Next, melt chocolate in candy piping bags. Start with 45 seconds at 50% power and knead to melt. Continue with 15 second intervals until smooth.
- Cut a small (or large) tip in the bag and move across each cookie horizontally to mimic mummy wrapping.
- Create a mouth with decorating icing or gel or decorate with sprinkles and sanding sugar while chocolate is still tacky.
- Allow to set, then package in layers with parchment or wax paper separating each layer unless you used frosting or gel, in which case I recommend a single layer.
- Store in a cool, dry place, but not in the refrigerator for up to a week.
- If you've tried this idea, come back and let us know how it was in the comments or ratings!
Nutrition Information
Show DetailsNutrition Facts
Serving: 20Serving
Amount Per Serving
Calories 114 kcal
% Daily Value*
| Calories | 114kcal | 6% |
| Carbohydrates | 15g | 5% |
| Protein | 1g | 2% |
| Fat | 6g | 9% |
| Saturated Fat | 3g | 15% |
| Sodium | 57mg | 2% |
| Potassium | 59mg | 1% |
| Fiber | 1g | 4% |
| Sugar | 11g | 22% |
| Calcium | 5mg | 1% |
| Iron | 1mg | 6% |
* Percent Daily Values are based on a 2,000 calorie diet.
User Reviews
Overall Rating
5
You'll Also Love











