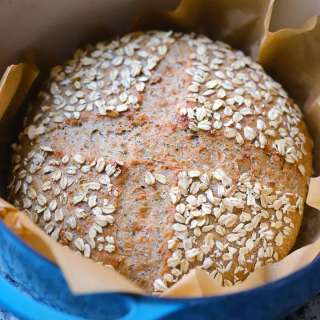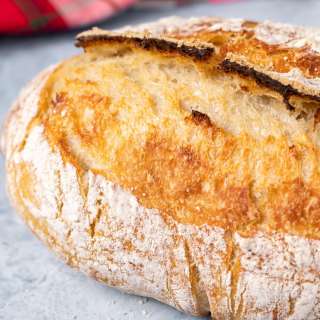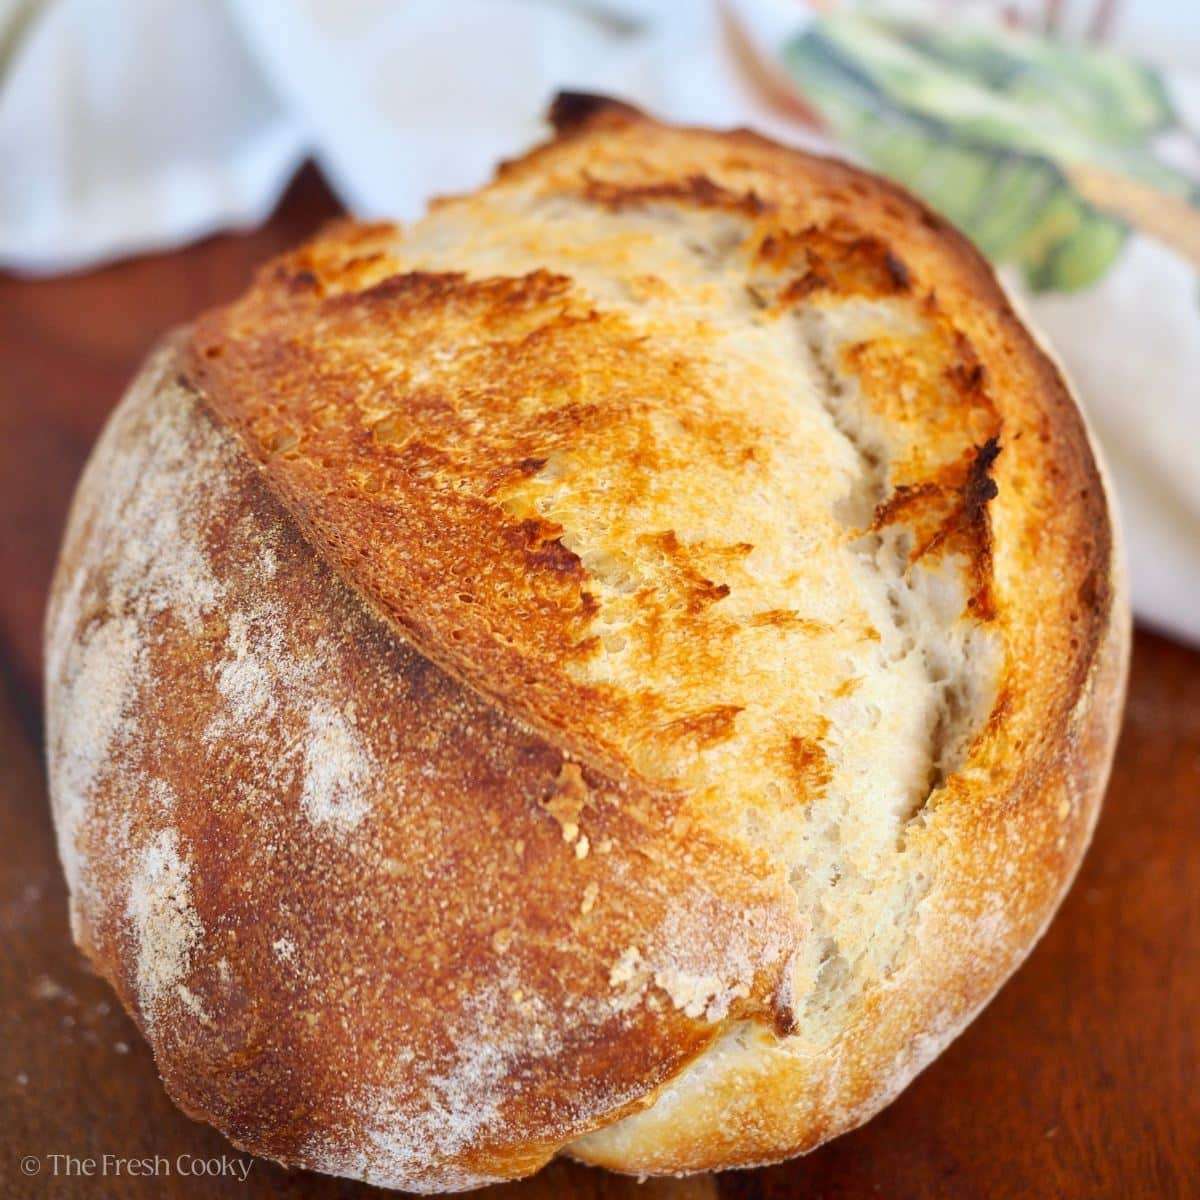
Sourdough (Dutch Oven)
User Reviews
5.0
Sourdough (Dutch Oven)
Have you ever dreamed of baking Homemade Sourdough Bread but felt overwhelmed by the process? This easy overnight recipe is here to make your bread-baking dreams a reality! Perfect for beginners, it’s a no-fuss, easy recipe with step-by-step instructions and a handy printable guide to walk you through each part of the process.
Ingredients
- 150 grams bubbly Sourdough starter fed and ready to use, see note 1
- 500 grams bread flour See note 2
- 9 grams kosher salt Or fine sea salt.
- 285 grams filtered water room temperature, see note 3
Instructions
- Feed your starter; stir the starter, discard half (or save for discard recipes), then feed with 100 grams of bread flour and 100 grams of room temperature filtered water (not RO reverse osmosis- see note 3), stir vigorously, cover loosely, and allow to rise in a warm location (70-75° F or 21-27° C) for 4-6 hours.
- In a large ceramic or glass bowl (metal can react with the fermentation process) add 500 grams of flour, 9 grams of salt and stir to mix.
- Next add 150 grams of bubbly starter and 285 grams of room temperature filtered (not RO) water. See note 3.
- Use a Danish dough whisk or wooden spoon to mix or “squelch” all of the ingredients together, just for a minute or so, it’s very dry, feel free to do this part by hand as well. Cover tightly with plastic wrap and allow to rest for 30 minutes.
- Now, grab two sides of the dough with your hands, stretch outward and then fold in on itself, turn a quarter turn and do the same thing; repeat about 4-5 times. This is called stretch and fold. Return to the bowl, cover and allow to rest on the counter overnight for baking the next day (or 6-8 hours) until it’s doubled. If needed, you can place it in the fridge in the morning if you don’t have time to bake it until later, this will keep it from overproofing. *If after assembling you realize you won't have time to back it for awhile, proof the sourdough (bulk fermentation) in the fridge in a well covered bowl or banneton for up to 48 hours.
The Next Day
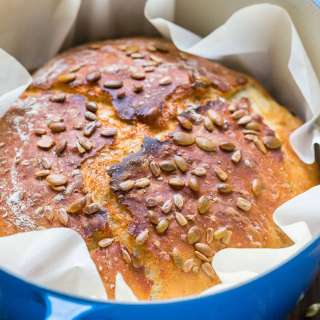
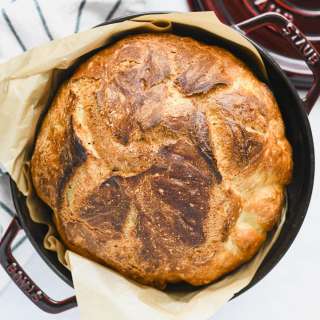
- Preheat Your Oven and Dutch Oven: Preheating your oven about an hour before baking to ensure it’s fully up to temperature. Set the oven to 475°F (245°C) for sea level or 500°F (260°C) for high altitudes. Place a 4-quart (or larger) lidded Dutch oven inside while it heats. Make sure the oven rack is in the lower third of the oven, with enough clearance for the pot. Do not put the rack on the bottom, your bread bottom will burn.
- Prepare Your Dough: About 30 minutes into preheating your oven, it’s time to shape your dough. Gently remove the dough from the bowl, being careful to preserve the air bubbles. Use a firm rubber spatula or scraper to ease the dough onto a marble surface or a lightly floured piece of parchment paper. Avoid punching down the dough; keeping those bubbles intact is key to a light and airy loaf.
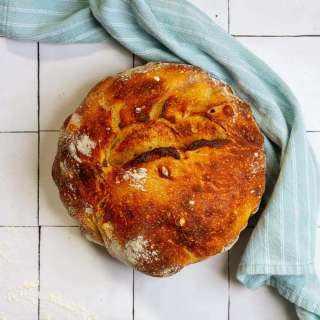
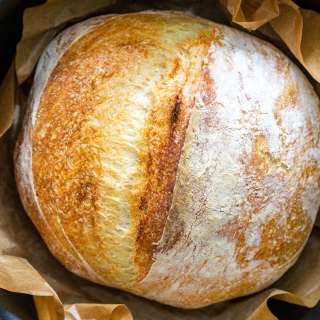
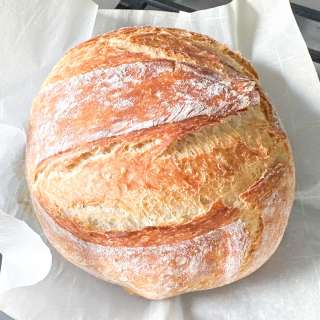
- Shape Your Loaf: To shape, gently pull the outer thirds of the dough into the center. Turn the dough over, and use your hands to tuck and turn the bottom under as you shape it into a tight loaf. You can make a round loaf (boule) or an oval loaf (batard), depending on your preference.
- Cover and Rest: Lightly dust the top of your loaf with flour, then cover it with the non-wet side of your plastic wrap or a clean tea towel. Let the dough rest for 30 minutes to relax and rise slightly—it won’t rise much during this step.
- If you haven’t started preheating your oven and Dutch oven yet, now is the time to do so. A fully preheated oven is crucial for achieving the perfect crust.
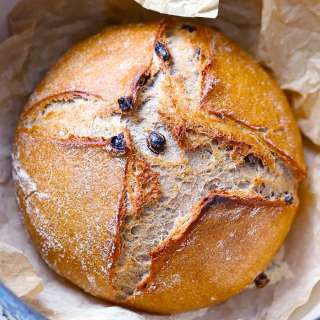
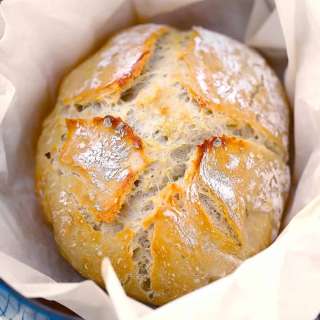
- Score the Loaf: Take off the plastic wrap or towel, and grab a sharp knife or a lame. A single deep slash down the middle works just fine, but if you’re feeling adventurous, go ahead and try some fun designs. You can get creative as you get confident!
- Into the Oven It Goes: Use the parchment paper as a cradle to move your dough closer to the oven. Using an oven mitt, carefully remove the lid from your blazing-hot Dutch oven. Gently set the parchment and dough inside, replace the lid, and close the oven door. High five—you’re almost there!
- Bake: Drop the oven temperature to 425°F (220°C) for sea level or 450°F (230°C) for high altitudes (above 3500 feet). Bake with the lid on for 20 minutes to let your loaf get that amazing initial rise and crust.
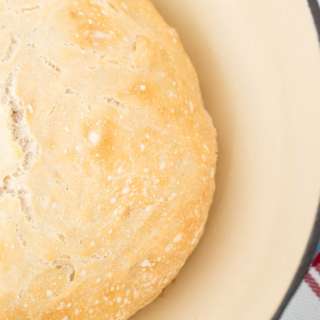
- After 20 minutes, carefully remove the lid (remember the lid is hot!). Continue baking uncovered for another 20–25 minutes, until the loaf is golden brown, sounds hollow when tapped on the bottom, or hits an internal temp of 205–210°F (96–99°C). Remove from the Dutch oven (using the parchment paper sling) and cool on wire rack.
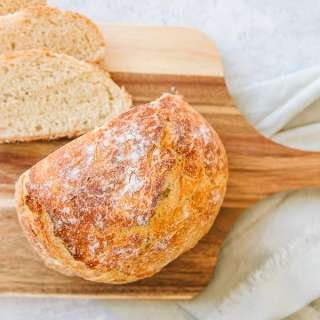
- Be Patient—Let It Cool: Ideally, let your bread cool on a wire rack for 4–6 hours before slicing. Why? Because bread keeps baking after it leaves the oven. Slice too soon, and you’ll have a gummy, sticky center. If that happens, no worries—just toast those slices in the toaster, and they’ll taste like pure heaven. If you just have to dive into your divine bread, allow it to cool for a minimum of an hour or longer before slicing.
Notes
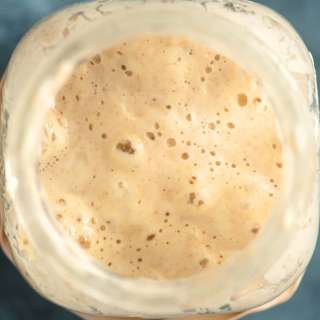
- A properly fed and active sourdough starter is key to great bread. Here’s what to look for and how to get your starter ready:
- Strengthening Your Starter: If your starter is still runny after feeding, it’s likely hungry and needs another 1–2 feedings to strengthen itself.
- Check out my How to Make Sourdough Starter guide for detailed instructions on creating, feeding, and maintaining a starter. A strong starter is the foundation of any successful sourdough loaf!
- Filtered Water (dechlorinating): You want your water to be room temperature, not hot and not cold. If you have Reverse Osmosis (RO) water, it strips out too many minerals for a healthy starter. Alternately, you may dechlorinate tap water; by allowing it to sit out uncovered for 24 hours for the chlorine to dissipate.
- Filtered Water (dechlorinating): You want your water to be room temperature, not hot and not cold. If you have Reverse Osmosis (RO) water, it strips out too many minerals for a healthy starter. Alternately, you may dechlorinate tap water; by allowing it to sit out uncovered for 24 hours for the chlorine to dissipate.
- Be sure to read my Sourdough Starter post, where I go into more detail about caring for your starter, troubleshooting your starter and more.
- A kitchen scale is recommended for accuracy, but here are the approximate US conversions:
- For all of my tips, troubleshooting and variations, please refer back to the original post. And don't forget to print my handy printable Sourdough Cheatsheet!
A properly fed and active sourdough starter is key to great bread. Here’s what to look for and how to get your starter ready:
Feeding and Rising: Your starter should be fed and allowed to rise for 4–6 hours or until it has increased by about 30% or doubled in size. Strengthening Your Starter: If your starter is still runny after feeding, it’s likely hungry and needs another 1–2 feedings to strengthen itself. Float Test: To check if your starter is ready, pinch off a dime-sized piece and drop it into a small bowl of water.
If it sinks, your starter needs more time or another feeding. If it floats, it’s typically ready to use!
Check out my How to Make Sourdough Starter guide for detailed instructions on creating, feeding, and maintaining a starter. A strong starter is the foundation of any successful sourdough loaf!
- Feeding and Rising: Your starter should be fed and allowed to rise for 4–6 hours or until it has increased by about 30% or doubled in size.
- Strengthening Your Starter: If your starter is still runny after feeding, it’s likely hungry and needs another 1–2 feedings to strengthen itself.
Float Test: To check if your starter is ready, pinch off a dime-sized piece and drop it into a small bowl of water.
If it sinks, your starter needs more time or another feeding. If it floats, it’s typically ready to use!
- If it sinks, your starter needs more time or another feeding.
- If it floats, it’s typically ready to use!
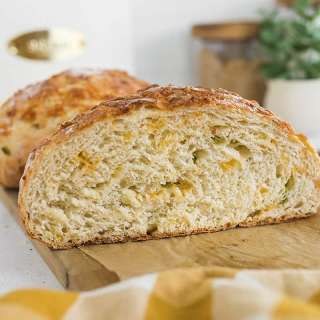
- Flours: I prefer using organic bread flour and occasionally adding a little rye flour (50 grams in place of 50g of bread flour) or whole wheat flour. You may also use unbleached, all-purpose flour, but it won't yield as good as a bread loaf.
- Filtered Water (dechlorinating): You want your water to be room temperature, not hot and not cold. If you have Reverse Osmosis (RO) water, it strips out too many minerals for a healthy starter. Alternately, you may dechlorinate tap water; by allowing it to sit out uncovered for 24 hours for the chlorine to dissipate. To dechlorinate water by boiling, boil it for at least 15–20 minutes. This process helps remove chlorine as it evaporates during boiling. For sourdough baking or any fermentation process, dechlorinated water is essential to avoid harming your starter's wild yeast and bacteria!
- Be sure to read my Sourdough Starter post, where I go into more detail about caring for your starter, troubleshooting your starter and more.
- Preheat: Place the baking stone/steel on the center rack and a cast-iron skillet (or pan with lava rocks) on the lower rack. Preheat to 500°F (260°C), offsetting the skillet for steam flow.
- Bake: Slide the prepared, rested loaf (including parchment paper) onto the stone using a baker's peel or inverted cookie sheet and carefully pour 1 cup of water into the hot skillet. Quickly close the oven to trap the steam. Reduce the oven temperature to 475°F (245°C) and bake for 25 minutes.
- Finish Baking: Lower the temperature to 450°F (230°C) and bake for another 20 minutes, until the loaf is browned and firm.
- Cool: Cool completely on a wire rack before slicing—patience pays off!
- Flour: 500g / 3½ cups
- Water: 285g / 1¼ cups
- Starter: 150g / ⅔ cup
- Salt: 9g / 1½ tsp
- Cool Completely: Always let the bread cool fully before storing to maintain texture.
- Room Temperature: Use a bread box to keep it fresh for 4–5 days. Avoid the fridge, as it dries out the bread. If you go through your sourdough quickly, store cut side down on a breadboard.
- Freezing: For longer storage, slice the cooled loaf in half or keep it whole, wrap it tightly in plastic wrap (twice), then in foil, and place in a freezer bag. Freeze for up to 3 months and thaw at room temperature.
Nutrition Information
Show DetailsNutrition Facts
Serving: 12-16 slices
Amount Per Serving
Calories 113 kcal
% Daily Value*
| Calories | 113kcal | 6% |
| Carbohydrates | 23g | 8% |
| Protein | 4g | 8% |
| Fat | 1g | 2% |
| Saturated Fat | 0.1g | 1% |
| Polyunsaturated Fat | 0.2g | 1% |
| Monounsaturated Fat | 0.04g | 0% |
| Sodium | 220mg | 9% |
| Potassium | 31mg | 1% |
| Fiber | 1g | 4% |
| Sugar | 0.1g | 0% |
| Vitamin A | 1IU | 0% |
| Calcium | 5mg | 1% |
| Iron | 0.3mg | 2% |
* Percent Daily Values are based on a 2,000 calorie diet.
User Reviews
Overall Rating
5.0
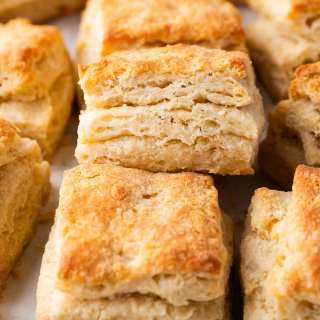
You'll Also Love