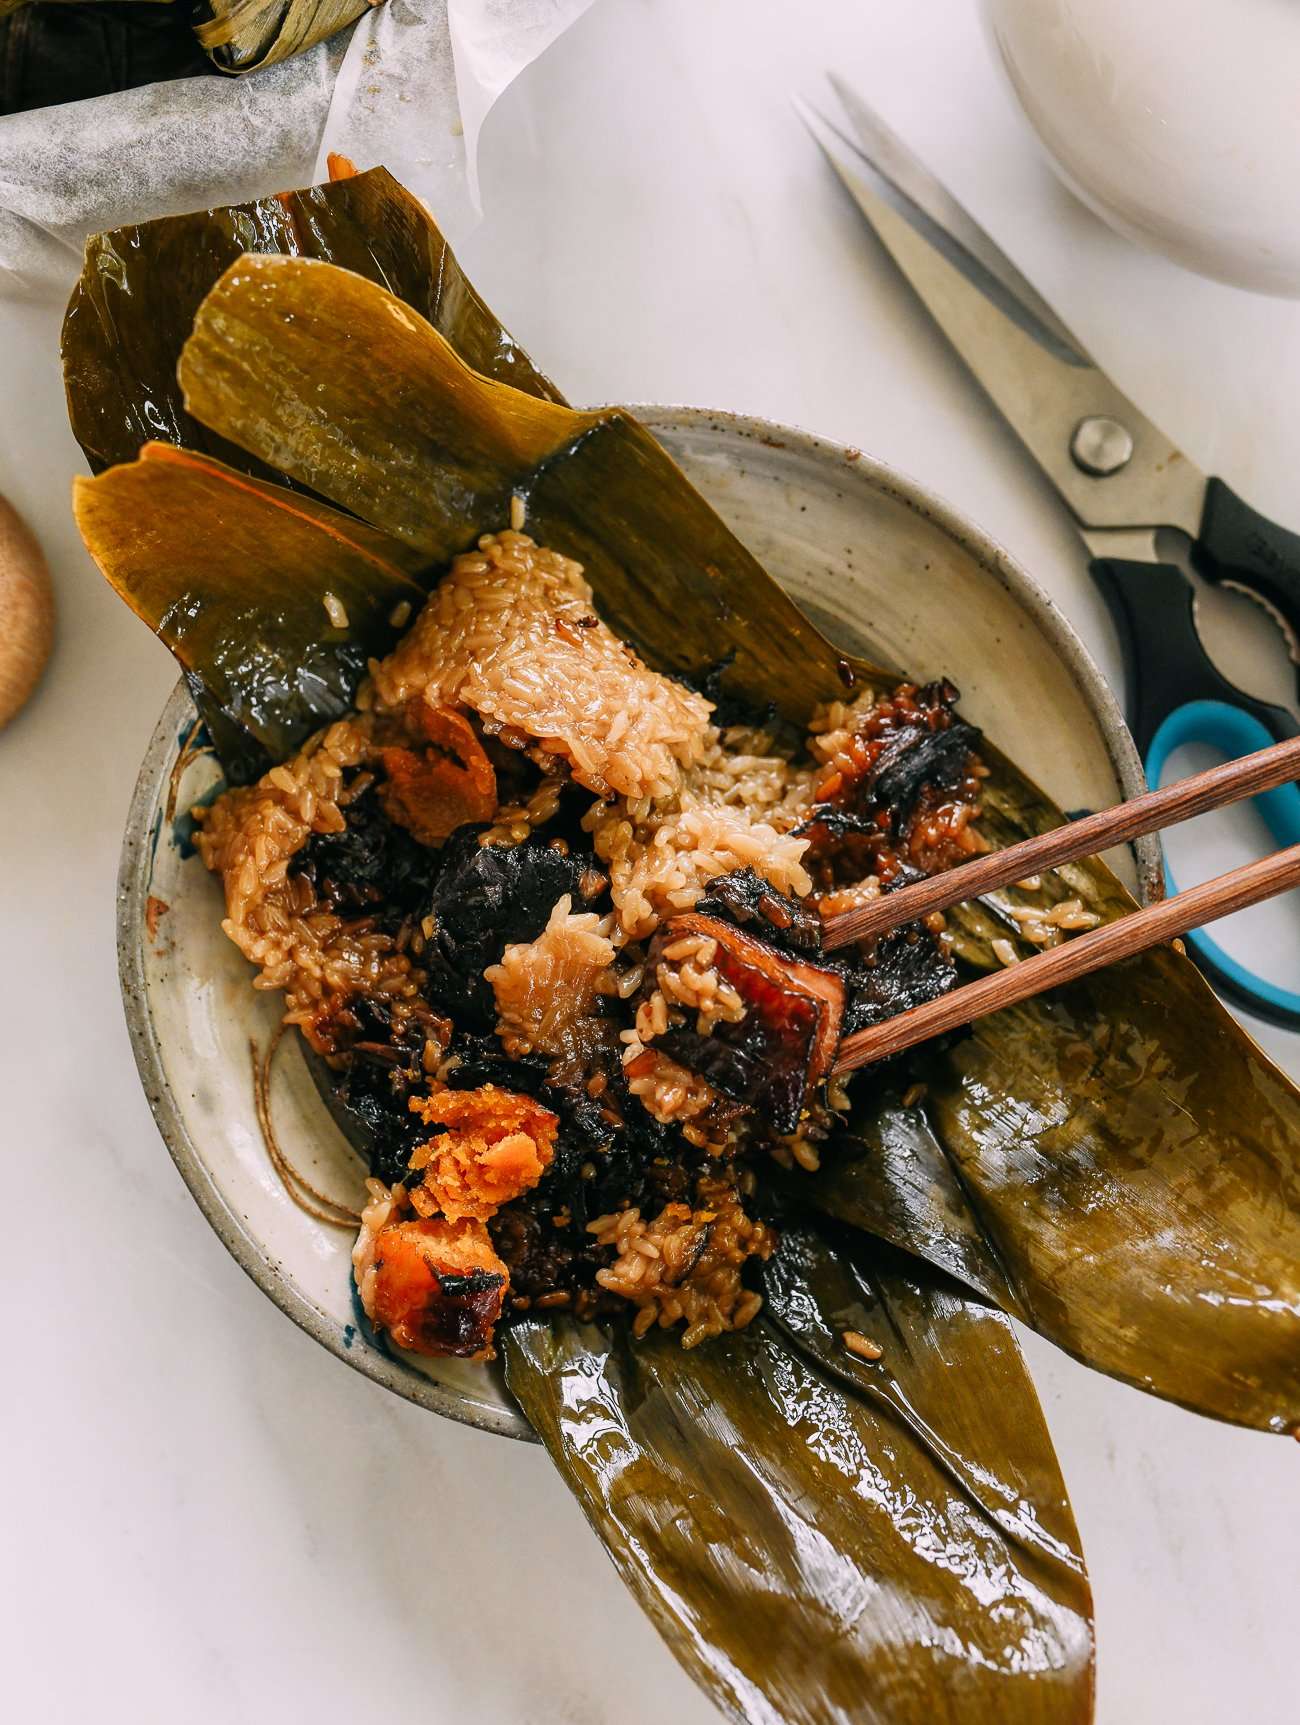
Zongzi with Pork Belly and Meigan Cai - 梅干菜肉粽
User Reviews
4.5
6 reviews
Excellent
Zongzi with Pork Belly and Meigan Cai - 梅干菜肉粽
Report
Our zongzi with pork belly and meigan cai (preserved vegetables) is perfect for celebrating the Chinese Dragon Boat Festival.
Share:
Ingredients
- 25-30 dried zongzi leaves (bamboo or reed leaves)
For the rice:
- 2 pounds glutinous rice (AKA sweet rice)
- 2 tablespoons sugar
- 1 1/2 tablespoons salt
- 1 tablespoon dark soy sauce
- 1 tablespoon light soy sauce
For the pork and meigan cai:
- 3 cups meigan cai (dried preserved vegetables)
- 1 1/2 pounds skin-on lean pork belly
- 2 tablespoons oil (any neutral oil)
- 50 g rock sugar (or 1/4 cup granulated sugar)
- 2 whole star anise pods
- 3 lices ginger
- 1/4 cup Shaoxing wine
- 2 tablespoons light soy sauce
- 1 1/2 teaspoons dark soy sauce
- 1 teaspoon salt
- 2 cups water
To assemble:
- 10 cooked salted duck egg yolks (store bought, optional)
Instructions
The Night Before: soak leaves & rice
- Soak the zongzi leaves overnight by weighing them down in a bowl of water with a heavy object. They should be completely submerged.
- In a large bowl, cover the glutinous rice with at least 2 inches of water, and soak overnight (the rice will expand as it soaks).
The Morning Of (or day before) Assembly: prepare pork & meigan cai
- Soak the mei gan cai in cold water for 30 minutes. Lift the soaked meigan cai out of the bowl and into a colander, and pour off any sandy water. Rinse the bowl clean, put the meigan cai back in, and cover with fresh water. Rinse it well, agitating it with your hands, and let it stand for 5 to 10 minutes (to give time for the dirt to settle at the bottom of the bowl). Lift the meigan cai out of the bowl once again, and repeat this process until there is no more sand remaining. Once clean, squeeze out as much water as possible from the reconstituted vegetables, and set aside.
- Cut the pork belly into 20 pieces—10 leaner pieces, and 10 fattier pieces (this will allow you to evenly distribute both lean and fatty pieces across your 10 zongzi). Add them to a pot with enough water to cover the pork belly. Bring to a boil, and boil for 1 minute to remove impurities. Remove from the heat, drain in a colander, rinse, and set the pork aside.
- Over low heat, add the oil and sugar to your wok. Heat until sugar melts into an amber liquid (if it’s not melting, increase the heat to medium). Add the whole star anise, ginger, and the pork belly. Increase the heat to medium-high, and lightly brown the pork belly pieces. Then add the mei gan cai, and stir-fry everything together for 1 minute.
- Reduce the heat to low while you add the Shaoxing wine, light soy sauce, dark soy sauce, salt and water. Make a point to melt any sugar sticking to your spatula into the sauce. Bring the liquid to a boil, cover, and increase the heat to medium-high. Simmer for 20 minutes, stirring every 5 minutes to prevent burning.
- Remove the lid, increase the heat to high, and cook off any standing liquid while stirring constantly. After a few minutes, there should be no sauce left (it will be absorbed into the pork and vegetables). Turn off the heat, and pick out the ginger slices and star anise pods. Remove from the wok and transfer to a bowl.
Prepare to Assemble:
- Gently wipe each soaked zongzi leaf front and back with a soft cloth, and rinse clean. Trim away about ½ -inch of each leaf’s tough base (this prevents tearing during assembly). Transfer them to a bowl of fresh water until you’re ready to use them, so they don’t dry out.
- Drain the soaked rice and add to a large bowl, along with the sugar, salt, dark soy sauce, and light soy sauce. Mix well and set aside.
To Assemble:
- Lay out all the components: the soaked leaves, marinated rice, the pork with meigan cai, the salted egg yolks (if using), kitchen twine, and a pair of scissors. Now you’re ready to start wrapping zongzi!
- Take two zongzi leaves and position them parallel to each other so that they're overlapping by about half, then roll the base into a cone.
- Then add about half of your rice into the bottom of your cone. Since we’re making 10 zongzi, you’ll need about 90g (¾ cup) of rice per zongzi.
- Add a piece each of fatty and lean pork belly, along with some of the meigan cai and a salted duck egg yolk. Cover with the remaining rice.
- Use one hand to gently squeeze the filling ingredients while using your other hand to fold the long ends of the leaves over the filling, folding the leaves down over the filling to cover it completely. Don't squeeze too hard, or the leaves can rip! Fold the any excess leaf down so you have a neat, compact parcel.
- Take your kitchen string and tie it securely around the zongzi—though again, not too tightly. The rice needs room to expand as it cooks. Repeat with the remaining zongzi!
To Cook the Zongzi in an Instant Pot:
- Neatly nest the zongzi in the Instant Pot, minimizing gaps between them and handling with care so as not to damage the leaves. Fill the pot until it’s no more than 2 inches below the max fill line. (If you have fewer zongzi, simply cover them with at least 2 inches of water.)
- Put the metal steamer rack that came with your Instant Pot on top of the zongzi, to keep them in place during cooking.
- Cover the Instant Pot and lock the lid in place. Set on manual high pressure for 70 minutes, and allow the pressure to release naturally. Be sure all pressure is released before safely opening the lid.
To Cook the Zongzi on the Stove:
- To cook zongzi on the stove, neatly and tightly nest all the zongzi in a large stock pot. Ideally, there will be no visible gaps. If necessary, put a large heatproof plate directly on top of the zongzi to weigh them down.
- Fill the pot with cold water until the zongzi are completely submerged. Place the pot on the stove over high heat and bring to a boil.
- Once the water boils, reduce the heat to medium-low, and simmer for 4 to 5 hours. The water should be “moving” at a light simmer, but not at a full boil. Check the pot fairly often to make sure the zongzi are always submerged in water. If you need to add more water, add only boiling water.
Notes
- Prep and cook times assume you will be cooking your zongzi on the stove.
- You can keep the zongzi warm in the pot off the heat until you’re ready to eat them! If you have leftovers, you can refrigerate them to consume within 3-4 days, or freeze them for up to 3 months. To freeze, simply store them in an airtight container. To reheat, re-boil for 25 minutes for refrigerated zongzi or 40 minutes for frozen zongzi.
- You can keep the zongzi warm in the pot off the heat until you’re ready to eat them! If you have leftovers, you can refrigerate them to consume within 3-4 days, or freeze them for up to 3 months. To freeze, simply store them in an airtight container. To reheat, re-boil for 25 minutes for refrigerated zongzi or 40 minutes for frozen zongzi.
Nutrition Information
Show Details
Calories
813kcal
(41%)
Carbohydrates
83g
(28%)
Protein
16g
(32%)
Fat
44g
(68%)
Saturated Fat
15g
(75%)
Polyunsaturated Fat
6g
Monounsaturated Fat
21g
Trans Fat
1g
Cholesterol
243mg
(81%)
Sodium
1771mg
(74%)
Potassium
237mg
(7%)
Fiber
3g
(12%)
Sugar
8g
(16%)
Vitamin A
266IU
(5%)
Vitamin C
1mg
(1%)
Calcium
41mg
(4%)
Iron
3mg
(17%)
Nutrition Facts
Serving: 10Serving
Amount Per Serving
Calories 813 kcal
% Daily Value*
| Calories | 813kcal | 41% |
| Carbohydrates | 83g | 28% |
| Protein | 16g | 32% |
| Fat | 44g | 68% |
| Saturated Fat | 15g | 75% |
| Polyunsaturated Fat | 6g | 35% |
| Monounsaturated Fat | 21g | 105% |
| Trans Fat | 1g | 50% |
| Cholesterol | 243mg | 81% |
| Sodium | 1771mg | 74% |
| Potassium | 237mg | 5% |
| Fiber | 3g | 12% |
| Sugar | 8g | 16% |
| Vitamin A | 266IU | 5% |
| Vitamin C | 1mg | 1% |
| Calcium | 41mg | 4% |
| Iron | 3mg | 17% |
* Percent Daily Values are based on a 2,000 calorie diet.
Genuine Reviews
User Reviews
Overall Rating
4.5
6 reviews
Excellent
Other Recipes
You'll Also Love