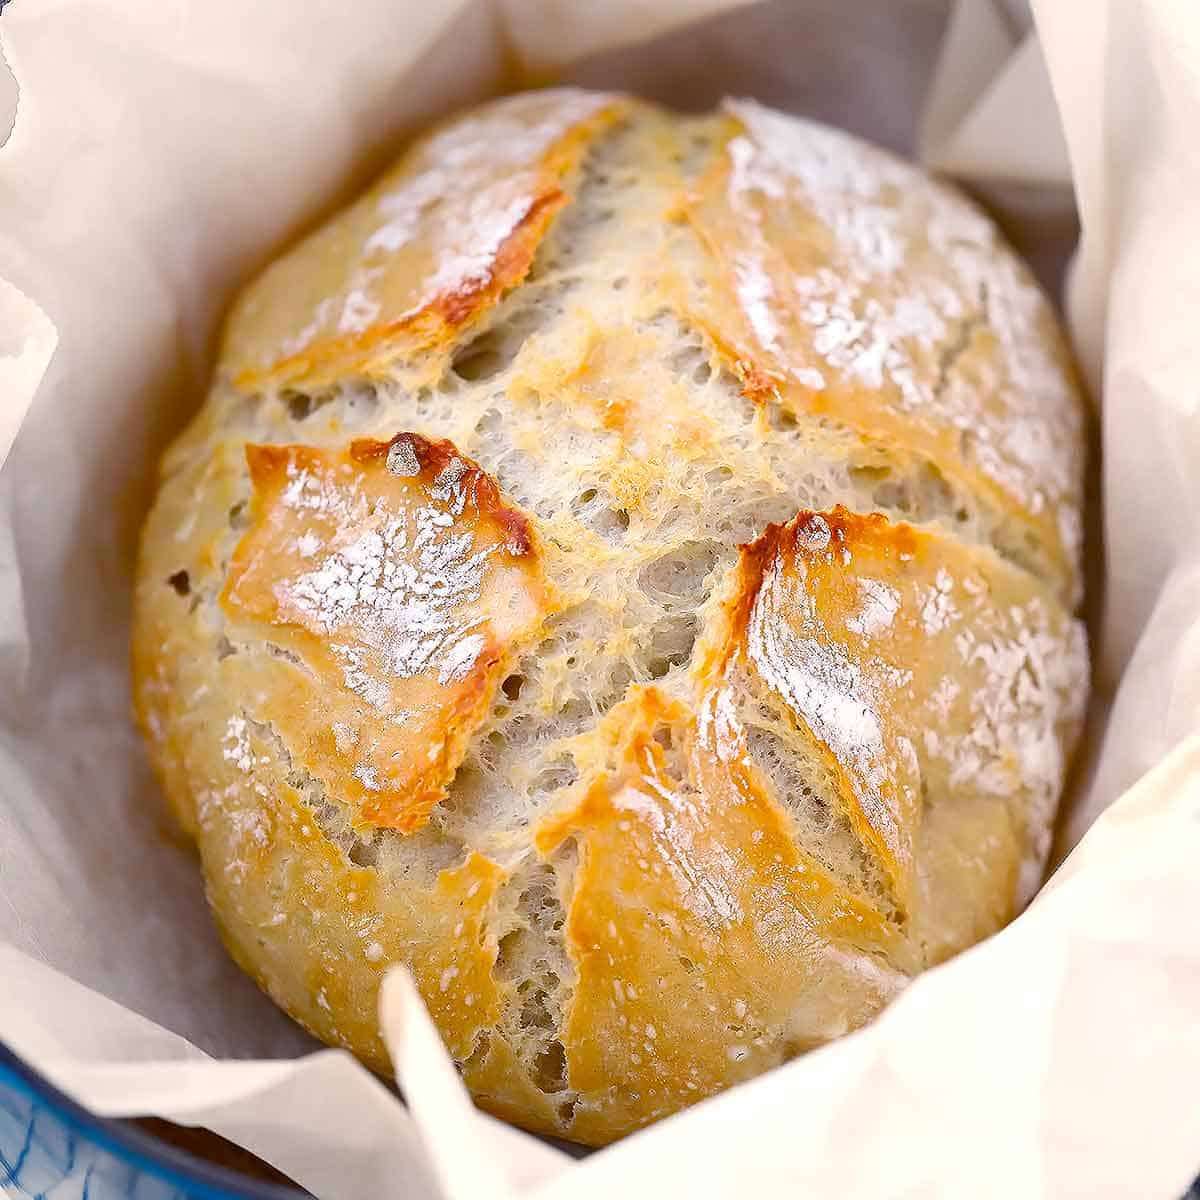
Dutch Oven No Knead Crusty Bread
User Reviews
4.9
Dutch Oven No Knead Crusty Bread
Description
This Dutch Oven No Knead Crusty Bread recipe involves combining warm water, yeast, salt, and all-purpose flour to form a wet, sticky dough that is left to rise for 2-3 hours until doubled. The dough is then baked inside a preheated Dutch oven, allowing steam to create a crispy crust while the bread bakes to a chewy, tender inside. This method bypasses traditional kneading and shaping, relying instead on hydration and slow fermentation.
The resulting loaf features a golden crust with characteristic blisters and a soft crumb. The Dutch oven traps moisture during baking, enhancing crust crispiness. The recipe suggests variations such as making smaller loaves, adding herbs or cheese into the dough, and adapting to different salt types.
Serving this bread pairs well with soups, stews, or as a base for sandwiches. It can be sliced thinly or thickly depending on need. Allowing the bread to cool fully before slicing prevents a gummy or underbaked interior. Leftover bread freezes well when sliced and wrapped tightly.
For best results, use fine grain, preferably non-iodized salt, and store dough loosely covered in the fridge for up to seven days to improve handling and flavor development. Avoid preheating an enameled Dutch oven empty to protect the finish. The dough's hydration may require adjustment depending on flour type and humidity.
Ingredients
- 1 1/2 cups water about 100 degrees F, warm
- 1 packet yeast (active dry, instant, or quick rise- 2.25 teaspoons)
- 1 ½ teaspoons salt preferably NOT iodized, see notes, you can up the amount to 2 teaspoons if you like things really salty!, fine grain
- 3 1/4 cups all-purpose flour or bread flour, more if needed to get correct consistency, plus more for dusting (I use King Arthur AP flour - other flours may yield different results)
Instructions
- In a large bowl (or container), mix together the 1 1/2 cups warm water, 1 packet yeast (or 2.25 teaspoons), and 1 ½ teaspoons fine grain salt, until yeast and salt are fully or almost dissolved (I like using a whisk for this).
- Add the 3 1/4 cups all-purpose flour to the bowl all at once and stir together until a sticky dough forms. Don't worry about mixing it too much, just make sure everything is uniformly wet. It WILL be messy and sticky. You can scrape what's left on the spoon with a silicone spatula. (photo below provided for what the texture should look like - if it seems too wet, add 1-2 tablespoons more flour at a time until it is more like the photo. If it seems too dry, do the same thing with more water).
- Cover the bowl with a kitchen towel (or place the container to the lid on ajar). Leave it for 2-3 hours to rise in a somewhat warm place until it's doubled in volume, like photo in previous step (If it's cold out, I like to preheat my oven for a few minutes, then turn it off, then place the bowl in the oven, trapping the heat inside. If your house is warm just leave it out, or if it's warm outside you can place it there).
- After the two-three hour rise time when the dough has about doubled, you have two options: bake, or store in the fridge. See notes for how to store.
- 30 minutes to an hour before you are ready to bake, preheat your oven to 450 degrees F. Place your Dutch oven in the oven, with the lid ON, while the oven is preheating. Once the oven reaches 450, keep it preheating for another 20 minutes, so the Dutch oven gets good and hot.
- Scrape the dough into the edge of a piece of parchment paper dusted with flour. Make it into as much of a "loaf" shape as you can by folding the edges up on top of it (a silicone spatula works well for this).
- Then, use the edges of the parchment paper to flip the loaf over so the floured side is on top and the loaf is in the center of the parchment paper. Don't worry about it looking beautiful or smooth on top. My Dutch oven is an oval, so I made an oval shape. You can do a circle if yours is round.
- Optional: use a very sharp knife or clean razor blade to cut a few slits across the top of the loaf about 1/2" deep, across the entire top. I did this in a cross shape for mine.
- Take out the preheated Dutch oven and take off the lid, carefully! Grab the parchment from the sides and place the loaf in your Dutch oven.
- Place the cover back on the Dutch oven and place in the preheated oven on the center rack. Bake for 35 minutes at 450 degrees F (40 minutes if dough was cold from the fridge). Remove the lid and bake for another 5-10 minutes, until a golden brown color forms- longer if necessary. Remove the loaf from the dutch oven (grabbing the sides of the parchment paper works well here) and place it on a wire rack or cutting board to cool for at least 10 minutes (preferably 30 minutes - an hour, if you have time) before slicing.
Notes
- Store dough loosely covered in the refrigerator for up to 7 days to improve flavor and handling.
- Use fine grain, non-iodized salt to avoid bitterness and ensure proper yeast activity.
- Allow baked bread to cool completely before slicing to prevent gummy crumb.
- If making smaller loaves, reduce covered baking time accordingly.
- To prevent sticking, use quality parchment paper or lightly oil the surface before baking.
- Adding water to a baking sheet in the oven can help develop a crusty crust if not using a Dutch oven.
- Adjust flour or water quantities as needed to achieve a sticky but manageable dough consistency.
Nutrition Information
Show DetailsNutrition Facts
Serving: 8servings
Amount Per Serving
Calories 188 kcal
% Daily Value*
| Calories | 188kcal | 9% |
| Carbohydrates | 39g | 13% |
| Protein | 6g | 12% |
| Fat | 1g | 2% |
| Saturated Fat | 1g | 5% |
| Sodium | 437mg | 18% |
| Potassium | 63mg | 1% |
| Fiber | 2g | 8% |
| Sugar | 1g | 2% |
| Calcium | 8mg | 1% |
| Iron | 2mg | 11% |
* Percent Daily Values are based on a 2,000 calorie diet.
User Reviews
Overall Rating
4.9
You'll Also Love