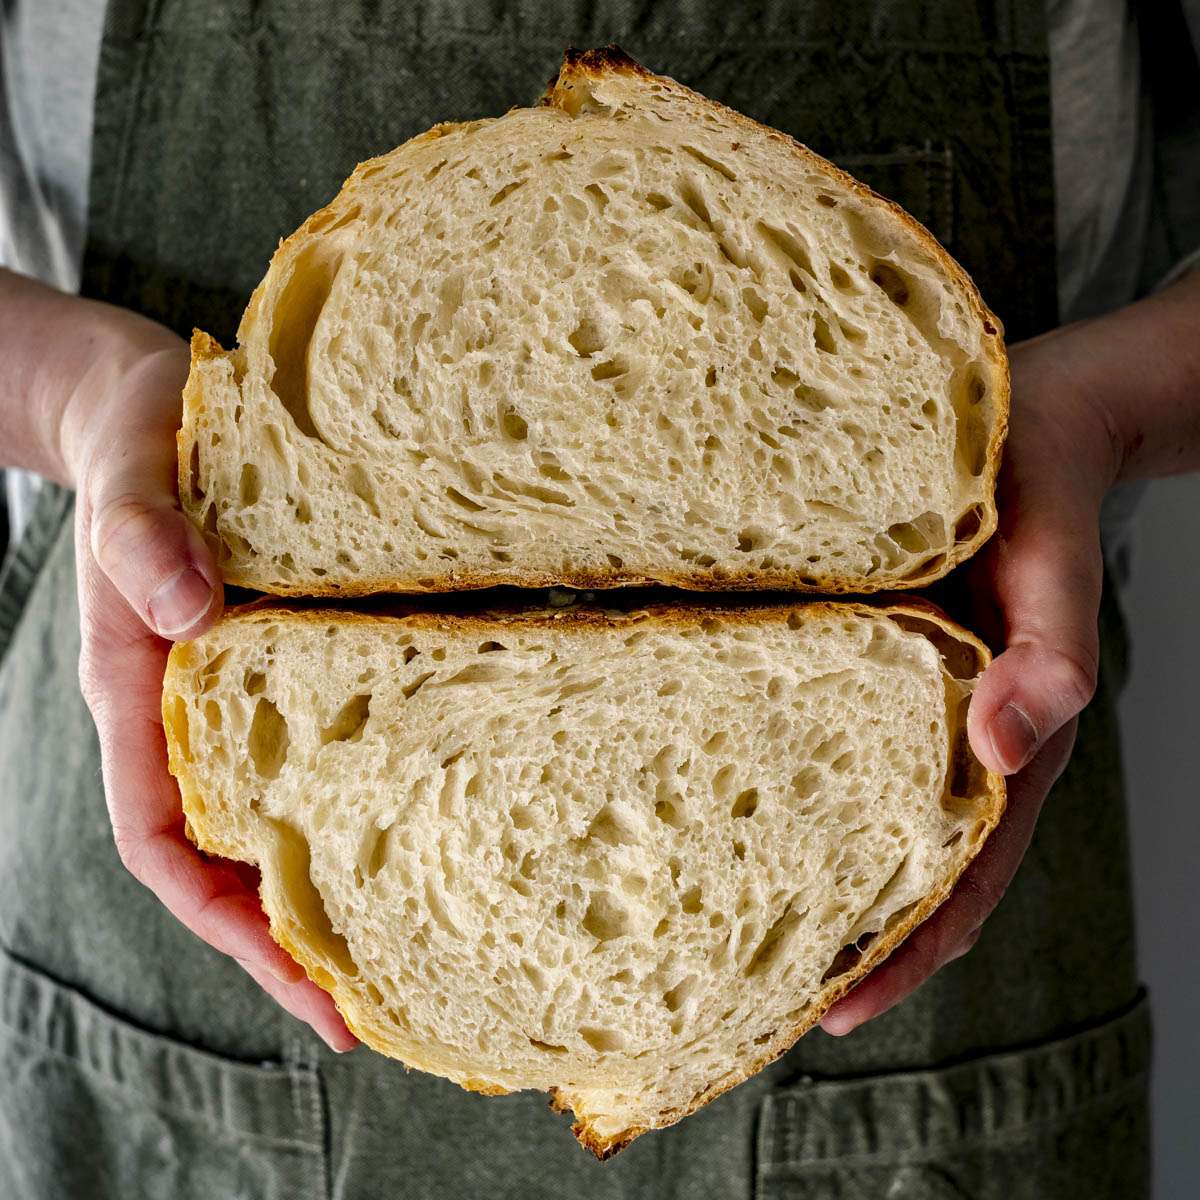
Fluffy Dutch Oven Sourdough Bread
User Reviews
5
Fluffy Dutch Oven Sourdough Bread
Description
Fluffy Dutch Oven Sourdough Bread begins with an active sourdough starter refreshed with all-purpose flour and lukewarm water to a batter-like consistency. The dough is then mixed with bread flour, more water, and fine sea salt, creating a shaggy dough that rests before folding and shaping. Stretching and folding improve gluten development without overworking the dough. Using a Dutch oven traps steam during baking, generating a crust with a crisp exterior and tender inside.
The bread benefits from precise shaping to build surface tension, encouraging good oven spring. Various resting times between folds allow flexibility without negatively affecting the dough. Storage in a zippered bag or airtight container lets moisture soften the crust for easier slicing, although this is optional depending on crust preference.
Timing adjustments may be necessary depending on the oven model used. The recipe's feeding and handling techniques yield consistent fluffiness and an open crumb texture while maintaining the characteristic sourdough flavor. For visual guidance, a photo tutorial of shaping and folding can be helpful.
Ingredients
Feeding Starter:
- 150 g all-purpose flour
- 150 g water lukewarm
Bread:
- 125 g sourdough starter
- 350 g water lukewarm
- 10 g salt fine sea salt
- 500 g bread flour
Instructions
Feeding Starter:
- Remove all but a couple of tablespoons of the starter from the jar. You can use the discard for other recipes or if you have chickens you can feed it to them!
- Add 150 g of all-purpose flour and 150 g of lukewarm water to the jar and stir it with a long silicone spatula or another clean kitchen utensil until well combined. It should be the consistency of a thick pancake batter. Loosely place the lid on the jar and let rise in a warm spot for 6-8 hours. I like to put mine on top of my fridge.
Dough:
- To a large mixing bowl, add 125 g of active starter and 350 g of lukewarm water. Whisk the mixture with a dough whisk until the starter is somewhat dispersed in the water. It doesn't have to be a homogenous mixture.
- Add 10 g of salt and 500 g of bread flour. Stir with the dough whisk until a shaggy dough forms. Cover the bowl and let it rest for 30 minutes. I like to use a shower cap to cover my bowl and banneton so I don't use a bunch of plastic wrap and they're easier to fit around the bowl.
- Use a silicone bowl scraper to pull the dough away from the bowl edges. Gently stretch the dough between your hands. Then fold the dough in half, grab the sides with the seams, and stretch it in the opposite direction. Repeat until dough starts to feel tight and resists stretching, about 3-4 times. Cover the bowl and let the dough rest for 30 minutes.
- Repeat the stretching, folding, and resting process 3 more times. Cover the dough and let it sit on the counter overnight, about 8-12 hours.
Shaping and Baking:
- In the morning, shape the dough into your desired shape (boule or batard) with a bench scraper and place it top-down in a floured banneton or cloth-lined bowl. See the recipe post for a photo tutorial on shaping.
- Seal the bottom edges of the dough ball together. Cover the banneton and refrigerate for at least 1 hour or up to 24 hours for a really crispy crust. The sweet spot is around 3-4 hours for this recipe.
- Place the Dutch oven in a cold oven and preheat it to 500°F. Preheat for at least 1 hour.
- Place the dough ball, seam side down, on a piece of parchment paper. Score it with a razor blade or bread lame. It needs at least one big slash on the side of the dough ball to let out steam as it rises. You can add decorative scoring as well, but it isn't necessary.
- Place the dough on parchment paper in the preheated Dutch oven and cover it with the Dutch oven lid. Reduce the oven heat to 450°F. Bake for 23 minutes.
- Remove the lid and bake for an additional 12 minutes.
- Remove the bread from the oven and let it cool completely on a cooling rack.
Sample Schedule:
- 10 am: Feed the starter.
- 6:30 pm: Make the dough. Cover the starter with the lid and refrigerate for up to a week before feeding again.
- 7 pm: Stretch and fold the dough, and cover the bowl.
- 7:30 pm: Stretch and fold the dough, and cover the bowl.
- 8 pm: Stretch and fold the dough, and cover the bowl.
- 8:30 pm: Stretch and fold the dough. Cover the bowl and leave it on the counter overnight.
- 6:30 am (next day): Shape the dough and place it in a floured banneton or cloth-lined bowl. Cover and refrigerate.
- 10 am: Place the Dutch oven in the oven and preheat the oven.
- 11 am: Score dough, reduce the oven temperature and bake. Let the bread cool completely on a wire rack.
- 3 pm: Place the bread in a zippered bag to soften the crust (optional).
- 6 pm: Eat!
Notes
- Use measuring cups approximately when feeding the starter; precision is not critical.
- Perform four stretch-and-fold cycles spaced about 30 minutes apart; resting times may vary from 20 minutes to an hour.
- Proper shaping creates surface tension which is crucial for good bread rise during baking.
- Baking times provided suit gas ovens; adjust as necessary based on your oven type.
- Storing the loaf in an airtight container can soften the crust, facilitating easier slicing but is optional.
Nutrition Information
Show DetailsNutrition Facts
Serving: 1loaf
Amount Per Serving
Calories 1919 kcal
% Daily Value*
| Calories | 1919kcal | 96% |
| Carbohydrates | 387g | 129% |
| Protein | 63g | 126% |
| Fat | 9g | 14% |
| Saturated Fat | 1g | 5% |
| Polyunsaturated Fat | 4g | 24% |
| Monounsaturated Fat | 1g | 5% |
| Sodium | 3905mg | 163% |
| Potassium | 501mg | 11% |
| Fiber | 13g | 52% |
| Sugar | 2g | 4% |
| Vitamin A | 10IU | 0% |
| Calcium | 88mg | 9% |
| Iron | 5mg | 28% |
* Percent Daily Values are based on a 2,000 calorie diet.
User Reviews
Overall Rating
5
You'll Also Love