Homemade Bread (Homemade White Bread)
User Reviews
5
Homemade Bread (Homemade White Bread)
Description
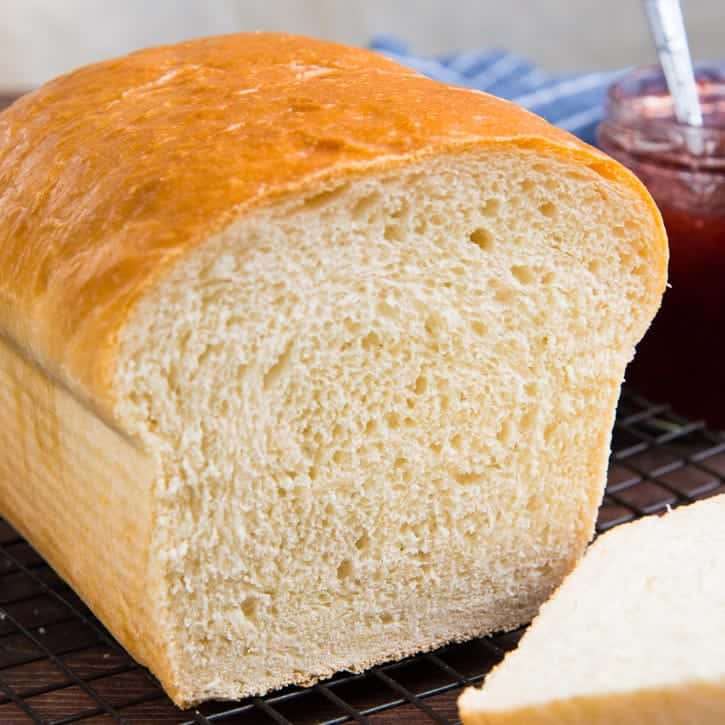
This Homemade Bread recipe uses a proofed yeast mixture combined with all-purpose flour, water, salt, and honey to create a slightly sweet, tender white loaf. Citric acid or white vinegar is added optionally to improve crumb texture and shelf life, while butter enriches the dough and adds softness. The dough undergoes a passive autolyse-like step after mixing, resting on the counter to hydrate the flour before kneading, which helps gluten development and results in a smoother dough.
The dough is kneaded in a stand mixer until it forms a soft, tacky ball and is allowed to proof until doubled, ensuring good rise. Baking at 350°F (180°C) produces bread with an even crumb and a modest crust without burning. This bread can be formed into one large loaf or divided into two smaller loaves, baked in appropriately sized pans for better shape.
Tips include measuring flour by weight for accuracy, using the spoon and leveled method if measuring by cups, and adjusting proofing times with environment temperature. The dough's appearance and a finger indentation test determine ideal proofing. The result is a home-baked loaf with a soft crumb and a subtle honey sweetness, suitable for sandwiches or toast.
Ingredients
Proofing yeast
- 7 g active dry yeast 2 ¼ tsp.
- 240 mL water lukewarm
- 11 g honey (or sugar or maple syrup)
Bread loaf
- yeast ingredients listed above, proofed mixture
- 553 g all-purpose flour 4 ⅓ cups, spoon and leveled (please see notes
- 120 mL water ½ cup - more if needed, lukewarm
- 1 ¼ tsp salt sea salt
- 22 g honey 2 tbsp / 30 mL (or sugar or maple syrup), add up to 4 tbsp / 60 mL for a more pronounced honey flavor)
- ¼ tsp citric acid or ½ tbsp white vinegar (optional)
- 30 g butter 2 tbsp. melted (or vegetable oil, unsalted
Instructions
Proofing yeast
- Place the water in the mixer bowl of your stand mixer.
- Stir in the honey to dissolve, and sprinkle the yeast over the water. Gently stir to mix.
- Allow the yeast to sit in a warm place for about 15 minutes, until it's activated and becomes frothy. This could take longer if your yeast was in the freezer. If the yeast doesn't activate (no frothy bubbles), then your yeast is likely too old and you will need it replaced with fresh yeast.
- Once the yeast is activated, you’re ready to make the bread dough.
Bread loaf
- To the proofed yeast mixture, add the flour, warm water, salt, honey, citric acid and melted butter.
- Using a dough whisk or a spatula, mix the ingredients to form a rough dough.
- Place the bowl in the mixer with a kneading hook attached, and knead the dough on low speed for about 2 - 5 minutes, until the dough comes together to form a ball.
- Increase the speed by 1 or 2 levels (speed 3 or 4 in a kitchen aid mixer) and knead the dough for a further 12 - 15 minutes until it's smooth and elastic.
- While the dough is kneading, check on it every few minutes to make sure it’s kneading well, and is not too dry or too wet. The dough is going to be very sticky and wet at the beginning, and become smoother as it's kneaded.
- To check if the dough has the right consistency after about 10 minutes of kneading - Increase the speed of the mixer to about 5 or 6 just for a minute or two. If the dough is sticking to the sides of the bowl, then it’s too wet, so add a little extra flour (a dusting at a time), to get the right texture. If the dough is still tacky but is coming off the sides (mostly), and only sticking to the bottom of the bowl, then it's at the right consistency. When you stop the mixer and lift the kneading hook from the bowl, and the dough isn’t sticking to the bottom of the bowl, then the dough might be too dry. You may need to add a little extra water (just ½ tsp at a time), to get the right consistency. The dough should be smooth, a little soft and tacky to the touch.
- Once the dough is kneaded, remove the dough hook and fold the dough over a few times by hand, to get a smooth ball. Then place it in a lightly oiled bowl, and cover with plastic wrap. Let the dough proof for about 1 hour until it has at least doubled in size.
- While the dough is proofing, prepare the bread loaf pans. Butter 1 - 9 x 5 inch loaf pan for a very large loaf, or 2 - 8.5 x 4.5 inch loaf pans for smaller loaves, and set aside until the dough is ready.
- Turn the proofed dough out onto a lightly floured work surface. Slightly flatten is with your hands. If making two smaller loaves, halve the dough with a sharp knife or bench scraper. (For more accurately halved dough, weigh the dough and then split it evenly by weight.) Place one portion of the dough back in the bowl and place it in the fridge while you shape the first portion.
- Gently press the dough into an evenly thick rectangle. The short side of this rectangle should be roughly about 8 - 8.5 inches (i.e. slightly shorter than the length of your bread loaf pan).
- Next, tightly roll up the short side, along the length of the dough rectangle. Make sure to pinch / press the edge of the dough as you go, while rolling it up (read the post and see pictures for more details).
- Once the dough is rolled up, pinch the seams to seal it, and tuck in the two sides and pinch these seams as well. Make sure all the seams are on one side (this will be the bottom) and the other side is smooth and seam-free (this will be the top).
- Transfer this into the prepared loaf pan, seam side down, and press the dough into the pan. Make sure it’s evenly pressed into the bottom of the pan. Loosely cover the loaf pan with plastic wrap and let it proof again in a warm place, for about 45 minutes - 1 hour. The dough should double in size inside the loaf pan / pans.
- Repeat with the second portion of dough (if making two smaller loaves).
- To check if it has proofed enough, gently press the top of the dough with your finger to leave an indentation that is about ½ cm deep. If proofed properly, this indentation should remain, or only bounce back slightly. If it bounces back almost completely, then it's underproofed. (Read the post and see pictures for more details.)
- Preheat the oven (conventional oven) to 375°F / 190°C, during the last 30 minutes of the second proofing time. It’s best for the oven to be preheated to the right temperature for at least 20 minutes before baking the bread.
- When the bread loaf is ready and the oven has preheated, place the loaf pans in the middle of the oven, and bake for 35 - 45 minutes. Make sure there is at least 2 inches of space between the pans to allow for proper air circulation. The bread is done when it sounds hollow when tapped on top, OR when the internal temperature reaches 195°F / 91°C.
- Remove the pans from the oven and keep in a warm place (away from drafts) to cool. After about 10 minutes, remove the bread from the pans and keep it on a wire rack to cool down completely. The bread is now ready to be served.
- Optional - brush melted butter on top while it's hot to add more buttery flavor.
- Keep the loaf (or loaves) in a bread box at room temperature for up to 4 - 5 days, or slice and keep in the freezer for up to 1 month.
Notes
- For best results, measure flour by weight and use the spoon-and-level method if using cups to avoid dense bread.
- The dough should be soft and tacky but not sticky; kneading time affects this texture.
- Baking temperature and time may vary; if the crust darkens too quickly, reduce oven heat.
- Proofing times vary with temperature; check dough with the indentation test to avoid overproofing.
- You can bake one large loaf in a 9x5 inch pan or two smaller loaves in 8.5x4.5 or 8x4 inch pans for better shaping.
Nutrition Information
Show DetailsNutrition Facts
Serving: 32slices
Amount Per Serving
Calories 90 kcal
% Daily Value*
| Serving | 1slice | |
| Calories | 90kcal | 5% |
| Carbohydrates | 17g | 6% |
| Protein | 2g | 4% |
| Fat | 1g | 2% |
| Saturated Fat | 1g | 5% |
| Polyunsaturated Fat | 0.1g | 1% |
| Monounsaturated Fat | 0.3g | 2% |
| Trans Fat | 0.04g | 2% |
| Cholesterol | 3mg | 1% |
| Sodium | 130mg | 5% |
| Potassium | 25mg | 1% |
| Fiber | 1g | 4% |
| Sugar | 2g | 4% |
| Vitamin A | 34IU | 1% |
| Vitamin C | 0.01mg | 0% |
| Calcium | 4mg | 0% |
| Iron | 1mg | 6% |
* Percent Daily Values are based on a 2,000 calorie diet.
User Reviews
Overall Rating
5
You'll Also Love