How to Cook a Duck Breast
User Reviews
5
-
Prep Time
20 mins
-
Cook Time
15 mins
-
Resting time
5 mins
-
Total Time
35 mins
-
Servings
4 people
-
Calories
287 kcal
-
Course
Main Course
-
Cuisine
American
How to Cook a Duck Breast
Description
How to Cook a Duck Breast addresses preparing duck breasts with techniques that ensure a balance between crisp skin and juicy meat. Starting with properly scored skin on domestic or fatty wild ducks allows fat to render during cooking. Salting both sides and resting the meat before cooking brings it closer to room temperature, which helps control the internal temperature while cooking. The duck fat or oil is spread in a cool pan and the breast is placed skin-side down without preheating the pan; this slow warming lets the fat melt and the skin crisp gradually.
The method advises starting over medium-high heat and adjusting as needed to avoid burning while maximizing fat render. Using a heavy pan such as cast iron improves searing. After cooking, the breast should rest skin side up to preserve crispness and redistribute juices. The recipe notes suggest the approach can be scaled for multiple portions and reminds against nonstick pans that do not tolerate high heat well.
This cooking technique results in a duck breast with a golden, crispy skin and a tender, flavorful interior that benefits from resting. The recipe offers variations depending on the duck type, including cooking colder breasts for smaller wild birds. Rendering duck fat beforehand is mentioned as a helpful preparation step.
Ingredients
- 4 duck breasts (breasts from two ducks)
- salt
- 1 teaspoon duck fat or olive oil
Instructions
- Take the duck breasts out of the fridge. If you are using a domestic duck or a very fat wild duck, score the skin (but not the meat) in a cross-hatch pattern, making the cross-hatches about 1/2 inch across; this helps the fat render and will give you a crispier skin. Salt it well on both sides, then let it sit on a cutting board for at least 15 minutes and up to 45 minutes for a goose breast.
- Pat the duck breasts dry with paper towels. If you are cooking a domestic duck or a very fat wild duck, put 1 teaspoon of duck fat or cooking oil in a large pan; Lay the breasts skin side down and use them to smear the fat all over the surface of the pan. Turn the heat to medium-high. Yes, you read that right: Don't preheat the pan. You want as much fat to render out as possible, so start with a cool pan. If you are working with normal wild duck breasts, i.e., skinny ones, heat the pan over high heat for 1 minute, then add 2 tablespoons of duck fat, lard or some other oil. Let this get hot, but do not let the fat smoke. Only then do you lay the duck breasts in the pan, skin side down. Either way, once the duck breasts start cooking, you will notice the "tails" of skin and fat from the head and the tail side of the fillet contract immediately. As the skin contracts, you will sometimes get a little oval patch on the tail end of the breast that curls up and doesn't make contact with the pan. Use your tongs to press down on this part for 30 to 60 seconds. This gives you a more even sear.
- Let the pan do its job. Cook at a jocular sizzle -- not an inferno, not a gurgle. Think about how bacon sounds in the pan when you cook it, and you have the right idea. How long? It depends. I like my duck medium-to-medium-rare. To do this with small ducks like teal or ruddy ducks, you need only about 3 minutes on the skin side, and you might want to keep the heat higher. Medium-sized ducks like wigeon, gadwall or wood ducks need 3 to 5 minutes. Mallards, pintail, canvasbacks and domestic ducks need between 5 and 8 minutes. If you are cooking a goose breast, you will want the heat on medium-low and you'll need to cook the skin side a solid 10 to 12 minutes. The key is to let the breast do most of its cooking on this side -- it's the flattest, and will give you that fabulously crispy skin we all know and love. Again, I repeat: When you cook a duck breast, 3/4 of the total cooking time is on the skin side.
- Turn the breasts over. When? Follow the guidelines above, but also use your ears: You will hear the sizzle change; it will die down, just a bit. That's when you turn. Lightly salt the now-exposed skin immediately. Doing this seems to absorb any extra oil and definitely gives you an even crispier skin. Let the ducks cook on the meat side for less time. I recommend: 1 to 2 minutes for small ducks; 3 to 4 minutes for medium ducks; 4 to 6 minutes for large wild ducks and domestic duck; 5 to 7 minutes for geese. More than mere time, however, you need to just use The Force to know when your duck is ready. Not in tune with The Force? The next best thing is the finger test for doneness. Use this to determine when you're almost ready. My advice is to go to the next step when your duck breasts are rare.
- Now "kiss" the thick side of the breasts by standing two halves against each other. You will notice that duck and goose breasts plump up and contract as they cook. One side of the fillet will be wider than the other, and this side will need some heat. Just tip the breasts on their sides and cook for 30 to 90 seconds, just to get some good color.
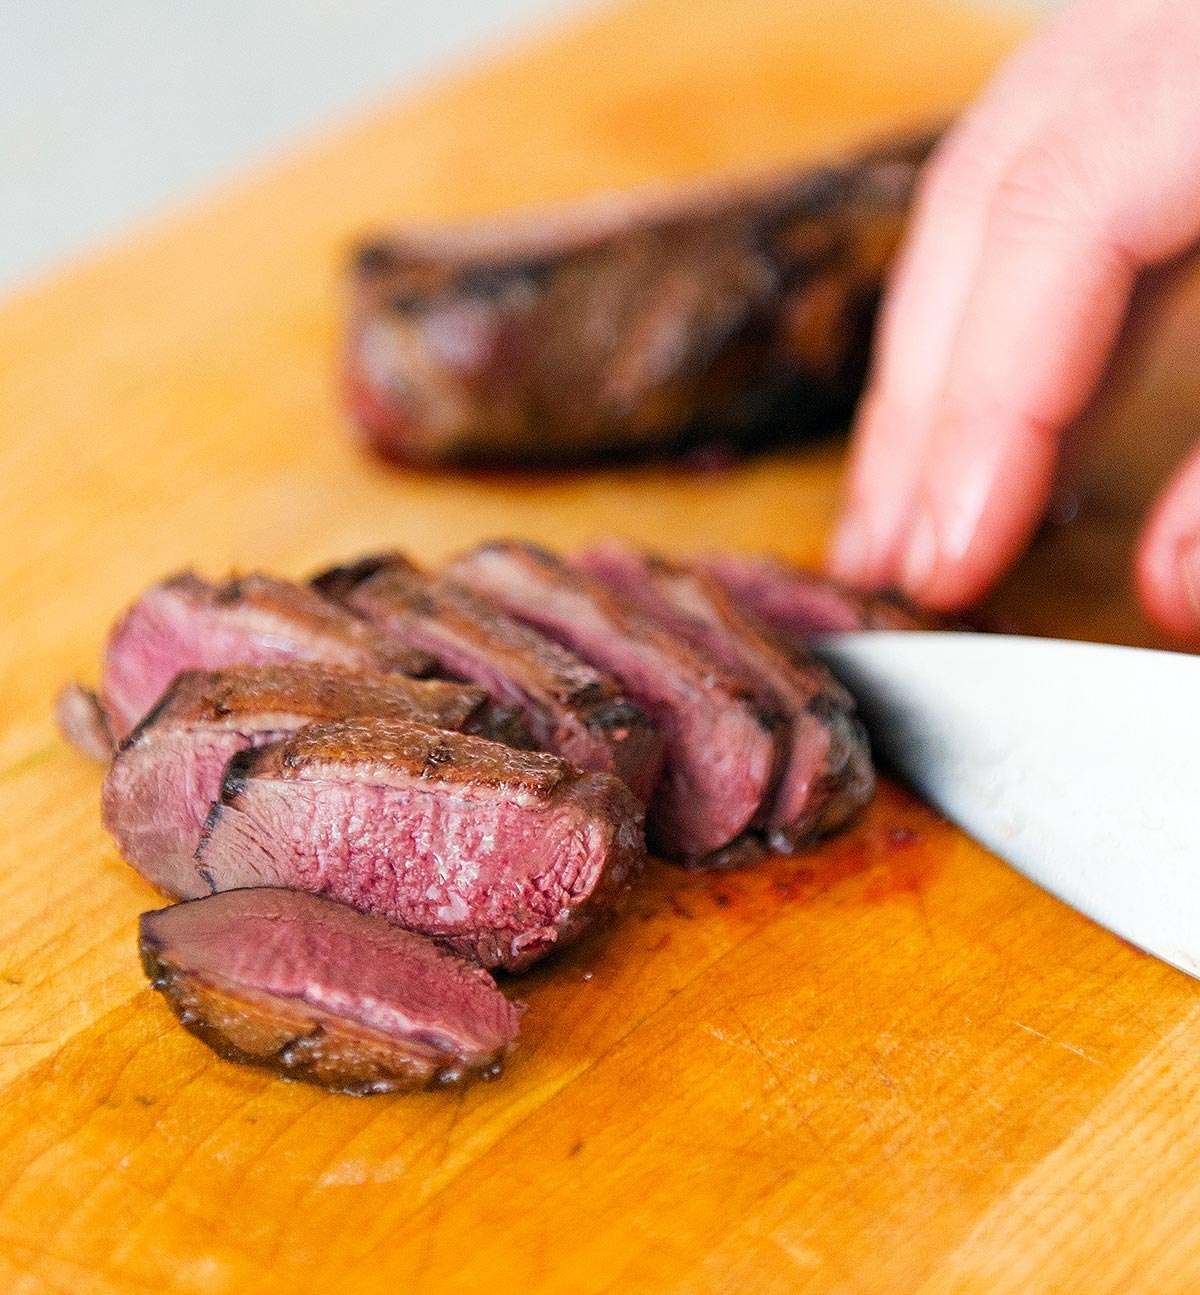
- Take the duck off the heat and let it rest on a cutting board, skin side up. This would be a good time to grind black pepper over it. Teal need only need a minute or two rest, while big Canada geese might need 10 minutes. Everything else benefits from about a 5 minute rest. A duck breast is just like a steak: If you don't rest it, the juices will run all over your cutting board -- and not down your chin, where they should be. You can slice the breast from either end, either side up. You can get thinner slices by starting at the meat end, but you lose a little of the crispiness of the skin. If you are serving a whole breast, always serve it skin side up, with its sauce underneath.
Notes
- Allow duck breasts to rest at room temperature for 15 to 45 minutes before cooking to better regulate internal temperature.
- Use cast iron or steel pans rather than nonstick for better heat control and skin crisping.
- Score duck skin in a cross-hatch pattern to help render fat and improve crispness, especially for domestic or fatty wild ducks.
- For small wild duck breasts like teal, cook directly from cold to avoid overcooking.
- After cooking, rest the duck breast skin side up for several minutes to maintain crispy skin and redistribute juices.
- Rendered duck fat can be prepared ahead at home for cooking.
Nutrition Information
Show DetailsNutrition Facts
Serving: 4people
Amount Per Serving
Calories 287 kcal
% Daily Value*
| Calories | 287kcal | 14% |
| Protein | 45g | 90% |
| Fat | 11g | 17% |
| Saturated Fat | 3g | 15% |
| Cholesterol | 174mg | 58% |
| Sodium | 129mg | 5% |
| Potassium | 606mg | 13% |
| Vitamin A | 120IU | 2% |
| Vitamin C | 14mg | 16% |
| Calcium | 7mg | 1% |
| Iron | 10.2mg | 57% |
* Percent Daily Values are based on a 2,000 calorie diet.
User Reviews
Overall Rating
5
You'll Also Love