How to Make Lard (Pies vs Chinese Food)
User Reviews
5
-
Prep Time
20 mins
-
Cook Time
3 hrs 30 mins
-
Servings
1 serving
-
Calories
18 kcal
-
Course
Snacks
-
Cuisine
Asian, Chinese, American, Singaporean
How to Make Lard (Pies vs Chinese Food)
Description
Rendering lard involves slowly melting pork fat over low heat to separate the fat from the solids. Cutting the pork fat into small, evenly sized pieces helps it melt evenly without burning. Using a heavy-bottom pot or dutch oven encourages even heat distribution. Optional aromatics such as ginger, scallions, and Sichuan peppercorns can be added when rendering lard for savory Chinese dishes but are omitted for lard intended for baking to keep a neutral flavor.
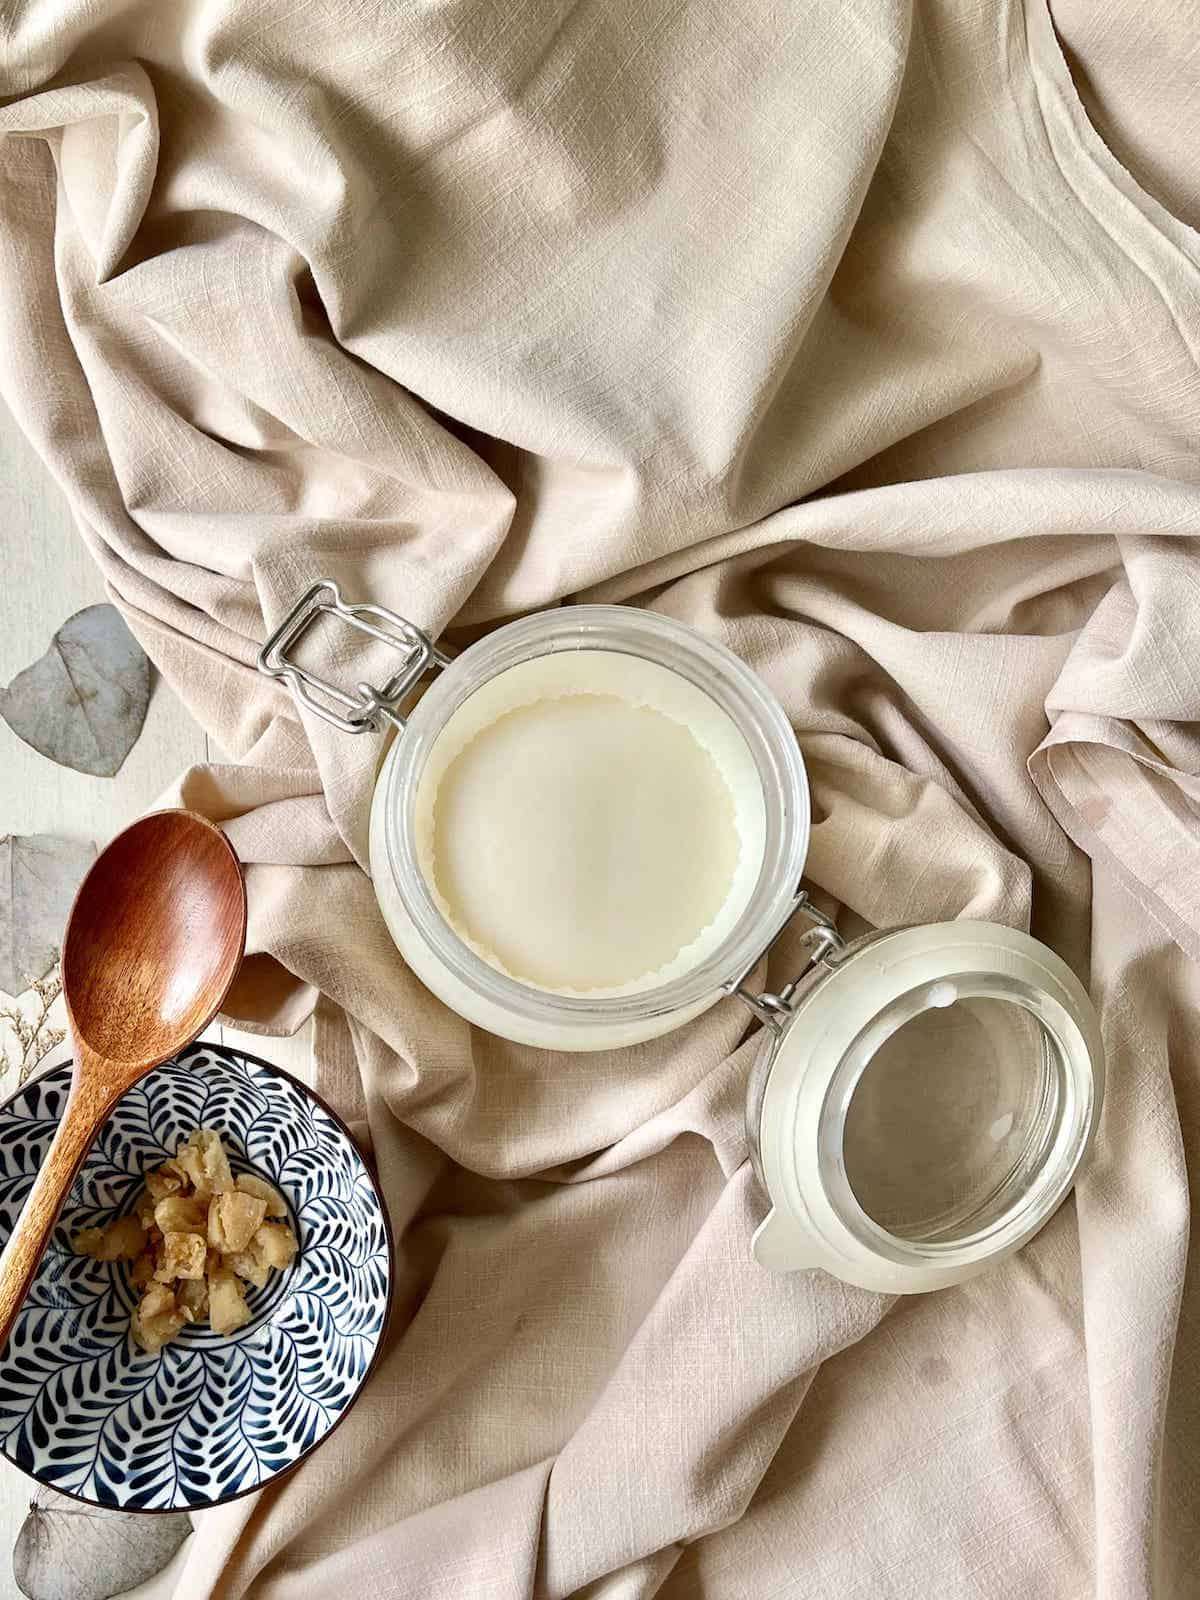
The process should proceed gently over low heat to avoid developing strong porky flavors or burning the fat. Stirring occasionally prevents sticking. Rendered lard changes from opaque white solid fat to clear liquid fat, which solidifies into creamy or white fat below certain temperatures. The rendered lard can be strained and stored for months.
Different methods include stovetop rendering, oven slow roasting at low temperature without water, or slow cooker method for convenience. Each has benefits and practical considerations such as dealing with odor and ensuring even cooking. Cracklings remain after rendering and can be saved for snacks or other uses. Removing all small particles carefully is important to prevent spoilage.
Ingredients
- 2 lb pork fat I say 2 lb but, really, use as much as you can get without over-filling your pot! Rendering pork lard doesn't get significantly quicker if you reduce the amount of fat, so make sure your time is well-spent. It also lasts for months in the fridge, so it makes sense to batch make!
- ginger Optional, only use if melting pork fat to use in savory dishes such as Chinese Noodles. Not to be used when rendering lard for pies and cookies!, aromatics and spices etc
- scallions
- Sichuan peppercorn
- ¼-½ Cup water Optional, only for wet rendering. Also not necessary if rendering in the oven.
Instructions
- Optional pre-step: blanch the lard in boiling water before rendering. Chinese cooks believe this reduces the sour pork smell! Also, rendering lard produces a strong smell. Make sure to open your windows and shut bedroom doors!
- Cut your partially thawed or chilled pork fat into equal sized, small pieces. (For easier cutting, put the fat in the freezer for 10-15 minutes to firm it up. Don't work with room temperature fat as it's slippery.) Alternatively, get your butcher to grind it or blitz it in your food processor.
- Add the cut-up pork lard (and water and aromatics, if using) to a heavy-bottom pot which allows for even heating. Use a Dutch Oven if you have one. (A flimsy pot is also dangerous, as you can easily overturn it and the rendered lard is HOT.)
- On low heat: melting pork fat needs to be a slow process. (Using high heat gives the lard a stronger porky taste.) Set the fire on 2 (mine's a Bosch induction with a maximum of 9.) Stir the fat to prevent sticking and burning.
- When you see the fat melting/ oil oozing out, reduce to 1 (lowest heat possible.) Note that it is more difficult to tell when the oil is oozing out with wet vs dry rendering.
- Stir every 30 minutes or when you hear sizzling. Don't let the fat stick to the bottom or sides of the pot, or your lard will taste porky!
- The lard will eventually start bubbling so don't be alarmed. (The bubbles indicate that there is still moisture in the fat. You're always using low heat so you should never be boiling the lard.)
- The fat will take 2-4 hours to completely render. Make sure that there are no more bubbles and the crackling (pork bits) have risen before switching off the fire.
- Remove the golden brown scratchings. I recommend sieving using a strainer or cheesecloth. You can also crush the scratchings to get every bit of oil out.
- Place the pork scratchings on a kitchen towel to absorb the excess oil. If not as crunchy as you like, pop them into a dry pan, air fryer or oven for a few minutes (350F/ 177C)
- Filter the pork lard into a sterilised, heat resistant glass jar- this is particularly important if you've added aromatics to your lard. Allow it to completely cool before covering and refrigerating.
- Keep it for up to 6-9 months in the fridge and do not use if rancid (smells bad) or moldy. (Some people say 12 months- I like to err on the side of caution! You can freeze if it you want it to last longer.)
Notes
- Rendering lard slowly on low heat prevents a strong porky taste and preserves quality.
- Cut pork fat into small, uniform pieces and chill before cutting to make the process easier.
- Use a heavy-bottom pot for safe, even heating and avoid flimsy pans that risk tipping or burning.
- Optional aromatics like ginger and scallions enhance savory lard but are omitted for baking uses.
- Rendering methods include stovetop, oven at 200-225°F (93-107°C) without water, slow cooker, or Instant Pot (less tested).
- Removing fine particles carefully is essential to avoid lard spoilage or mold.
- Lighter-colored lard is preferred for baking, while yellowish lard is better suited for savory cooking.
Nutrition Information
Show DetailsNutrition Facts
Serving: 1serving
Amount Per Serving
Calories 18 kcal
% Daily Value*
| Calories | 18kcal | 1% |
| Fat | 2g | 3% |
| Saturated Fat | 1g | 5% |
| Polyunsaturated Fat | 0.2g | 1% |
| Monounsaturated Fat | 1g | 5% |
| Cholesterol | 2mg | 1% |
| Sodium | 3mg | 0% |
| Calcium | 2mg | 0% |
* Percent Daily Values are based on a 2,000 calorie diet.
User Reviews
Overall Rating
5
You'll Also Love