Pan Dulce
User Reviews
4.9
Pan Dulce
Description
Pan Dulce combines a traditional yeasted dough with a distinctive topping made from flour, powdered sugar, butter, and vanilla extract. The dough is prepared by activating yeast in warm milk with sugar, then mixing it with eggs, melted butter, vanilla, salt, and flour to a smooth consistency. After kneading and a warm rise, the risen dough is shaped into disks for topping.
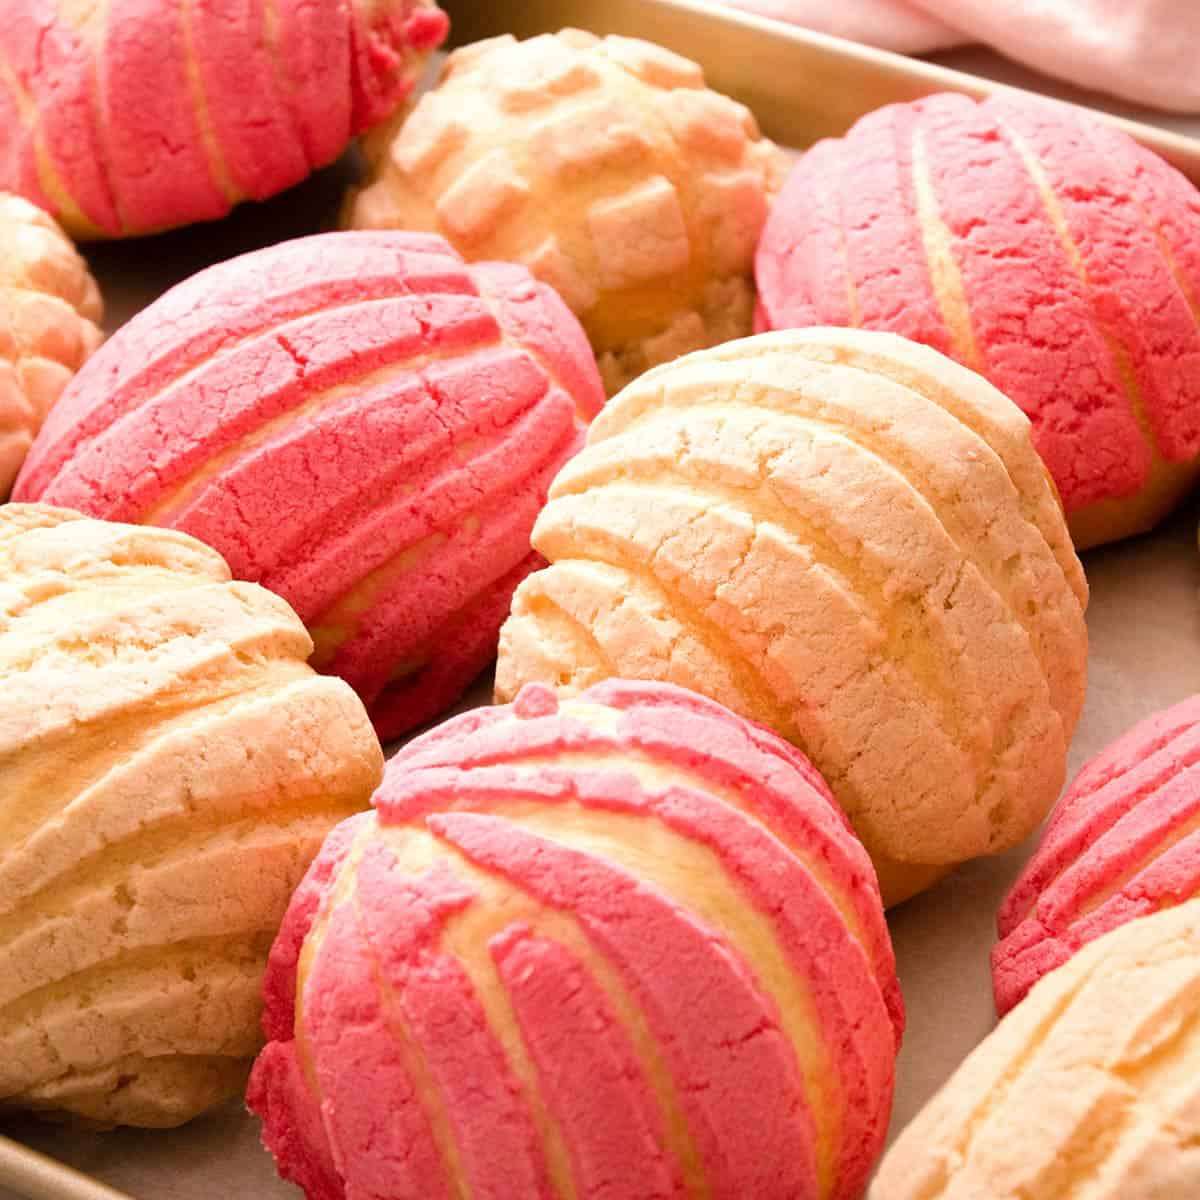
The topping is a paste-like mixture that may be flavored with cinnamon or cocoa powder and colored with food coloring for visual variety. The topping is typically pressed over the shaped dough disks to form the characteristic pan dulce concha pattern. The bread bakes to have a soft crumb inside contrasting with the crisp, sweet topping.
This bread can be customized with flavor variations and colors for different presentations. Bakers should ensure fresh, active yeast for proper rising, and warm liquids to activate the yeast effectively. Both raw dough and baked pan dulce can be frozen, making them practical for advance preparation.
Ingredients
For the Dough
- 1 dry yeast or 1 tablespoon, package
- 3/4 cup milk
- ½ cup butter melted
- 1/2 cup sugar divided
- 3 egg room temperature
- 1 teaspoon salt
- 1 tsp vanilla extract
- 4 1/2 cups flour
For the Topping
- 1/2 cup butter very soft, unsalted
- 1 cup powdered sugar
- 1 cup flour
- 1 tbsp vanilla extract
- cocoa powder cinnamon, optional
- Food Coloring cinnamon, optional
Instructions
For the Dough
- Warm your milk to about 110F then transfer to the bowl of your stand mixer or a large bowl if using an electric hand mixer. Mix in half the sugar and the yeast. Set aside for about 5 minutes or until the yeast is nice and bubbly. No bubbles mean dead yeast so you’ll have to start over if this happens.
- Whisk in the eggs, vanilla, salt and remaining sugar then whisk in half the flour to create a smooth paste.
- Add the melted butter and mix once more then place on your stand mixer add the remaining flour and attach a dough hook. Run the mixer on medium speed for 5-7 minutes or until the dough comes together, is smooth and will not stick to your finger when pressed lightly. You can sprinkle a couple teaspoons of flour on the edge of the bowl to discourage the dough from sticking.
- Transfer the dough to a large lightly oiled bowl then cover and place in a warm place to rise for one and a half to two hours, or until doubled in size.
For the Topping
- Mix the flour and powdered sugar together in a medium bowl then add the butter and vanilla. Work together with a spatula or your clean hand until a smooth paste forms. You can divide the mixture into batches and flavor with ½ tsp cinnamon, 1 tbsp cocoa powder, etc. A few drops of food coloring can be worked into the batched for some visual interest if desired.
For the Assembly
- Lightly flour your counter and invert the dough onto it then divide into 12 equal pieces, about 90g each. Place your thumb and middle finger together then cup the dough in your hand and move in small circles on the (unfloured) counter to create a roll shape. Place six rolls onto each baking sheet lined with parchment paper.
- Portion out 1 ½ tbsp balls of the topping, about 30g. Flatten into thin disks large enough to cover your buns then place over the bun. Use a very sharp knife to cut the Concha pattern into the top. You can also cut a grid, or any other pattern you enjoy.
- Cover loosely with plastic wrap and allow your conchas to rise for about 30 minutes or until roughly doubled in size. Preheat oven to 350F.
- Bake at 350F for 18 to 20 minutes or until the bottoms are golden.
Notes
- Check the yeast's expiration date to ensure it activates properly for rising.
- Warming the mixing bowl before use can help yeast activation.
- Milk should be warm but not hot to protect yeast activity.
- Bubbles in the yeast mixture signal successful activation; absence means starting over.
- Flatten dough disks with palms or a rolling pin, optionally using plastic wrap to prevent sticking.
- Flavor variations include adding cinnamon or cocoa powder to the topping for distinct tastes and colors.
- Use food coloring to create traditional pan dulce colors like yellow, pink, white, or brown.
- Freeze raw or baked Pan Dulce for up to 3 months; store baked bread in airtight containers for up to 3 days.
Nutrition Information
Show DetailsNutrition Facts
Serving: 12servings
Amount Per Serving
Calories 348 kcal
% Daily Value*
| Serving | 1concha | |
| Calories | 348kcal | 17% |
| Carbohydrates | 63g | 21% |
| Protein | 8g | 16% |
| Fat | 18g | 28% |
| Saturated Fat | 10g | 50% |
| Trans Fat | 1g | 50% |
| Cholesterol | 83mg | 28% |
| Sodium | 287mg | 12% |
| Potassium | 113mg | 2% |
| Fiber | 2g | 8% |
| Sugar | 19g | 38% |
| Vitamin A | 557IU | 11% |
| Vitamin C | 1mg | 1% |
| Calcium | 37mg | 4% |
| Iron | 3mg | 17% |
* Percent Daily Values are based on a 2,000 calorie diet.
User Reviews
Overall Rating
4.9
You'll Also Love