Unbelievably Easy Artisan Rolls
User Reviews
4.9
Unbelievably Easy Artisan Rolls
Description
This artisan roll recipe features a no-knead dough composed of bread flour, kosher salt, active dry yeast, and room-temperature water. Mixing these ingredients produces a wet and sticky dough that requires a long fermentation period of 10 to 12 hours at room temperature. This slow rise develops flavor and gluten structure without kneading.
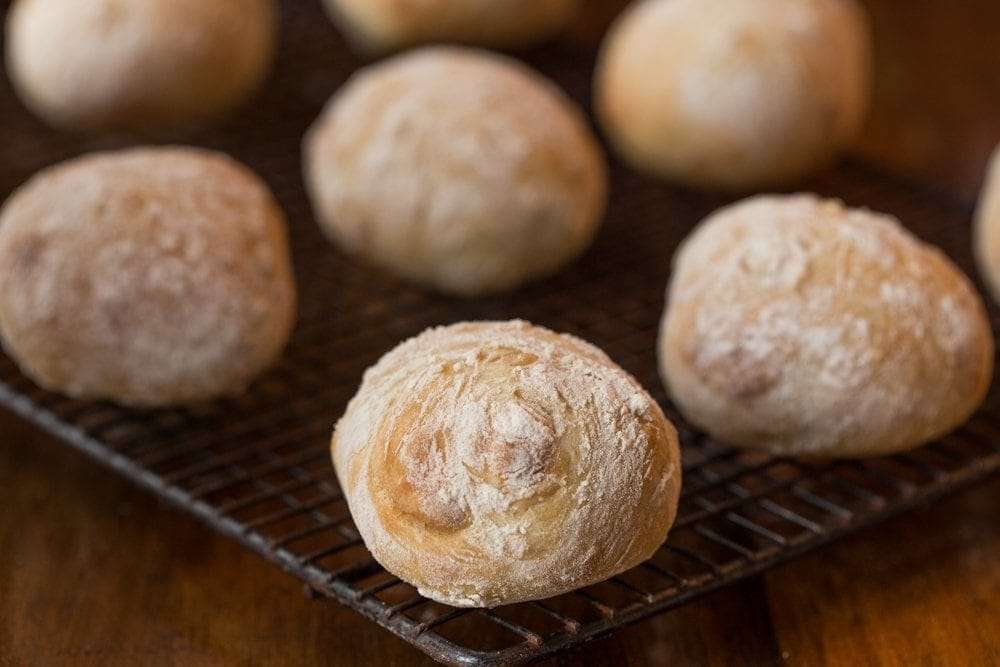
After the rise, the dough is transferred to a floured surface where it is coated with flour and divided into 12 to 16 equal pieces. Each piece is shaped into a smooth ball by pulling the edges under to create surface tension. The rolls are baked on a parchment-lined pan at 425ºF, producing a golden crust with characteristic artisan texture.
The final rolls have a chewy, tender crumb and a crisp exterior from the minimal handling and high-heat baking. This method is accessible to home bakers seeking rustic bread without complicated techniques. They can accompany meals or serve as sandwich buns.
Tips in the notes suggest detailed instructions for success including dough handling and rising cues. Using a bench scraper helps in shaping and portions. The recipe balances simplicity with artisan bread qualities through fermentation time and baking method.
Ingredients
- 4 cups bread flour plus extra for shaping
- 2 teaspoons kosher salt
- 1 teaspoon active dry yeast traditional
- 2 cups water tap, room-temperature
Instructions
- In a medium-large bowl, whisk together the bread flour, salt, and yeast. Make a well in the center and add the water. Mix with a sturdy rubber spatula until all flour is incorporated. Don’t worry, the dough will be wet and sticky, that’s how it should be. Cover the bowl with plastic wrap and leave to rise at room temperature for 10 to 12 hours.
- The following morning (or after 10-12 hours), the dough will have risen, but it may still look shaggy and its surface will be covered with bubbles.
- Line a sheet pan with parchment paper. Preheat the oven to 425ºF.
- Spread a generous ¼ cup of flour on a work surface. Dump the dough out onto the floured surface and turn it several times to coat with flour. I like to use a bench scraper for this.
- Divide the dough into 12-16 equal portions, turning each piece in the flour to coat. (The bench scraper is also great for cutting the dough). Shape each piece into a ball, pulling edges under and pinching together to make a smooth top. Invert balls and place on prepared pan, pinched side up. This will give you craggy, rustic textured rolls. If the dough is sticky as you’re shaping, just roll the piece in more of the flour. Let shaped rolls rise for 20 minutes.
- The rolls may look a little deflated as they're rising and they won't rise a ton during the 20 minutes but a little magic happens when they hit the hot oven and you'll be shocked at how beautiful they look when baked.
- Transfer the pan to the oven. Bake 15 minutes. Rotate pan. Bake 5 minutes more or until nicely golden. Transfer rolls to a cooling rack to cool completely.
- If making in advance, remove from oven when pale golden brown (about 3-4 minutes less). Cool completely, then freeze on a baking sheet. Once frozen, transfer rolls to a large zip lock bag and store in the freezer. To serve, allow rolls to thaw, then heat for 10-12 minutes at 325˚F.
Notes
- Refer to detailed tips for handling and shaping wet dough to achieve the best texture and rise.
- Use a bench scraper to ease dough portioning and flour coating to prevent sticking.
- Allow full 10 to 12 hour rise for optimal flavor and structure before baking.
Nutrition Information
Show DetailsNutrition Facts
Serving: 16dinner rolls
Amount Per Serving
Calories 115 kcal
% Daily Value*
| Calories | 115kcal | 6% |
| Carbohydrates | 22g | 7% |
| Protein | 4g | 8% |
| Sodium | 291mg | 12% |
| Potassium | 38mg | 1% |
| Calcium | 5mg | 1% |
| Iron | 0.3mg | 2% |
* Percent Daily Values are based on a 2,000 calorie diet.
User Reviews
Overall Rating
4.9
You'll Also Love