Homemade Bread (Homemade White Bread)
User Reviews
5.0
1,113 reviews
Excellent

Homemade Bread (Homemade White Bread)
Report
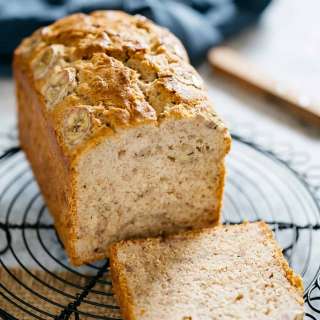
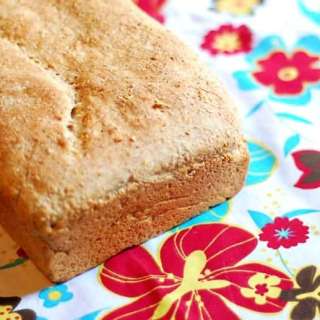
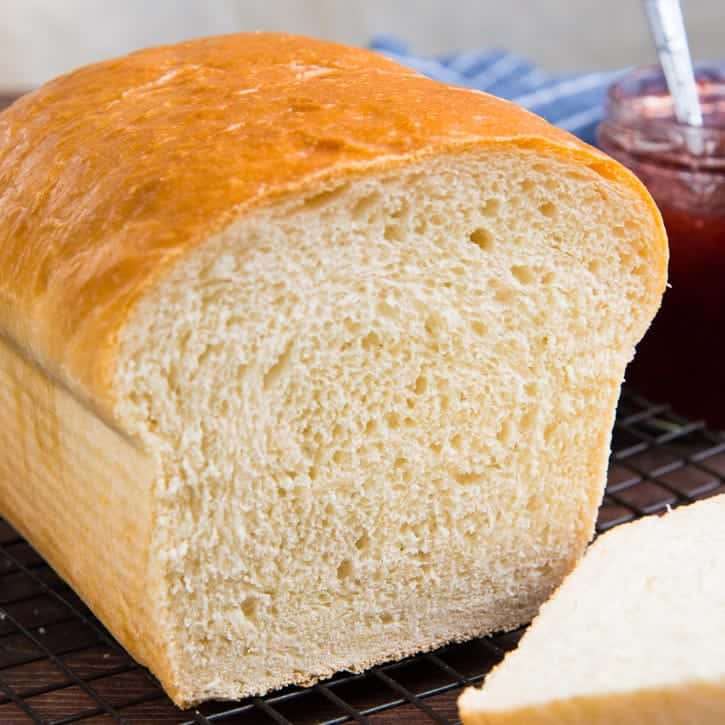
How to make the best Homemade White Bread that's soft and delicious, with a touch of sweetness. An easy to follow recipe for perfect homemade bread, with step by step instructions. This recipe yields 1 very large loaf, or 2 smaller loaves. Please see recipe notes below for further adjustments on how to make two standard-sized loaves. EASY - A great basic bread dough recipe for beginners. Weight measurements are recommended for accurate results. US based cup, teaspoon, tablespoon measurements. Common Measurement Conversions
Share:
Ingredients
Proofing yeast
- 7 g active dry yeast 2 ¼ tsp.
- 240 mL lukewarm water
- 11 g honey (or sugar or maple syrup)
Bread loaf
- Proofed yeast mixture (ingredients listed above)
- 553 g AP flour 4 ⅓ cups, spoon and leveled (please see notes)
- 120 mL lukewarm water ½ cup - more if needed.
- 1 ¼ tsp sea salt
- 22 g honey 2 tbsp / 30 mL (or sugar or maple syrup), add up to 4 tbsp / 60 mL for a more pronounced honey flavor)
- ¼ tsp citric acid or ½ tbsp white vinegar (optional)
- 30 g unsalted butter 2 tbsp. melted (or vegetable oil)
Instructions
Proofing yeast
- Place the water in the mixer bowl of your stand mixer.
- Stir in the honey to dissolve, and sprinkle the yeast over the water. Gently stir to mix.
- Allow the yeast to sit in a warm place for about 15 minutes, until it's activated and becomes frothy. This could take longer if your yeast was in the freezer. If the yeast doesn't activate (no frothy bubbles), then your yeast is likely too old and you will need it replaced with fresh yeast.
- Once the yeast is activated, you’re ready to make the bread dough.
Bread loaf
- To the proofed yeast mixture, add the flour, warm water, salt, honey, citric acid and melted butter.
- Using a dough whisk or a spatula, mix the ingredients to form a rough dough.
- Place the bowl in the mixer with a kneading hook attached, and knead the dough on low speed for about 2 - 5 minutes, until the dough comes together to form a ball.
- Increase the speed by 1 or 2 levels (speed 3 or 4 in a kitchen aid mixer) and knead the dough for a further 12 - 15 minutes until it's smooth and elastic.
- While the dough is kneading, check on it every few minutes to make sure it’s kneading well, and is not too dry or too wet. The dough is going to be very sticky and wet at the beginning, and become smoother as it's kneaded.
- To check if the dough has the right consistency after about 10 minutes of kneading - Increase the speed of the mixer to about 5 or 6 just for a minute or two. If the dough is sticking to the sides of the bowl, then it’s too wet, so add a little extra flour (a dusting at a time), to get the right texture. If the dough is still tacky but is coming off the sides (mostly), and only sticking to the bottom of the bowl, then it's at the right consistency. When you stop the mixer and lift the kneading hook from the bowl, and the dough isn’t sticking to the bottom of the bowl, then the dough might be too dry. You may need to add a little extra water (just ½ tsp at a time), to get the right consistency. The dough should be smooth, a little soft and tacky to the touch.
- Once the dough is kneaded, remove the dough hook and fold the dough over a few times by hand, to get a smooth ball. Then place it in a lightly oiled bowl, and cover with plastic wrap. Let the dough proof for about 1 hour until it has at least doubled in size.
- While the dough is proofing, prepare the bread loaf pans. Butter 1 - 9 x 5 inch loaf pan for a very large loaf, or 2 - 8.5 x 4.5 inch loaf pans for smaller loaves, and set aside until the dough is ready.
- Turn the proofed dough out onto a lightly floured work surface. Slightly flatten is with your hands. If making two smaller loaves, halve the dough with a sharp knife or bench scraper. (For more accurately halved dough, weigh the dough and then split it evenly by weight.) Place one portion of the dough back in the bowl and place it in the fridge while you shape the first portion.
- Gently press the dough into an evenly thick rectangle. The short side of this rectangle should be roughly about 8 - 8.5 inches (i.e. slightly shorter than the length of your bread loaf pan).
- Next, tightly roll up the short side, along the length of the dough rectangle. Make sure to pinch / press the edge of the dough as you go, while rolling it up (read the post and see pictures for more details).
- Once the dough is rolled up, pinch the seams to seal it, and tuck in the two sides and pinch these seams as well. Make sure all the seams are on one side (this will be the bottom) and the other side is smooth and seam-free (this will be the top).
- Transfer this into the prepared loaf pan, seam side down, and press the dough into the pan. Make sure it’s evenly pressed into the bottom of the pan. Loosely cover the loaf pan with plastic wrap and let it proof again in a warm place, for about 45 minutes - 1 hour. The dough should double in size inside the loaf pan / pans.
- Repeat with the second portion of dough (if making two smaller loaves).
- To check if it has proofed enough, gently press the top of the dough with your finger to leave an indentation that is about ½ cm deep. If proofed properly, this indentation should remain, or only bounce back slightly. If it bounces back almost completely, then it's underproofed. (Read the post and see pictures for more details.)
- Preheat the oven (conventional oven) to 375°F / 190°C, during the last 30 minutes of the second proofing time. It’s best for the oven to be preheated to the right temperature for at least 20 minutes before baking the bread.
- When the bread loaf is ready and the oven has preheated, place the loaf pans in the middle of the oven, and bake for 35 - 45 minutes. Make sure there is at least 2 inches of space between the pans to allow for proper air circulation. The bread is done when it sounds hollow when tapped on top, OR when the internal temperature reaches 195°F / 91°C.
- Remove the pans from the oven and keep in a warm place (away from drafts) to cool. After about 10 minutes, remove the bread from the pans and keep it on a wire rack to cool down completely. The bread is now ready to be served.
- Optional - brush melted butter on top while it's hot to add more buttery flavor.
- Keep the loaf (or loaves) in a bread box at room temperature for up to 4 - 5 days, or slice and keep in the freezer for up to 1 month.
Notes
- If you use a scale to measure the flour, the amount of liquid given in the recipe should be perfectly sufficient to make wonderfully soft bread loaves.
- However, if you use MEASURING CUPS to measure flour, please use the spoon and level method to weigh the flour accurately. When using cups, you risk having MORE flour than intended, which will result in a dense, heavy bread. Or you may end up using more water than stated in the recipe to compensate for the extra flour.
- This dough will be very sticky at the start of the kneading time, and then should gradually become soft and tacky with a smooth surface.
- I have had a few readers reach out to me about the bread being perfect, except for the fact that their loaves were quite tall after baking.
- For this reason, this loaf can be split into two, to make two smaller loaves as well.
- If you're making 1 larger loaf, choose a 9 x 5 inch loaf pan (taller pans are better).
- If you choose to make 2 smaller loaves, each loaf will be smaller than a standard-sized loaf. Baking them in a 8.5 x 4.5 inch, OR 8 x 4 inch loaf pan is better for this purpose.
- The proofing time will vary greatly depending on the environment. In summer, the bread will proof much faster than during winter. So keep an eye on the dough to make sure it doesn't overproof.
- To check if the bread is perfectly proofed, follow the indentation test described in the post to confirm.
- Once the dough ingredients are mixed, and the flour is well hydrated, cover the bowl with plastic wrap and leave it on your counter for about 30 minutes. The water in the dough should passively develop gluten in the flour. This will extend the time to make the dough, however it should lower the amount of time it takes to knead the dough (by hand or by mixer).
- If your oven runs hot, then I recommend baking the loaves at 350 F / 180 C. If the crust of your bread burns, then your bread dough must be baked at a lower temperature.
- If you'd like to make 2 standard-sized loaves, here are the ingredient adjustments to follow.
- Proofed yeast ingredients
- 9 g active dry yeast, 2 ½ tsp
- 9 g active dry yeast, 2 ½ tsp
- 9
- 2 ½
- 240 mL lukewarm water, 1 cup
- 240 mL lukewarm water, 1 cup
- 240
- 1
- 15 mL honey (or sugar or maple syrup), 1 tbsp
- 15 mL honey (or sugar or maple syrup), 1 tbsp
- 15
- 1
- Bread loaf
- Proofed yeast mixture (ingredients listed above)
- Proofed yeast mixture (ingredients listed above)
- 700 g AP flour, 5 ⅔ cups, spoon and leveled
- 700 g AP flour, 5 ⅔ cups, spoon and leveled
- 700
- 5 ⅔
- 220 mL lukewarm water, scant 1 cup
- 220 mL lukewarm water, scant 1 cup
- 220
- 1
- 2 tsp sea salt
- 2 tsp sea salt
- 2
- 55 mL honey (or sugar or maple syrup), add up to 4 tbsp / 60 mL for a more pronounced honey flavor)
- 55 mL honey (or sugar or maple syrup), add up to 4 tbsp / 60 mL for a more pronounced honey flavor)
- 55
- 4
- ½ tsp citric acid or 1 tbsp white vinegar (optional)
- ½ tsp citric acid or 1 tbsp white vinegar (optional)
- ½
- 1
- 45 g unsalted butter melted (or vegetable oil), 3 ½ tbsp
- 45 g unsalted butter melted (or vegetable oil), 3 ½ tbsp
- 45
- 3 ½
Nutrition Information
Show Details
Serving
1slice
Calories
90kcal
(5%)
Carbohydrates
17g
(6%)
Protein
2g
(4%)
Fat
1g
(2%)
Saturated Fat
1g
(5%)
Polyunsaturated Fat
0.1g
Monounsaturated Fat
0.3g
Trans Fat
0.04g
Cholesterol
3mg
(1%)
Sodium
130mg
(5%)
Potassium
25mg
(1%)
Fiber
1g
(4%)
Sugar
2g
(4%)
Vitamin A
34IU
(1%)
Vitamin C
0.01mg
(0%)
Calcium
4mg
(0%)
Iron
1mg
(6%)
Nutrition Facts
Serving: 32slices
Amount Per Serving
Calories 90 kcal
% Daily Value*
| Serving | 1slice | |
| Calories | 90kcal | 5% |
| Carbohydrates | 17g | 6% |
| Protein | 2g | 4% |
| Fat | 1g | 2% |
| Saturated Fat | 1g | 5% |
| Polyunsaturated Fat | 0.1g | 1% |
| Monounsaturated Fat | 0.3g | 2% |
| Trans Fat | 0.04g | 2% |
| Cholesterol | 3mg | 1% |
| Sodium | 130mg | 5% |
| Potassium | 25mg | 1% |
| Fiber | 1g | 4% |
| Sugar | 2g | 4% |
| Vitamin A | 34IU | 1% |
| Vitamin C | 0.01mg | 0% |
| Calcium | 4mg | 0% |
| Iron | 1mg | 6% |
* Percent Daily Values are based on a 2,000 calorie diet.
Genuine Reviews
User Reviews
Overall Rating
5.0
1,113 reviews
Excellent
Other Recipes
