Easy Coconut Ice with condensed milk
User Reviews
5
-
Prep Time
10 mins
-
Fridge time:
6 hrs
-
Total Time
6 hrs 10 mins
-
Servings
15 medium sized squares
-
Calories
281 kcal
-
Course
Dessert
-
Cuisine
International, British
Easy Coconut Ice with condensed milk
Description
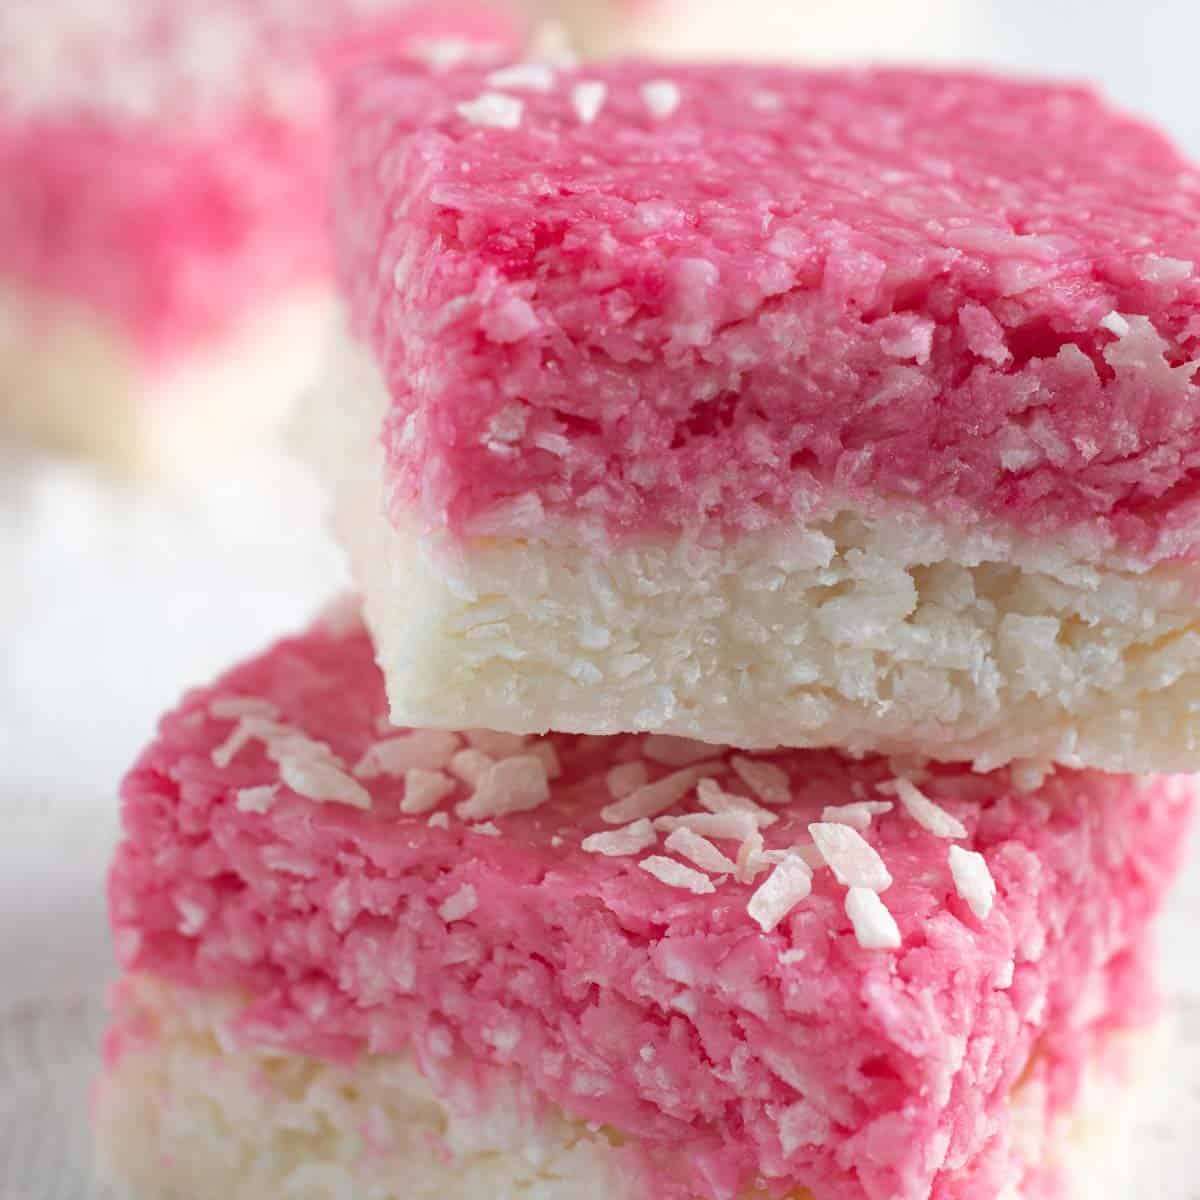
This recipe blends condensed milk with icing sugar and desiccated coconut to create a thick mixture that forms the base of coconut ice. Dividing the mixture and coloring one half pink before layering provides the distinctive two-tone appearance. Pressing the mixture firmly into a parchment-lined baking tray ensures compact, even slices after setting.
The texture is firm but chewy with sweetness from the condensed milk and sugar balancing the coconut's dry character. The recipe suggests avoiding large baking trays to maintain slice thickness. The top of the surface can be smoothed using lightly moistened fingers for an even finish.
Coconut ice is traditionally served cut into small squares or slices as a sweet treat or dessert. It can be stored wrapped or in an airtight container. Using gloves during mixing prevents staining hands with food coloring, although it washes off easily.
Ingredients
- 1 can condensed milk circa 395g
- 250 grams icing sugar
- 300 grams desiccated coconut
- Few drops food colouring pink
Instructions
- Line a 20cm x 20cm (8" x 8") baking tray with parchment paper. If you want thicker slices, you can use a smaller tray. We would not advise using a larger sized tin than 20cm x 20cm (8" x 8") as the coconut ice slices will be too thin. Top tip: It helps to leave a slight overhang of paper, that way you can lift the entire slab of coconut ice out of the baking tray much easier later on.
- In a large bowl, add all the ingredients except for the food colouring.
- Start by combining the mixture with a large spoon. The mixture may seem stiff and dry but don't worry, it will come together.
- Put the spoon aside and dive in with your hands to bring the mixture together. No need to be gentle - this step requires a bit of elbow grease. Get in there and really squish the mixture together.You can use rubber gloves if you don't want the mixture on your hands.
- Divide the mixture in two. If you want an accurate split between the pink and white layers you can weigh each half.
- Take the one half of the mixture and divide it into smaller pieces, then arrange them across the bottom of the baking tin. Use your fingertips to press the mixture firmly into the bottom of the tin, ensuring an even spread.Use a metal spoon to smooth the layer out.
- Add a small amount of pink food colouring to the remaining half of the mixture.
- Get hands-on and thoroughly work the colouring into the mixture. Don't hold back - give it a good squish to ensure an even colour distribution.
- Similar to the white layer, distribute small pieces of the pink mixture over the surface. Handle it with a bit more gentleness this time, spreading it evenly and smoothing it out using the back of a clean metal spoon.
- Cover the coconut ice with cling film and place the tin in the fridge for a minimum of 6 hours to allow it to set.
- Once set, carefully lift the entire block of coconut ice from the tin onto a cutting board. Slice it into small squares or any desired shape.
Notes
- Mixing the dry coconut ice mixture by hand helps incorporate the ingredients thoroughly despite its stiffness.
- Wearing latex gloves is recommended to prevent pink food coloring from staining hands during mixing.
- Weighing the mixture halves before coloring helps create evenly sized pink and white layers.
- When placing the mixture in the tray, breaking it into pieces and spreading loosely aids in achieving an even layer when pressed.
- To smooth the top layer, wet fingers lightly and gently smooth before chilling.
Nutrition Information
Show DetailsNutrition Facts
Serving: 15medium sized squares
Amount Per Serving
Calories 281 kcal
% Daily Value*
| Calories | 281kcal | 14% |
| Carbohydrates | 36g | 12% |
| Protein | 3g | 6% |
| Fat | 15g | 23% |
| Saturated Fat | 13g | 65% |
| Polyunsaturated Fat | 0.2g | 1% |
| Monounsaturated Fat | 1g | 5% |
| Cholesterol | 9mg | 3% |
| Sodium | 41mg | 2% |
| Potassium | 207mg | 4% |
| Fiber | 3g | 12% |
| Sugar | 32g | 64% |
| Vitamin A | 70IU | 1% |
| Vitamin C | 1mg | 1% |
| Calcium | 80mg | 8% |
| Iron | 1mg | 6% |
* Percent Daily Values are based on a 2,000 calorie diet.
User Reviews
Overall Rating
5
You'll Also Love