Kashiwa Mochi
User Reviews
5
Kashiwa Mochi
Description
Kashiwa Mochi starts by preparing a syrup of water and sugar to moisten the red bean paste filling and rice flour dough. The sweet red bean paste is portioned into balls and chilled for firmness while the dough is mixed from rice flour, sugar, and water. Oak leaves, often salt-pickled, are rinsed and drained to soften before use.
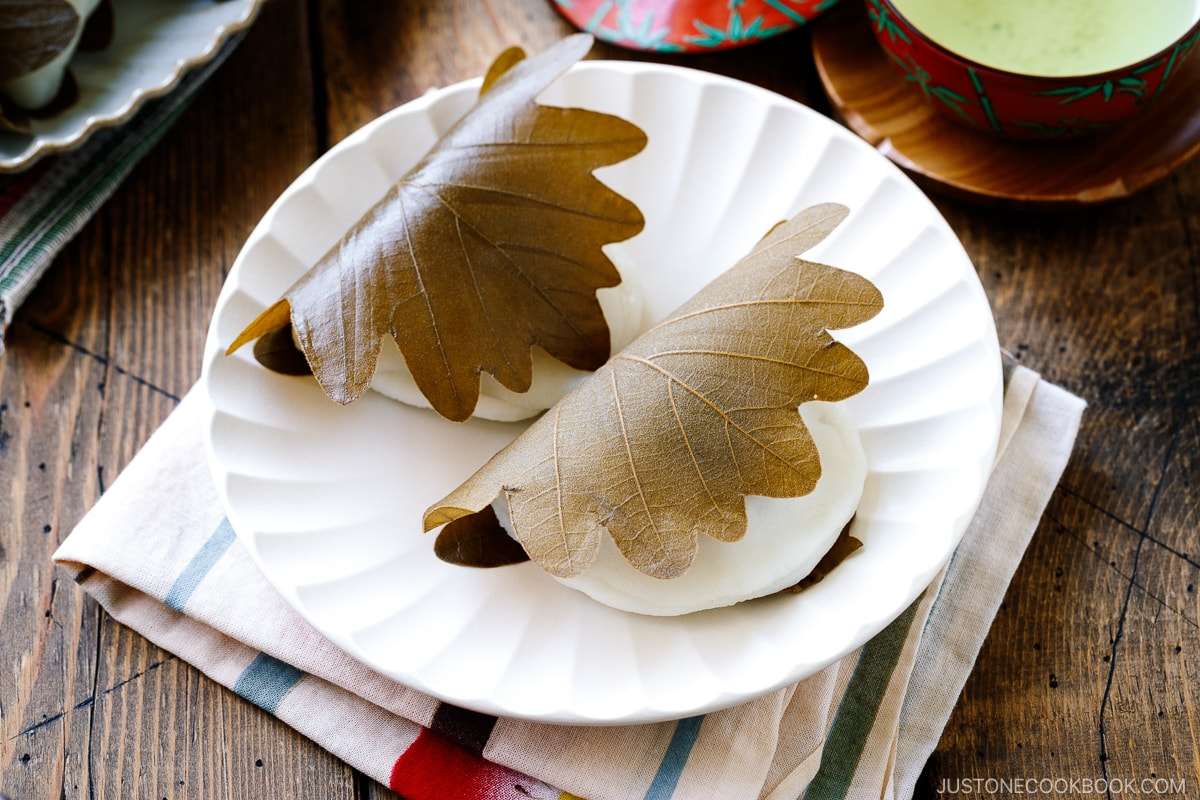
The dough is steamed to a soft consistency and then wrapped around the red bean balls. The mochi are then wrapped in the oak leaves, which add a subtle herbal note and also keep the rice cakes from drying out. This traditional sweet is commonly enjoyed during celebrations and has a tender, chewy texture with a sweet filling.
Ingredients
- 8 kashiwa leaves I get mine from an online shop that ships internationally from Japan, salt-pickled
For the Syrup
- 1 Tbsp sugar (sugar-to-water ratio is 1 to 5 by weight; use this syrup to roll the filling and shape the mochi)
- 4 Tbsp water (sugar-to-water ratio is 1 to 5 by weight; use to roll the filling and shape the mochi)
For the Filling
- 7 oz red bean paste I use koshian, a fine red bean paste; 1 heaping tablespoon is about 25 g; you can make my Pressure Cooker Anko recipe or Stove Top Anko recipe, sweet, aka anko
For the Mochi Mixture
- 7 oz rice flour 上新粉; this is short-grain rice flour, different from other Asian varieties; you can buy it from Amazon, joshinko variety (Japanese
- 2 Tbsp sugar
- 1⅛ cups water
Instructions
- Gather all the ingredients.
To Prepare the Leaves and Syrup
- Rinse the oak leaves in running water and set aside to drain. If the oak leaves you purchased are the dried kind, boil them for 10 minutes. Then, soak them in water and drain well.
- Combine the water and sugar for the syrup in a small bowl and mix well until the sugar is completely dissolved. Tip: I use a sugar-to-water ratio of 1:5 (by weight), but many people use 1:1 or 1:2. I use a flat whisk to mix it.
To Prepare the Filling
- Scoop 1 heaping tablespoonful of red bean paste (25 g) and place it on a plate or tray. Make 8 portions per batch.
- Wet your palms with the syrup. Pick up one portion of the red bean paste and place it on your palm.
- Shape it into a nice ball by rolling it between your palms. Place on the tray or plate. Repeat with the remaining portions. Cover and refrigerate these sweet red bean balls to keep them firm.
To Make the Mochi Mixture
- In a large bowl, mix the joshinko and sugar with a whisk.
- Add about 85–90% of the measured water to the bowl now, and reserve the remaining 10–15% of it for later. Mix well with a whisk to combine. The mixture should still be rather dry. Now, gradually add the reserved water, a little bit at a time, to loosen it up. Mix well after each addition and check the texture to decide if you need to add more.
- The final texture of the mixture should be thick but runny. When you lift the whisk, the mixture should fall in a thick ribbon pattern that sits on top of the swirl (see my image). You may not need to use all the water or you may need additional water. Loosely cover the bowl with plastic wrap.
To Cook the Mochi Mixture
- Microwave for 4 minutes* (1100 W), checking the progress halfway through (be careful of the hot steam when you open the plastic wrap). *Adjust the cooking time according to your microwave’s power.
To Pound and Knead the Mochi
- Take out the bowl from the microwave and carefully open the plastic wrap. Loosen the mochi from the sides of the bowl with a silicone spatula.
- Dip a wooden pestle (or anything that you can pound with) in the syrup and pound the mochi for 2–3 minutes. Tip: Dip it in the syrup from time to time during kneading, as needed, so it doesn’t stick
- When the mochi is cool enough for you to handle (but still hot/warm), transfer it to a work surface that's moistened with water. Wet your hands with the syrup and knead the mochi. Be careful it might be still hot.
- Knead until the mochi becomes more pliable, smoother, and shinier. The right amount of kneading makes the mochi more tender and creates a nice chewy bite. Do not overknead the mochi or it will get tough.
- Next, form the mochi into a cylinder and divide it into 8 equal pieces with a knife or bench scraper (I use this one). I used my favorite kitchen scale to make precise portions. Keep the mochi covered under plastic wrap or a damp tea towel to prevent drying.
To Shape the Mochi
- Take one portion of the mochi and roll it into a cylinder shape. Then, press down on it with your palm.
- With a rolling pin, roll the cylinder of mochi into a flat oval shape, roughly 2¾ inches x 4⅓ inches (7 cm x 11 cm).
- Continue rolling out the rest of the pieces. Keep the finished ones under the plastic or tea towel. Next, take one piece and pick the smoother side as the presentation side (the outer side of the mochi).
- With the presentation side down, place a red bean paste ball in the center of the mochi and fold the mochi in half. Then, seal the mochi's edges around the red bean paste. Make sure to dip your fingers in the syrup so they won't stick to the mochi.
- Press down the edges to seal nicely. If your red bean ball is too big or your mochi is too narrow, it'll be hard to seal the edges. In this case, roll out the mochi a bit more to make it wider.
- Wrap each mochi in a drained but still moist oak leaf, with the back side of the leaf (with more visible veins) facing out. Place the Kashiwa Mochi on a plate. Repeat to form the rest of the Kashiwa Mochi.
To Serve
- Serve Kashiwa Mochi with green tea. To enjoy, peel back the inedible oak leaf and enjoy the tender mochi with sweet red bean paste filling.
To Store
- It's best to consume Kashiwa Mochi the same day they're made, as the mochi will get hard by the next day. Store it in a cool place and avoid refrigerating.
Nutrition Information
Show DetailsNutrition Facts
Serving: 8mochi
Amount Per Serving
Calories 133 kcal
% Daily Value*
| Calories | 133kcal | 7% |
| Carbohydrates | 30g | 10% |
| Protein | 2g | 4% |
| Fat | 1g | 2% |
| Saturated Fat | 1g | 5% |
| Polyunsaturated Fat | 1g | 6% |
| Monounsaturated Fat | 1g | 5% |
| Sodium | 20mg | 1% |
| Potassium | 115mg | 2% |
| Fiber | 2g | 8% |
| Sugar | 8g | 16% |
| Vitamin A | 1IU | 0% |
| Vitamin C | 1mg | 1% |
| Calcium | 10mg | 1% |
| Iron | 1mg | 6% |
* Percent Daily Values are based on a 2,000 calorie diet.
User Reviews
Overall Rating
5
You'll Also Love