Rosemary-Garlic Sourdough Bread
User Reviews
5.0
6 reviews
Excellent
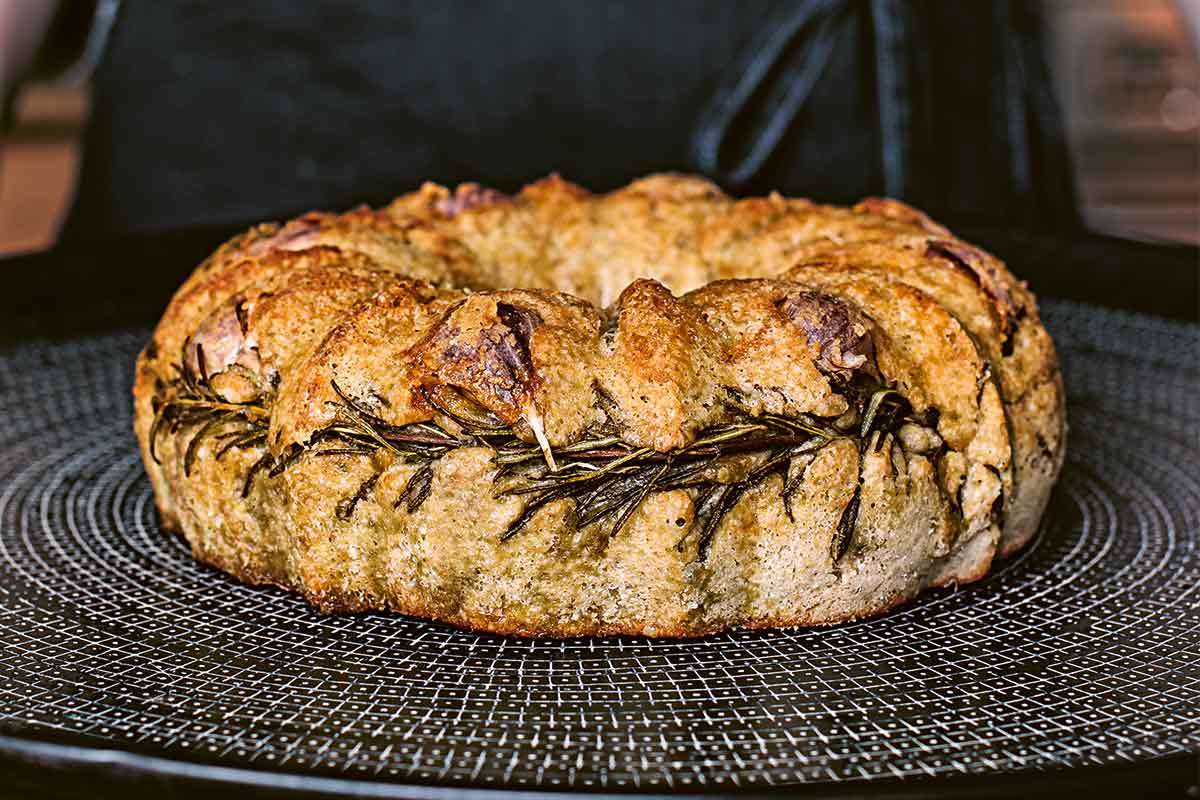
Rosemary-Garlic Sourdough Bread
Report
Sourdough is one of the tastiest and most nutritious breads you can make, but it has a reputation for being both tricky and time-consuming. After fermentation and time in the oven, this gorgeous loaf doesn’t require more than 10 minutes active work in total. That means anyone can turn their hand to sourdough baking, no matter how little time they have.
Share:
Ingredients
- 12.7 to 13 ounces water at 81°F (27.2°C)
- 3.5 ounces bubbly, lively sourdough starter
- 8.8 ounces organic stone-ground whole-wheat flour (11.5% protein)
- 8.8 ounces organic white flour (13% protein)
- 0.4 ounces fine sea salt (2 teaspoons)
- butter ghee or coconut oil, for the pan
- 8 garlic cloves skin on
- 3 long sprigs fresh Rosemary
- 1.4 ounces olive oil
- Olive oil spray
Instructions
- In a large, wide bowl, whisk together 12.3 ounces (350 g) of the water and the sourdough starter. Refresh the remaining starter in your jar.
- Add the flours and 0.35 ounces (1 3/4 teaspoons or 10 g) of the salt to the bowl and use a strong spatula to mix vigorously until it forms a stiff ball, about 2 minutes.
- Let the dough rest for 30 minutes, then mix in the remaining 0.4 to 0.7 ounces (10 to 20 g) water using your hands to fold the dough until the water is incorporated. This should take less than 1 minute. Cover, and leave the dough to rest for 30 minutes more.
- Slick a 10-inch (25 cm) bundt pan thoroughly with butter, ghee, or coconut oil. Arrange the garlic cloves in the pan, curved side down. Curve the rosemary sprigs around the inside of the pan, then drizzle the olive oil over the inside of the pan, covering all of the rosemary. Sprinkle in the remaining salt (1/4 teaspoon or 2 g).
- In the bowl, form the dough into a rough doughnut shape, then place it in the Bundt pan.☞ TESTER TIP: If you have a silicone bundt pan, it works well here, and allows for easier removal of the finished loaf.
- Cover with plastic wrap, and leave to prove at room temperature overnight. The next morning, your loaf will be at least 50 percent bigger.
Bake
- Preheat oven to 425°F (220°C) for 30 minutes and place a shallow baking pan in the bottom of the oven.
- Spray the top of the loaf with olive oil. As you place the bread in the oven, reduce the temperature to 350°F (175°C) and carefully throw a little water or some ice cubes into the hot tray at the bottom. Close the door quickly to trap the steam this creates.
- Bake until the loaf has a gorgeous burnished copper crust, and an internal temperature of 200°F (93°C), 40 to 45 minutes.
- Remove from the oven and leave to sit in the pan for about 5 minutes before turning out onto a wire rack to cool completely.☞ TESTER TIP: If your loaf wants to stick to the pan, use a chopstick to carefully pry it away from the edges.
- Once cool, wrap your loaf in a clean, dry dishtowel or parchment bag to store. The bread is best enjoyed within 2 to 3 days.
Nutrition Information
Show Details
Serving
1serving
Calories
186kcal
(9%)
Carbohydrates
33g
(11%)
Protein
5g
(10%)
Fat
4g
(6%)
Saturated Fat
1g
(5%)
Monounsaturated Fat
2g
Sodium
369mg
(15%)
Fiber
3g
(12%)
Sugar
1g
(2%)
Nutrition Facts
Serving: 12servings
Amount Per Serving
Calories 186 kcal
% Daily Value*
| Serving | 1serving | |
| Calories | 186kcal | 9% |
| Carbohydrates | 33g | 11% |
| Protein | 5g | 10% |
| Fat | 4g | 6% |
| Saturated Fat | 1g | 5% |
| Monounsaturated Fat | 2g | 10% |
| Sodium | 369mg | 15% |
| Fiber | 3g | 12% |
| Sugar | 1g | 2% |
* Percent Daily Values are based on a 2,000 calorie diet.
Genuine Reviews
User Reviews
Overall Rating
5.0
6 reviews
Excellent
Other Recipes
You'll Also Love