Homemade Miso
User Reviews
4.7
-
Prep Time
30 mins
-
Cook Time
1 hr 30 mins
-
Additional Time
18 hrs
-
Total Time
20 hrs
-
Servings
3 kg
-
Calories
1701 kcal
-
Course
Condiments
-
Cuisine
Japanese
Homemade Miso
Description
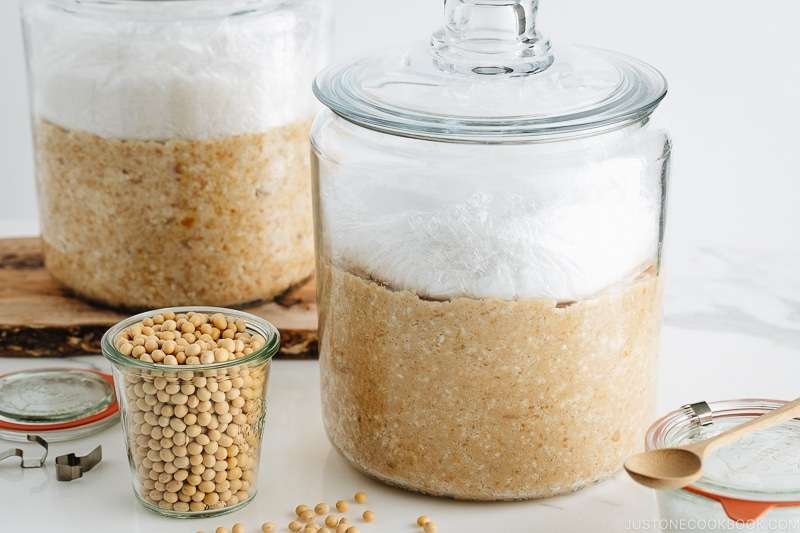
This Homemade Miso recipe calls for dry soybeans soaked extensively before cooking to soften them. Rice koji, a mold-inoculated grain essential for fermentation, is mixed with sea salt to create the mash that promotes fermentation. The preparation involves mashing cooked soybeans and combining them with the salted koji, shaping the mixture into a container, and covering it to ferment.
The fermentation process takes about nine months during which the miso develops its characteristic flavor and aroma. The long inactive fermentation period is key to achieving the paste's depth and complexity without active daily attention. This traditional method requires patience but allows hands-on creation of authentic miso ferment.
This miso can be used in soups, sauces, marinades, and dressings, contributing umami and richness. Making miso at home offers control over flavor intensity and salt levels while connecting to Japanese culinary tradition.
The original recipe notes indicate a source tutorial from a Japanese miso company, suggesting reliance on standard techniques and authentic ingredients available through specialized vendors.
Ingredients
- 1.4 lb soybeans (dry; 1 cup of dry soybeans is 6.3 oz/180 g)
- 5 cups rice koji (2 Cold Mountain packages; you can buy it from Anything from Japan, Amazon, or a Japanese grocery store; you can find Cold Mountain and other brands at Nijiya)
- 13.2 oz sea salt for mixing with the rice koji; plus ½ Tbsp more for sprinkling on top of the miso, arajio natural
- water for soaking and cooking the soybeans, filtered
Instructions
Before You Start...
- Please note that once you start the fermentation process, it takes about 9 months of mostly inactive time to make miso.
To Start Your Miso (in January/February)
- Gather all the ingredients. For the equipment, you will need 2 large bowls (one should be a very big one), 1 strainer, an Instant Pot (or pressure cooker or a large pot), a clean cloth, alcohol (shochu or vodka), a potato masher (or a food processor), a 1-gallon glass jar to put the miso in, and a bag of 1 kg (2.2 lb) table salt.
- Soak the Dry Soybeans: Gently wash 1.4 lb soybeans thoroughly several times under running water. Note: The foam shown in these images is not soap.
- To a large bowl, add the rinsed soybeans and enough filtered water to reach about 5 inches (10 cm) above the beans. Soak the soybeans for 18 hours.
- Drain the beans. Look how large the beans are now. The right image shows the soybeans before soaking, and the left two soybeans are after 18 hours of soaking. After soaking, the soybeans weigh 1435 g.
- Cook in a Pressure Cooker/Instant Pot: Add the soybeans to the inner pot of an Instant Pot. Add filtered water to about ½ inch (1.2 cm) above the beans (to roughly the 8-cup line for one batch).
- Close the lid and set to High pressure for 20 minutes. Make sure the steam release handle points at Sealing and not Venting.
- Cook on the Stovetop: Alternatively, you can cook the beans on the stovetop. Bring to a boil over high heat, skim off the surface scum, lower to a simmer, and cook for about 3–4 hours, uncovered, until the beans are soft. Add water as needed during simmering. You want to keep the soybeans submerged in just enough water.
- Prepare the Koji Mixture: Meanwhile, in a very large bowl (that‘s big enough to add the mashed soybeans later), combine 5 cups rice koji and 13.2 oz arajio natural sea salt with your hands.
- Clean the Jar: Put some alcohol (shochu, vodka, soju, sake, etc.) on a clean cloth and wipe the inside the jar or container you will store the miso in. This helps to deter mold growth.
- Once the pressure cooking is finished, release the pressure naturally. It will take about 30 minutes until it releases completely and you can open the lid.
- Test the Beans: To check if the beans are cooked enough, press one between your pinky finger and thumb. If it mashes easily and nicely, it’s ready. Drain the soybeans over a bowl to capture the liquid. Save about 1 cup of cooking liquid (just in case; you will only use a small amount of it). NOTE: When you are mashing the beans, you may need a bit of cooking liquid. Ideally, it’s best not to add any cooking liquid at all for this recipe, which is designed to make miso without adding liquid. Water in the miso has a higher risk of potentially causing mold growth.
- Mash the Soybeans: While they‘re still hot, transfer some of the soybeans back to inner pot of the Instant Pot and mash them with a potato masher (or a pestle or bottle). Do this process in batches so it’s easier to mash nicely.
- If you have a food processor, process some soybeans until they are in paste form. Do this in batches so it’s easier to process.
- ONLY if the soybeans look really dry, add a small amount of cooking liquid. As I mentioned earlier, it’s best not to add liquid for this recipe, but I used a little bit. Scoop out the paste and continue with the next batch.
- Mashed soybeans must be warm or at room temperature (NEVER hot) before combining with the koji because heat can kill the koji mold. Mashing takes time (unless you make a small batch), so the soybeans should be cool enough by the time you‘re done mashing all of it.
- Combine the Soybeans and Koji Mixture: Add the warm (not hot!) mashed soybeans into the bowl with the koji and salt mixture.
- Knead well to evenly distribute the rice koji and salt into the soybeans. Take time to do this and mix it well. Add a small amount of the reserved cooking liquid only if necessary.
- Pack the Jar: Using your hands, form tennis ball-sized balls with the mashed soybean mixture.
- Put the balls into the container, one layer at a time. As you add each ball, mash it with your fist and knuckles to ensure that you‘ve eliminated all the air pockets. Press down tightly. If you have a glass jar, you can check for air pockets by looking from the side.
- Repeat the layers until all the balls are pressed tightly in the jar. Pat down and smooth out the surface with a flat palm or your knuckles. Make sure you have space left for placing a weight on top of the miso. If your jar/container is too small, use another container. Clean the inside surface walls of the container with a shochu-soaked cloth/paper towel to deter mold.
- Sprinkle ½ Tbsp arashio natural sea salt on top of the surface.
- Place a sheet of plastic wrap on the surface and make sure to cover it well. I use my adjustable drop lid (otoshibuta) to hold down the plastic wrap while I work on covering the edges and remove it when I was done.
- Put heavy objects (or rocks) on top of the entire surface of the miso. I put 1 kg (2.2 lb) of inexpensive table salt in a plastic bag and placed it on top.
To Begin Fermentation
- Cover the jar with the lid; DO NOT use an airtight lid. Write today‘s date on some masking tape and label the jar. Place the miso in a dark and cool place for at least 3 months. I put it in a storage closet underneath my stairs. You can also use a dark pillowcase and try to find a darker spot in the house.
To Stir After 3 Months (in April/May)
- Check the miso quickly to avoid exposure to air. If you see any mold on the surface, carefully scrape it off. Stir the miso from the bottom up to avoid mold forming. Clean the inside surface walls of the container with a shochu-soaked cloth to deter mold. Smooth the surface, place a new plastic wrap on top, and put the weight back on top. Place the container back in a dark and cool place for another 3 months.
To Stir After 3 More Months (in July/August)
- During the summer months, the fermentation is faster but the chance of mold growth is higher. Stir the miso from the bottom up every 2–3 weeks and check your jar regularly and remove any mold appearing on the surface. Even if a layer of mold covers the entire surface, the miso below should be fine. Just scrape off the surface to a sufficient depth to where you only see mold-free miso. Clean the inside walls of the container with a shochu-soaked cloth to deter mold. Smooth the surface, place a new plastic wrap on top, and put the weight back on top. Place the container back in a dark and cool place.
When the Miso is Done (in September)…
- Because San Francisco has a cool climate year-round and does not get hot, I waited for about a year to mature my miso (darker and saltier miso). Remove the weights once the miso is done.
To Store
- Divide the miso into smaller containers so they will fit in your refrigerator. Store it in the refrigerator to prevent overfermenting. Now, you can enjoy your own miso paste made with patience, love, and perseverance.
Notes
- Patience is essential, as the fermentation takes about nine months to develop full flavor.
- Use filtered water for soaking and cooking soybeans to ensure purity.
- Rice koji can be purchased from Japanese grocery stores or reliable online sources.
- Maintain cleanliness during preparation to avoid unwanted bacteria in the fermenting miso.
- The finished miso can be stored for extended periods and used in various Japanese dishes.
Nutrition Information
Show DetailsNutrition Facts
Serving: 3kg
Amount Per Serving
Calories 1701 kcal
% Daily Value*
| Serving | 1kg | |
| Calories | 1701kcal | 85% |
| Carbohydrates | 310g | 103% |
| Protein | 58g | 116% |
| Fat | 19g | 29% |
| Saturated Fat | 3g | 15% |
| Sodium | 48961mg | 2040% |
| Potassium | 1126mg | 24% |
| Fiber | 13g | 52% |
| Sugar | 7g | 14% |
| Vitamin A | 20IU | 0% |
| Vitamin C | 4mg | 4% |
| Calcium | 251mg | 25% |
| Iron | 12mg | 67% |
* Percent Daily Values are based on a 2,000 calorie diet.
User Reviews
Overall Rating
4.7
You'll Also Love